Archimatix User Manual
Page 1
ARCHIMATIX
NODE-BASED PARAMETRIC MODELING FOR UNITY
ARCHIMATIX
MÔ HÌNH THAM SỐ DỰA TRÊN NÚT CHO ĐOÀN KẾT

Page 2
Archimatix
Archimatix
Contents
Nội dung
1.
First Steps
2.
The Archimatix Library
3.
Getting into Shapes
4.
Just Meshing Around
5.
Repeating Yourself
6.
It’s All What You Node
7.
Group Dynamics
8.
Getting to Know Your Relations
Better
1.
Những bước đầu tiên
2.
Thư viện Archimatix
3.
Bắt đầu vào hình dạng
4.
Chỉ cần lưới xung quanh
5.
Lặp lại chính mình
6.
Đó là tất cả những gì bạn nút
7.
Động lực nhóm
8.
Làm quen với mối quan hệ của bạn
Tốt hơn
© 2017 Rory O’Neill, Roaring Tide Productions,
© 2017 Rory O'Neill, Roaring Tide Productions,
Page 3
Archimatix
Archimatix
From the Desk of the Developer
Từ bàn làm việc của nhà phát triển
Welcome to parametric modeling in
Unity with Archimatix!
Chào mừng bạn đến với mô hình tham số trong
Đoàn kết với Archimatix!
Archimatix (AX) is a powerful nodebased parametric modeler extension for
Unity. Archimatix's purpose is to
enable artists and game developers to
quickly create rich worlds using
intuitive "smart models" capable of
generating hundreds of unique
architectural forms and typologies from
simple geometric primitives.
Archimatix (AX) là một phần mở rộng mô hình tham số dựa trên nút mạnh mẽ dành cho
Đoàn kết. Mục đích của Archimatix là
cho phép các nghệ sĩ và nhà phát triển trò chơi
nhanh chóng tạo ra những thế giới phong phú bằng cách sử dụng
"mô hình thông minh" trực quan có khả năng
tạo ra hàng trăm độc đáo
hình thức kiến trúc và kiểu chữ từ
nguyên thủy hình học đơn giản.

As the developer of AX, I am excited to walk you through your first steps in what should
prove to be an exciting in-editor modeling adventure!
Với tư cách là nhà phát triển của AX, tôi rất vui được hướng dẫn bạn những bước đầu tiên về những gì nên làm.
chứng tỏ đây là một cuộc phiêu lưu lập mô hình trong trình chỉnh sửa thú vị!
If you have never tried parametric modeling, don’t worry, it’s not hard to pick up. While
quite different from brush-based, or topological, modeling, where you directly manipulate
vertices and faces, parametric modeling enables you to manipulate relatively few handles or
gizmos that alter the entire mesh in smart ways. Archimatix features non-destructive mesh
creation, allowing you to produce many variations of a form quickly, either as an iterative
design process, or as a way to stamp out multiple versions of the model to create a rich and
varied environment.
Nếu bạn chưa bao giờ thử lập mô hình tham số, đừng lo lắng, nó không khó để làm được. Trong khi
hoàn toàn khác với mô hình hóa dựa trên cọ vẽ hoặc tôpô, nơi bạn thao tác trực tiếp
các đỉnh và các mặt, mô hình tham số cho phép bạn thao tác tương đối ít điểm điều khiển hoặc
gizmos làm thay đổi toàn bộ lưới theo những cách thông minh. Archimatix có tính năng lưới không phá hủy
tạo, cho phép bạn tạo ra nhiều biến thể của một biểu mẫu một cách nhanh chóng, dưới dạng lặp lại
quá trình thiết kế, hoặc như một cách để tạo ra nhiều phiên bản của mô hình nhằm tạo ra sự phong phú và
môi trường đa dạng.
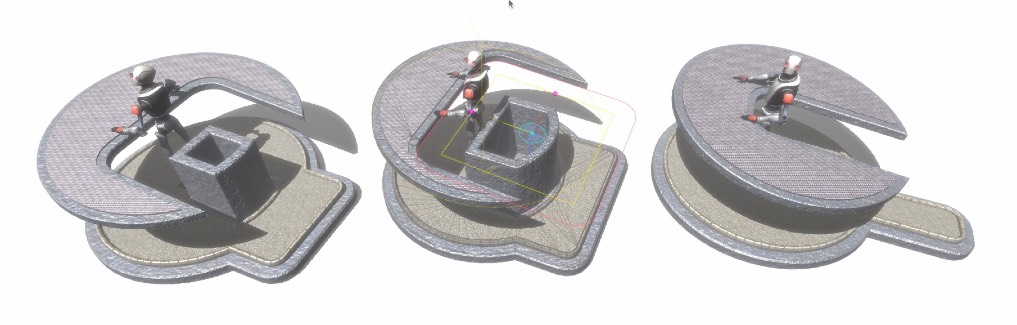
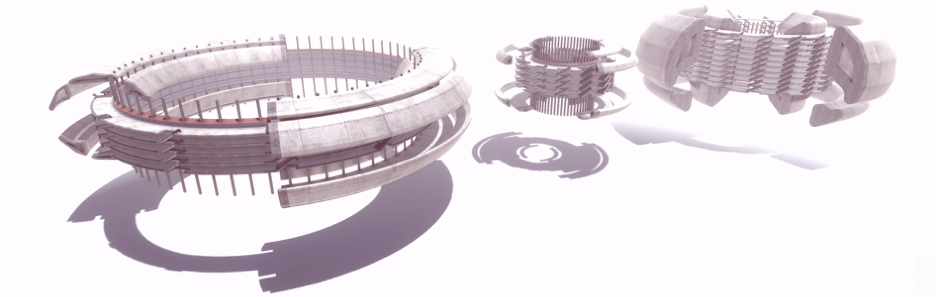
These three versions of Robot Kyle’s reception deck are generated from the same parametric model.
The variations are created by adjusting the handles visible in the center image.
Ba phiên bản bộ phận tiếp nhận của Robot Kyle này được tạo từ cùng một mô hình tham số.
Các biến thể được tạo bằng cách điều chỉnh các điểm điều khiển hiển thị trong hình ảnh ở giữa.
As the result of several years of development and testing, Archimatix is a full-featured
extension to Unity. I hope you find this User Guide to be a fun and useful introduction to
parametric modeling in Unity with Archimatix!
Là kết quả của nhiều năm phát triển và thử nghiệm, Archimatix là một phần mềm có đầy đủ tính năng
phần mở rộng cho Unity. Tôi hy vọng bạn thấy Hướng dẫn sử dụng này là một sự giới thiệu thú vị và hữu ích về
mô hình hóa tham số trong Unity với Archimatix!
Rory O'Neill, Ph.D.
Rory O'Neill, tiến sĩ
Roaring Tide Productions
Archimatix User Guide
!1
Sản phẩm thủy triều gầm
Hướng dẫn sử dụng Archimatix
!1
Page 4
1. First Steps
1. Những bước đầu tiên
Archimatix
Archimatix
1. First Steps
1. Những bước đầu tiên
Archimatix is available in the Unity Asset Store. If you have
not installed Archimatix yet, please follow Unity’s
instructions for Importing from the Asset Store.
Archimatix có sẵn trong Unity Asset Store. Nếu bạn có
chưa cài đặt Archimatix, vui lòng theo dõi Unity
hướng dẫn nhập từ Cửa hàng tài sản.
If you have already successfully purchased (thank you!) and
installed Archimatix, then you have taken your first step into
parametric modeling in Unity!
Nếu bạn đã mua thành công (cảm ơn bạn!) và
đã cài đặt Archimatix thì bạn đã thực hiện bước đầu tiên vào
mô hình hóa tham số trong Unity!


Congratulations!
Xin chúc mừng!
Robot Kyle
remembers his
very first step
with Archimatix…
and it was a doozy! But
that was back during preAlpha. Archimatix is much less
perilous now than it was back then!
Robot Kyle
nhớ anh ấy
bước đầu tiên
với Archimatix…
và đó là một sự ngu ngốc! Nhưng
điều đó đã trở lại trong giai đoạn tiền Alpha. Archimatix ít hơn nhiều
bây giờ còn nguy hiểm hơn hồi đó!
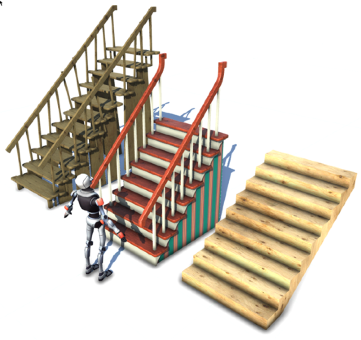
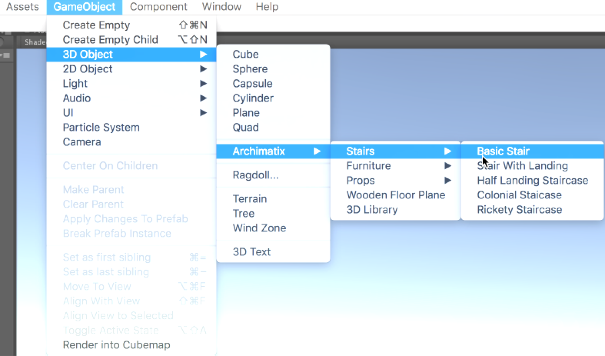
For the next step, let’s instantiate a parametric object from
the Archimatix 3D Library. Our first example will be an
interactive staircase?, the basic dimensions of which can be
changed in realtime in the editor. To launch a “smart” stair
from the Library, choose one from the main Unity menu.
Đối với bước tiếp theo, hãy khởi tạo một đối tượng tham số từ
Thư viện Archimatix 3D. Ví dụ đầu tiên của chúng tôi sẽ là một
cầu thang tương tác?, kích thước cơ bản của nó có thể là
đã thay đổi theo thời gian thực trong trình chỉnh sửa. Để khởi động một cầu thang “thông minh”
từ Thư viện, chọn một từ menu Unity chính.
Instantiate a Parametric Object
Khởi tạo một đối tượng tham số
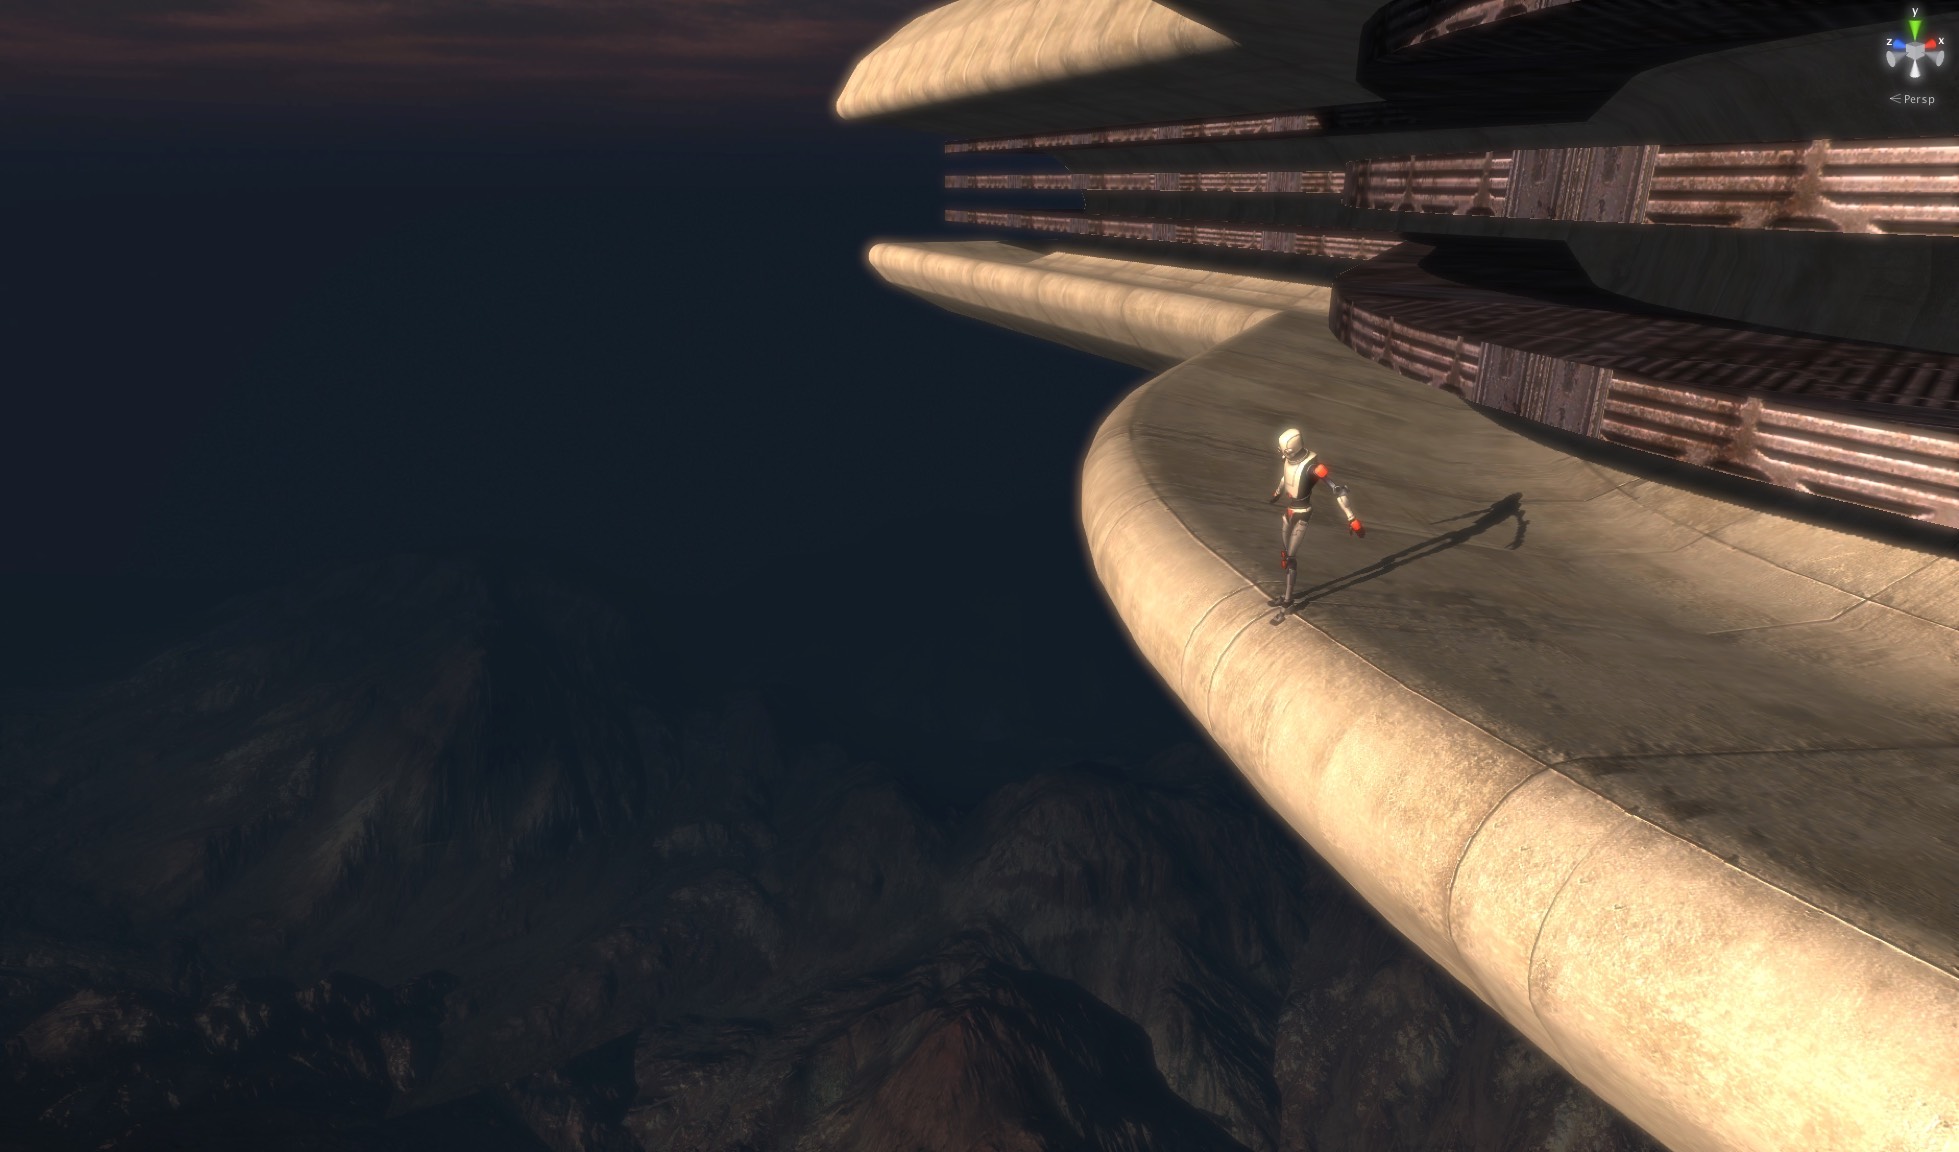
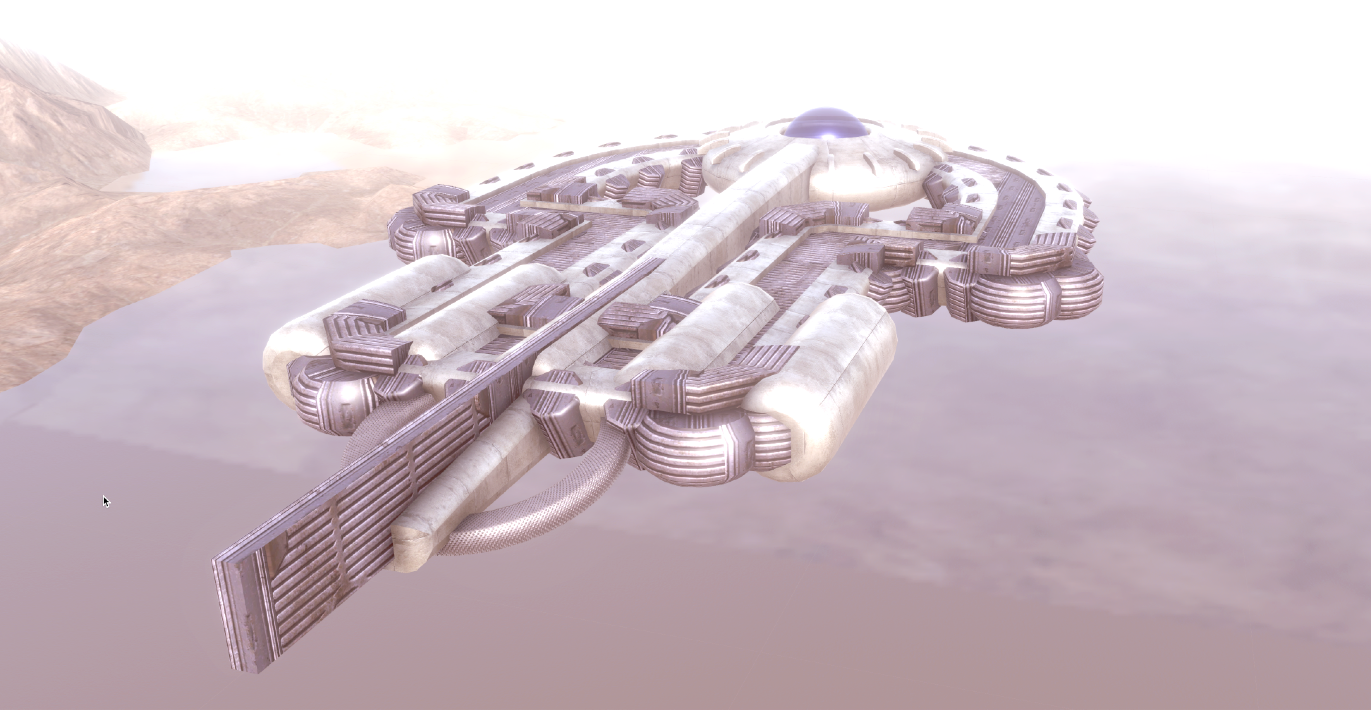
Robot Kyle’s Skyplatform, 5 nodes.
Skyplatform của Robot Kyle, 5 nút.
Step 1.1:
From the Unity menu, choose:
GameObject > 3D Object > Archimatix > Stairs >
BasicStair
Bước 1.1:
Từ menu Unity, chọn:
GameObject > Đối tượng 3D > Archimatix > Cầu thang >
Cầu thang cơ bản
City (below), 7 nodes.
Thành phố (bên dưới), 7 nút.
Roaring Tide Productions
Archimatix User Guide
!2
Sản phẩm thủy triều gầm
Hướng dẫn sử dụng Archimatix
!2
Page 5
1. First Steps
1. Những bước đầu tiên
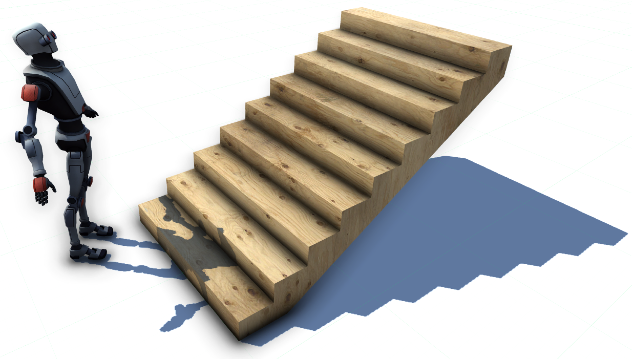
You should now be looking at a basic stair
with a plywood material in your scene. You
can frame it using the F-key. Since it is
selected, it should also be displaying its
relevant control handles.
Bây giờ bạn sẽ nhìn vào một cầu thang cơ bản
bằng vật liệu ván ép trong cảnh của bạn. bạn
có thể đóng khung nó bằng phím F. Vì nó là
được chọn, nó cũng sẽ hiển thị
các tay điều khiển có liên quan.
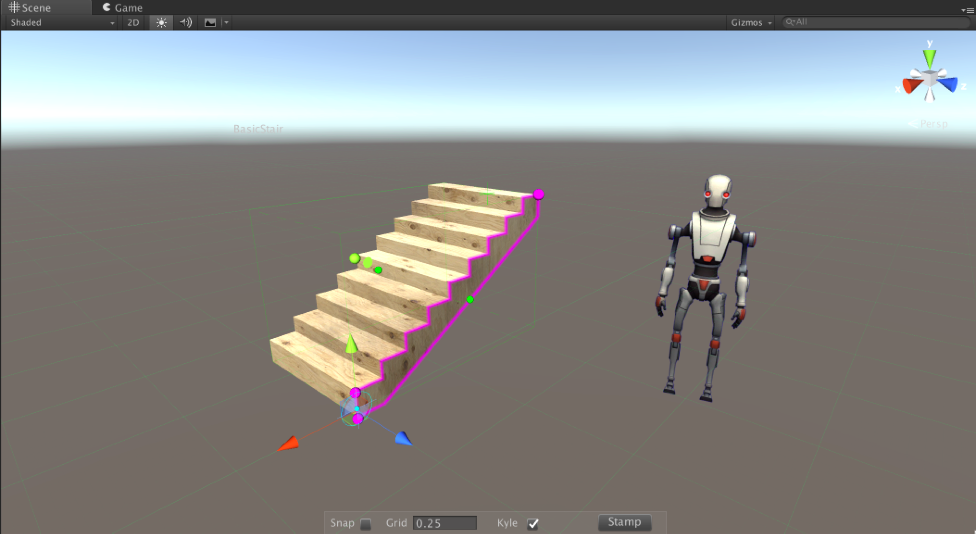
Step 1.2:
Click on the point handle at the
top of the magenta stair Shape and
begin to drag it. In the Inspector, you will notice the relevant parameters
changing.
Bước 1.2:
Bấm vào điểm xử lý ở
đầu cầu thang màu đỏ tươi Hình dạng và
bắt đầu kéo nó. Trong Thanh tra, bạn sẽ nhận thấy các tham số liên quan
đang thay đổi.


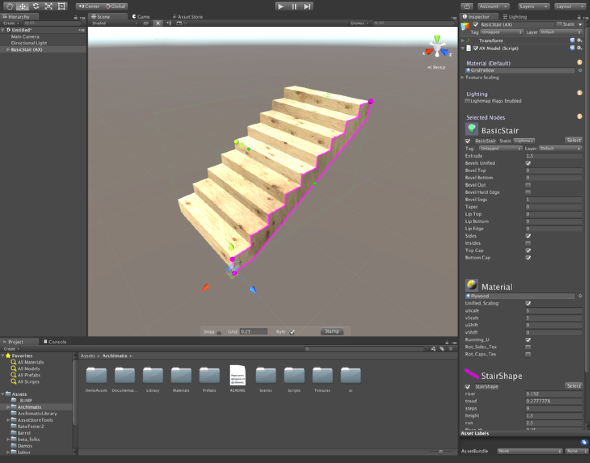


As you drag the handle around you should be able to create the following variations:
Khi bạn kéo tay cầm xung quanh, bạn sẽ có thể tạo ra các biến thể sau:
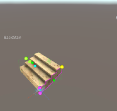
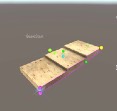
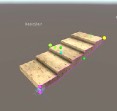
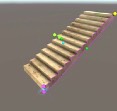
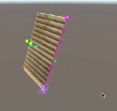
This handle is modifying two parameters at once: the stair length, or run, and the stair
height. The logic of the parametric object dictates what other parameters should change in
response to your modifications. For example, altering the run of the stairs re-calculates the
tread size, making the steps deeper.
Tay cầm này đang sửa đổi hai tham số cùng một lúc: chiều dài cầu thang hoặc đường chạy và cầu thang
chiều cao. Logic của đối tượng tham số chỉ ra những tham số khác sẽ thay đổi trong
phản hồi với những sửa đổi của bạn. Ví dụ: việc thay đổi bước đi của cầu thang sẽ tính toán lại
kích thước mặt lốp, làm cho các bước đi sâu hơn.
You may have noticed that this run-height handle modifies the stair as fast as you can drag.
In the development of Archimatix, a key goal was to ensure that the modification of
parameters is realtime within the editor.
Bạn có thể nhận thấy rằng tay cầm chiều cao chạy này sẽ điều chỉnh cầu thang nhanh nhất có thể mà bạn có thể kéo.
Trong quá trình phát triển Archimatix, mục tiêu chính là đảm bảo rằng việc sửa đổi
các tham số là thời gian thực trong trình chỉnh sửa.
Let’s go ahead and modify another parameter of the stair.
Hãy tiếp tục và sửa đổi một tham số khác của cầu thang.
Roaring Tide Productions
Archimatix User Guide
!3
Sản phẩm thủy triều gầm
Hướng dẫn sử dụng Archimatix
!3
Page 6
1. First Steps
1. Những bước đầu tiên
Step 1.3:
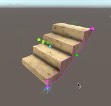
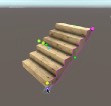
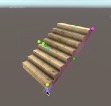
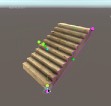
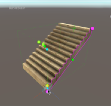
Click on the point handle at the top of the lowest step of the magenta stair Shape
and begin to drag it. Notice that this handle controls the riser height of the steps,
with the number of steps adjusting to maintain the overall height value for the
stair. Try to replicate the variations shown below.
Bước 1.3:
Bấm vào điểm điều khiển ở đầu bậc thấp nhất của cầu thang màu đỏ tươi
và bắt đầu kéo nó. Lưu ý rằng tay cầm này điều khiển chiều cao bậc thang,
với số bước điều chỉnh để duy trì giá trị chiều cao tổng thể cho
cầu thang. Hãy thử sao chép các biến thể được hiển thị bên dưới.



When first encountering new Library items, you may not be sure what the
displayed handles are supposed to control, but don’t be afraid to experiment
with them to explore the parametric behavior of the object – you can’t really
break them, after all; and if you do,
there’s always undo!
Khi lần đầu tiên tiếp xúc với các mục mới của Thư viện, bạn có thể không chắc chắn về những gì
tay cầm được hiển thị có nhiệm vụ kiểm soát, nhưng đừng ngại thử nghiệm
cùng họ khám phá hành vi tham số của đối tượng – bạn thực sự không thể
xét cho cùng thì hãy phá vỡ chúng; và nếu bạn làm thế,
luôn có sự hoàn tác!
Robot Kyle is eager to show you
other types of stairs, but let’s be
patient and cover the basics
before climbing up to more
complex parametric
models!
Robot Kyle rất háo hức muốn cho bạn xem
các loại cầu thang khác, nhưng hãy
kiên nhẫn và bao gồm những điều cơ bản
trước khi leo lên cao hơn
tham số phức tạp
người mẫu!
Roaring Tide Productions
Archimatix User Guide
!4
Sản phẩm thủy triều gầm
Hướng dẫn sử dụng Archimatix
!4
Page 7
The Talented Mr. Kyle
Ông Kyle tài năng
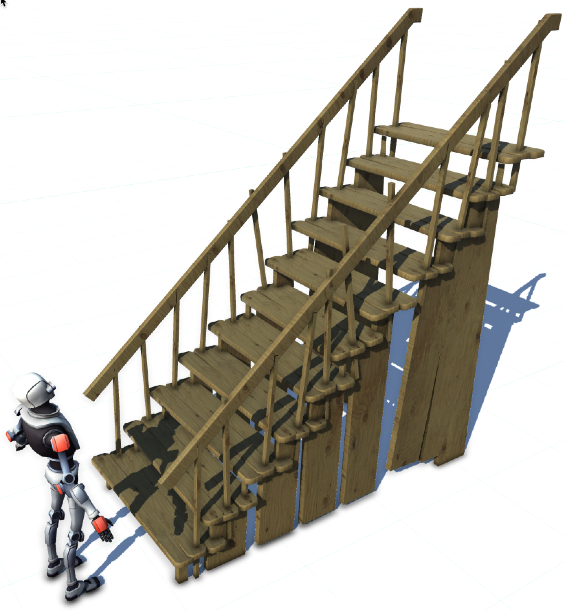
You may have notice that, when you created the BasicStair, another object appeared in the
scene: the one and only Robot Kyle!
Bạn có thể nhận thấy rằng, khi bạn tạo BasicStair, một đối tượng khác xuất hiện trong
cảnh: Robot Kyle duy nhất!


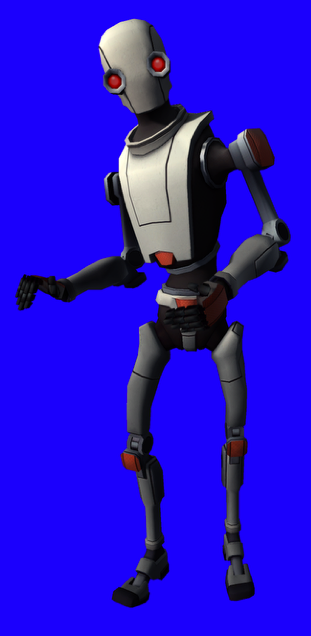
This is actually a flat stand-in for the real Robot Kyle – a free asset from Unity Technologies.
While you can download Robot Kyle, or any other character, to help give your design space
a sense of scale, we include this 2D billboard as a lightweight alternative, while paying
homage to the character that has served as an Archimatix mascot throughout the
development process. You can follow the trials and tribulations of Robot Kyle on the
Archimatix community thread on the Unity Forums.
Đây thực sự là một phiên bản thay thế phẳng cho Robot Kyle thực sự – một tài sản miễn phí từ Unity Technologies.
Mặc dù bạn có thể tải xuống Robot Kyle hoặc bất kỳ nhân vật nào khác để giúp cung cấp không gian thiết kế của bạn
để tạo cảm giác về quy mô, chúng tôi đưa bảng quảng cáo 2D này vào như một giải pháp thay thế gọn nhẹ, đồng thời trả tiền
tỏ lòng kính trọng đối với nhân vật đã từng là linh vật của Archimatix trong suốt thế giới
quá trình phát triển. Bạn có thể theo dõi những thử thách và đau khổ của Robot Kyle trên
Chủ đề cộng đồng Archimatix trên Diễn đàn Unity.
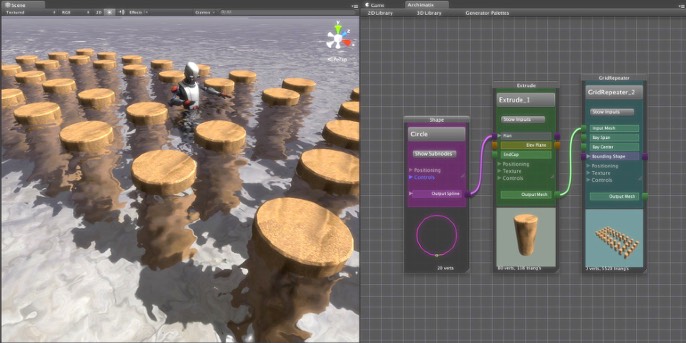
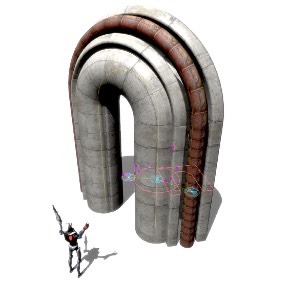

🔗 It was at that very moment
Robot Kyle began to wonder if he
was indeed waterproof...
🔗 Chính vào thời điểm đó
Robot Kyle bắt đầu tự hỏi liệu anh ấy có
đúng là không thấm nước...


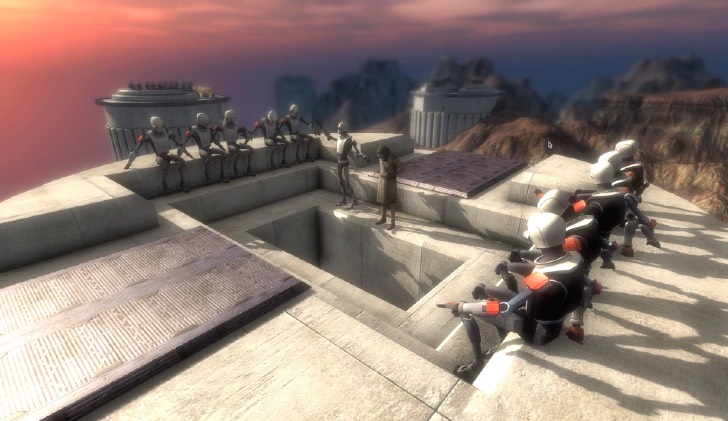
🔗 Robot Kyle speaks in defense of
the last human.
🔗 Robot Kyle lên tiếng bảo vệ
con người cuối cùng.
🔗 Every now and
then, Robot Kyle
stands in stupefied
awe of his own
creations!
🔗 Lúc này lúc khác
thì, Robot Kyle
đứng sững sờ
nỗi sợ hãi của chính mình
sáng tạo!
Roaring Tide Productions
Archimatix User Start Guide
!5
Sản phẩm thủy triều gầm
Hướng dẫn bắt đầu sử dụng Archimatix
!5
Page 8
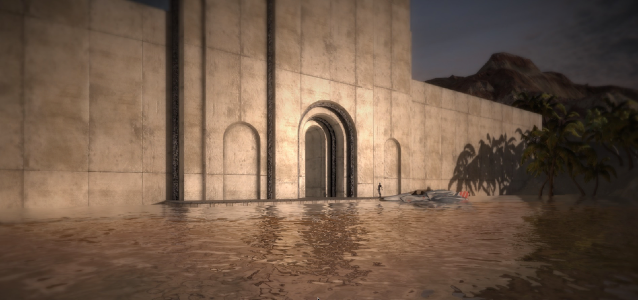
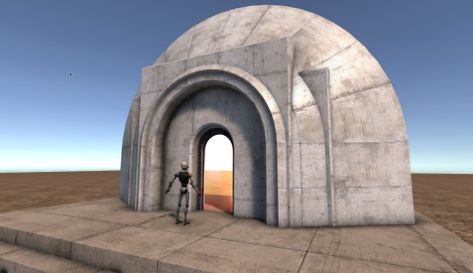
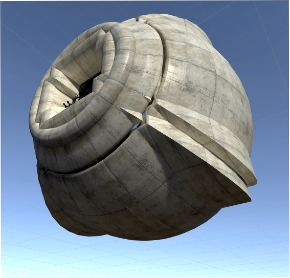



🔗 With no welcoming party
at the gate to greet him, Kyle's
robot senses were on high alert.
🔗 Không có tiệc chào mừng
ở cổng để chào đón anh ấy, Kyle's
các giác quan của robot đang ở mức cảnh giác cao độ.
🔗 Robot Kyle hesitates before the
time portal. He remembers last
time!
🔗 Robot Kyle lưỡng lự trước
cổng thời gian. Anh nhớ lần cuối
thời gian!
🔗 Hold on, Kyle. This
thing isn't even at cruising
speed yet!
🔗 Đợi đã, Kyle. Cái này
mọi thứ thậm chí không phải lúc bay
tốc độ chưa!
The Robot Kyle billboard, which is included with Archimatix as a Prefab, is automatically
instantiated in the scene when you create a new model. Being a standard GameObject, the
Kyle billboard can be translated as such. The billboard rotates automatically with the editor
camera.
Biển quảng cáo Robot Kyle, đi kèm với Archimatix dưới dạng Prefab, sẽ tự động được
được khởi tạo trong cảnh khi bạn tạo một mô hình mới. Là một GameObject tiêu chuẩn,
Biển quảng cáo Kyle có thể được dịch như vậy. Biển quảng cáo tự động xoay với người chỉnh sửa
máy ảnh.

Creating parametric objects while maintaining a sense of scale is important when working
with parametric modeling, since it is generally better to size your objects using their
parameters rather than using the scale transforms.
Tạo các đối tượng tham số trong khi vẫn duy trì cảm giác về tỷ lệ là điều quan trọng khi làm việc
với mô hình tham số, vì thông thường sẽ tốt hơn khi định cỡ đối tượng của bạn bằng cách sử dụng
tham số thay vì sử dụng các phép biến đổi tỷ lệ.
If you would prefer to work without Kyle’s omnipresence, you can click on the toggle at the
bottom of the Scene View to hide him. Or you can simply delete him from the scene.
Nếu bạn muốn làm việc mà không có sự hiện diện khắp nơi của Kyle, bạn có thể nhấp vào nút chuyển đổi ở
dưới cùng của Chế độ xem cảnh để ẩn anh ta. Hoặc bạn có thể chỉ cần xóa anh ta khỏi hiện trường.

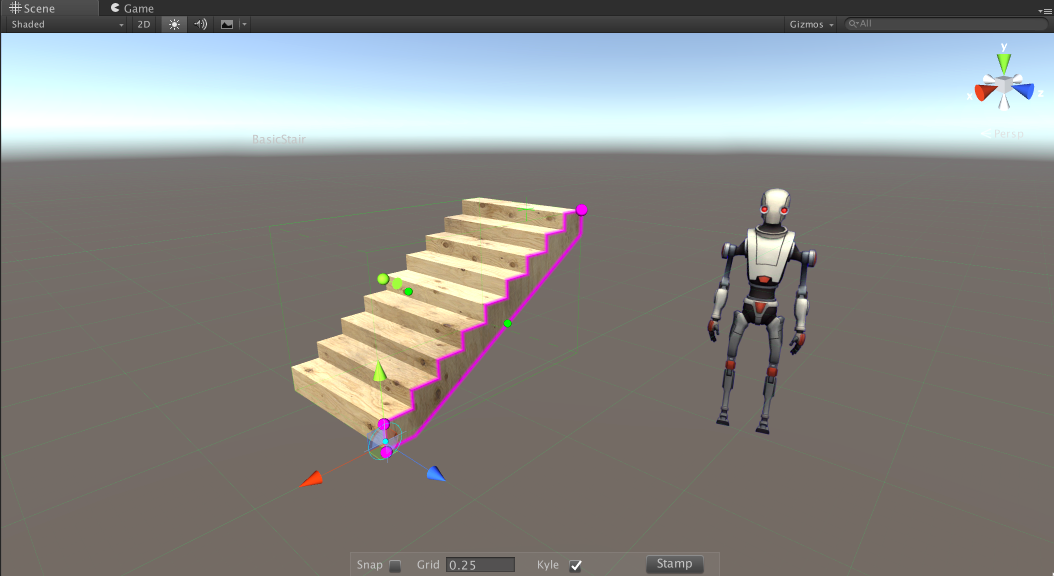

The Scene View footer menu appears whenever an Archimatix object is selected. The footer
menu also includes grid snapping controls and the Stamp button.
Menu chân trang của Chế độ xem cảnh xuất hiện bất cứ khi nào đối tượng Archimatix được chọn. Chân trang
menu cũng bao gồm các điều khiển chụp lưới và nút Tem.
Roaring Tide Productions
Archimatix User Start Guide
!6
Sản phẩm thủy triều gầm
Hướng dẫn bắt đầu sử dụng Archimatix
!6
Page 9
Inspecting the Inspector
Thanh tra thanh tra
Not every parameter is represented by a handle in your scene. To see the full set of
parameters available for a selected object, you can refer to the Inspector.
Không phải mọi tham số đều được biểu thị bằng một điều khiển trong cảnh của bạn. Để xem trọn bộ
các tham số có sẵn cho đối tượng được chọn, bạn có thể tham khảo Thanh tra.
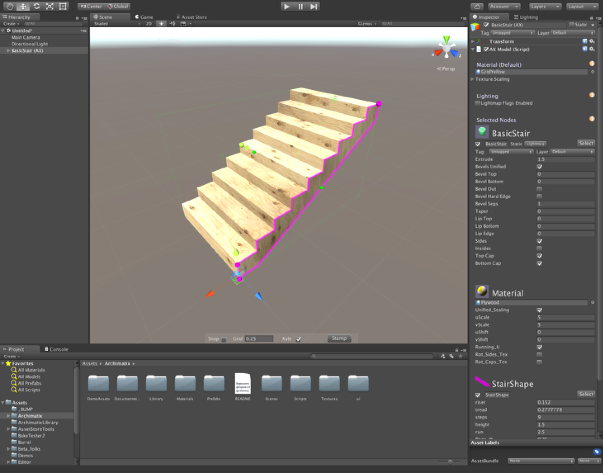
From the Inspector, we see the parameters for the BasicStair model are listed under certain
headings such as BasicStair, Material and StairShape. This is because a parametric object in
Archimatix is described by any number of nodes in a node graph.
Từ Inspector, chúng ta thấy các tham số cho mô hình BasicStair được liệt kê theo một số
các tiêu đề như BasicStair, Material và StairShape. Điều này là do một đối tượng tham số trong
Archimatix được mô tả bằng số lượng nút bất kỳ trong biểu đồ nút.
When you select a
parametric object in the
scene, the Inspector
displays the node that
represents that object,
as well as all of the
“upstream” nodes” that
feed into it.
Khi bạn chọn một
đối tượng tham số trong
hiện trường, thanh tra
hiển thị nút đó
đại diện cho đối tượng đó,
cũng như tất cả những
các nút “ngược dòng””
ăn vào nó.
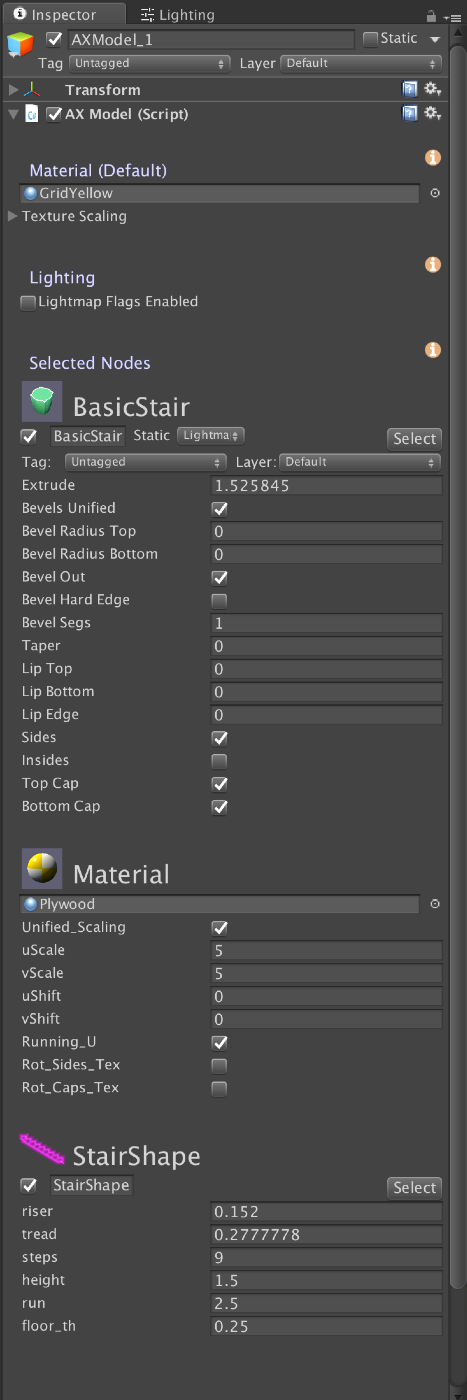


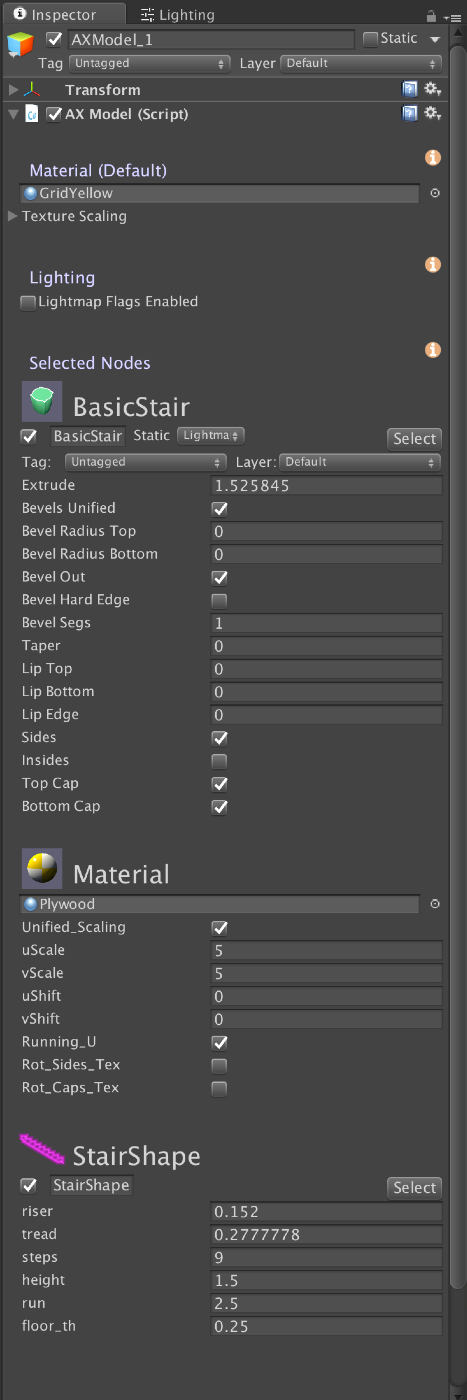

These headings represent nodes in
the Archimatix node graph.
Các tiêu đề này đại diện cho các nút trong
biểu đồ nút Archimatix.
Step 1.4: With the
Bước 1.4: Với
BasicStair still
selected, take a look at the Inspector and begin
to manipulate some of its parameters.
Cơ bảnCầu thang vẫn
đã chọn, hãy nhìn vào Thanh tra và bắt đầu
để thao tác một số tham số của nó.

The parameters we modified with the Scene View handles,
run, height and riser, are under the heading of StairShape.
Các tham số chúng tôi đã sửa đổi bằng bộ điều khiển Chế độ xem cảnh,
đường chạy, chiều cao và bậc thang, nằm dưới tiêu đề StairShape.
We can use the Inspector to select a material for the
BasicStair. The default material for the model is listed near
the top of the Inspector. This default material will be
applied to any node that does not have its own material
defined. In this case, the BasicStair object does have its
own material node, listed below it in the Inspector.
Chúng ta có thể sử dụng Thanh tra để chọn vật liệu cho
Cầu thang cơ bản. Vật liệu mặc định cho mô hình được liệt kê gần
đỉnh của Thanh tra. Vật liệu mặc định này sẽ được
áp dụng cho bất kỳ nút nào không có vật liệu riêng
được xác định. Trong trường hợp này, đối tượng BasicStair có
nút vật liệu riêng, được liệt kê bên dưới nó trong Thanh tra.
Step 1.5:
Drag a material from your Project Window to
the material ObjectField below the BasicStair
section of the Inspector. Alternatively, you can
click on the circle to the right of the
ObjectField to bring up the Material chooser.
Bước 1.5:
Kéo vật liệu từ Cửa sổ dự án của bạn tới
vật liệu ObjectField bên dưới BasicStair
phần của Thanh tra. Ngoài ra, bạn có thể
bấm vào vòng tròn bên phải
ObjectField để hiển thị bộ chọn Vật liệu.



Note: Archimatix does not yet support dragging and dropping a
material directly onto the object in the Scene View window, but
this is an upcoming feature.
Lưu ý: Archimatix chưa hỗ trợ kéo và thả
vật liệu trực tiếp lên đối tượng trong cửa sổ Scene View, nhưng
đây là một tính năng sắp ra mắt.
Roaring Tide Productions
Archimatix User Guide
!7
Sản phẩm thủy triều gầm
Hướng dẫn sử dụng Archimatix
!7
Page 10
Node Graph Editor (Sneak Peek)
Trình chỉnh sửa biểu đồ nút (Sneak Peek)
What makes the BasicStair so smart? Underneath
the hood is a full-featured node graph that visually
encodes the logic of how the model is generated.
The image of the Node Graph Editor to the right
reveals that the parametric object BasicStair is
actually composed using only two nodes.
Điều gì khiến BasicStair trở nên thông minh đến vậy? Bên dưới
mui xe là một biểu đồ nút đầy đủ tính năng trực quan
mã hóa logic về cách tạo ra mô hình.
Hình ảnh của Node Graph Editor ở bên phải
tiết lộ rằng đối tượng tham số BasicStair là
thực sự được sáng tác chỉ bằng hai nút.
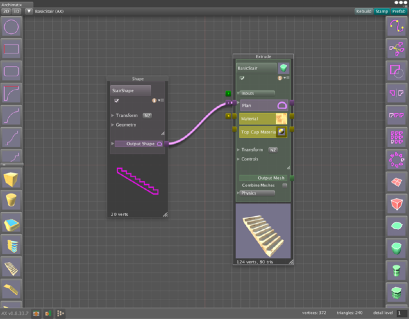

Node base classes can be Shapes, Meshers, Repeaters,
Tools and other bits of functionality to help you
describe the logic of a model. In the BasicStair
parametric object, the StairShape (instantiated
from the 2D Library) has its output fed into the
“Plan Shape” input of an Extrude node. The Extrude
node then takes the StairShape data and, based on
the Extrude node’s parameter values, generates a
Unity mesh. This mesh output can then be fed into
other nodes – such as a Repeater node – to duplicate
it according to the Repeater’s parameters.
Các lớp cơ sở của nút có thể là Hình dạng, Bộ chia lưới, Bộ lặp,
Các công cụ và các chức năng khác có thể giúp bạn
mô tả logic của một mô hình. Trong Cầu thang cơ bản
đối tượng tham số, StairShape (được khởi tạo
từ Thư viện 2D) có đầu ra được đưa vào
Đầu vào “Plan Shape” của nút Extrude. Đùn
nút sau đó lấy dữ liệu StairShape và dựa trên
các giá trị tham số của nút Extrude, tạo ra một
Lưới thống nhất. Đầu ra lưới này sau đó có thể được đưa vào
các nút khác – chẳng hạn như nút Lặp lại – để sao chép
nó theo các thông số của Repeater.
The BasicStair is actually composed of two
nodes: a parametric Shape named StairShape
and an Extrude node named BasicStair. The
output of the Shape is fed into the Plan input of
the Extrude node.
BasicStair thực sự bao gồm hai
nút: một Hình dạng tham số có tên StairShape
và một nút Extrude có tên BasicStair. các
đầu ra của Hình dạng được đưa vào đầu vào Kế hoạch của
nút Extrude.

Not all that scary, right? We will revisit the node graph in Chapter 6, but for now, let’s see
what else is happening in the scene.
Không đến nỗi đáng sợ lắm phải không? Chúng ta sẽ xem lại biểu đồ nút trong Chương 6, nhưng bây giờ hãy xem
những gì khác đang xảy ra trong hiện trường.
Hierarchy Window
Cửa sổ phân cấp
You may have already noticed that a GameObject has
appeared in the Hierarchy window named “BasicStair (AX).”
This is the root GameObject that instantiates an AXModel
Component, the manager of all Archimatix smart objects
within that model. While you may have multiple AXModel
GameObjects in a scene, it is quite common to have very
few or even only one. When instantiating a new Library
item, the default behavior is to add these to your scene as
node sets within the existing AXModel’s graph.
Bạn có thể đã nhận thấy rằng GameObject có
xuất hiện trong cửa sổ Phân cấp có tên “Cầu thang cơ bản (AX).”
Đây là GameObject gốc sẽ khởi tạo AXModel
Component, trình quản lý tất cả các đối tượng thông minh Archimatix
bên trong mô hình đó. Mặc dù bạn có thể có nhiều AXModel
GameObjects trong một cảnh, điều khá phổ biến là có rất nhiều
ít hoặc thậm chí chỉ một. Khi khởi tạo một Thư viện mới
item, hành vi mặc định là thêm chúng vào cảnh của bạn dưới dạng
tập hợp nút trong biểu đồ của AXModel hiện có.
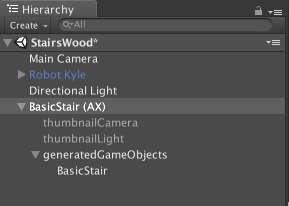

Hierarchy view of a typical AXModel
GameObject. Generally, you will not
be using the Hierarchy view to select
the children of this GameObject, but
instead you will be working in other
views, such as the Scene View, the
Inspector and the Node Graph Editor.
Chế độ xem phân cấp của một AXModel điển hình
GameObject. Nói chung, bạn sẽ không
đang sử dụng chế độ xem Thứ bậc để chọn
con của GameObject này, nhưng
thay vào đó bạn sẽ làm việc ở nơi khác
các chế độ xem, chẳng hạn như Chế độ xem cảnh,
Thanh tra và Trình chỉnh sửa biểu đồ nút.
Two children of the AXModel GameObject, the
thumbnailCamera and thumbnailLight, are inactive, being
only used internally by the AXModel component to render
thumbnail images. generatedGameObjects is a temporary
container to hold GameObjects that are generated as the
model and its parametric objects are manipulated.
Hai đứa con của AXModel GameObject,
hình thu nhỏMáy ảnh và hình thu nhỏÁnh sáng, không hoạt động, đang
chỉ được sử dụng nội bộ bởi thành phần AXModel để kết xuất
hình ảnh thu nhỏ. generateGameObjects chỉ là tạm thời
vùng chứa để chứa GameObject được tạo dưới dạng
mô hình và các đối tượng tham số của nó được thao tác.
You cannot actually select a child object of the AXModel
Bạn thực sự không thể chọn một đối tượng con của AXModel
Roaring Tide Productions
Archimatix User Guide
!8
Sản phẩm thủy triều gầm
Hướng dẫn sử dụng Archimatix
!8
Page 11
root in the Hierarchy, because with parametric modeling, we do not operate on
GameObjects directly, but rather on nodes that generate GameObjects. Smart objects in
your scene behave like separate GameObjects, but are, in fact, ParametricObject nodes
within the model.
gốc trong Hệ thống phân cấp, vì với mô hình tham số, chúng tôi không hoạt động trên
GameObjects trực tiếp mà thay vào đó là trên các nút tạo GameObjects. Đồ vật thông minh trong
cảnh của bạn hoạt động giống như các GameObject riêng biệt, nhưng trên thực tế là các nút ParametricObject
bên trong mô hình.
That’s enough basic anatomy for now! Since you are probably itching to manipulate some
more parametric objects, let’s call up a more complex example and explore another way to
instantiate Library objects.
Giải phẫu cơ bản như vậy là đủ rồi! Vì có lẽ bạn đang muốn thao túng một số
nhiều đối tượng tham số hơn, hãy xem một ví dụ phức tạp hơn và khám phá một cách khác để
khởi tạo các đối tượng Thư viện.

Roaring Tide Productions
Archimatix User Guide
!9
Sản phẩm thủy triều gầm
Hướng dẫn sử dụng Archimatix
!9
Page 12
The Archimatix Library
Thư viện Archimatix

2. The Archimatix
Library
2. Archimatix
Thư viện
Parametric modeling is made easier with
the help of the Archimatix Library.
With shelf space for a vast array of
parametric props available for you to
check out (and check in!), both 2D and
3D parametric objects archived in the
Library are searchable.
Mô hình tham số được thực hiện dễ dàng hơn với
sự giúp đỡ của Thư viện Archimatix.
Với không gian kệ cho nhiều loại sản phẩm
đạo cụ tham số có sẵn để bạn
kiểm tra (và kiểm tra!), cả 2D và
Các đối tượng tham số 3D được lưu trữ trong
Thư viện có thể tìm kiếm được.
While some Library items can be instantiated from
the Unity menus, visiting the Archimatix Library via
its own window is a great way to see the full holdings
of the Library at any given time. Archimatix ships with
some example Library items to help get you started,
and your Library will grow over time as you add your
own parametric props and share props with friends, and as packs of parametric props
become available from the Asset Store.
Mặc dù một số mục Thư viện có thể được khởi tạo từ
các menu Unity, truy cập Thư viện Archimatix qua
cửa sổ riêng của nó là một cách tuyệt vời để xem toàn bộ tài sản
của Thư viện vào bất kỳ thời điểm nào. Archimatix vận chuyển với
một số mục Thư viện mẫu để giúp bạn bắt đầu,
và Thư viện của bạn sẽ phát triển theo thời gian khi bạn thêm
sở hữu đạo cụ tham số và chia sẻ đạo cụ với bạn bè cũng như dưới dạng gói đạo cụ tham số
có sẵn từ Cửa hàng tài sản.

To get a better sense of how this works, let’s open a Library window.
Để hiểu rõ hơn về cách hoạt động của tính năng này, hãy mở cửa sổ Thư viện.
Step 2.1: Create a new scene and then open the Library window via the main Unity
Bước 2.1: Tạo cảnh mới rồi mở cửa sổ Thư viện thông qua Unity chính
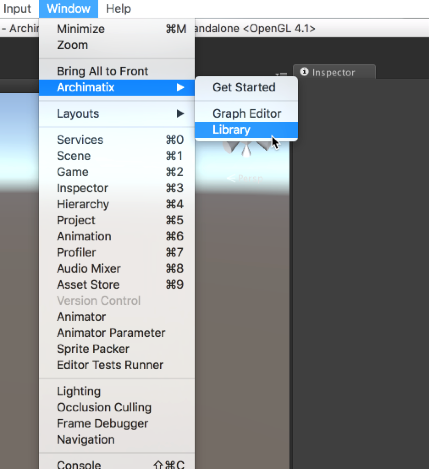
When the Library window opens, feel free to dock it
Khi cửa sổ Thư viện mở ra, hãy gắn nó vào đế
Roaring Tide Productions
Archimatix User Guide
!10
Sản phẩm thủy triều gầm
Hướng dẫn sử dụng Archimatix
!10
Page 13
The Archimatix Library
Thư viện Archimatix
within the Unity Editor interface.
trong giao diện Unity Editor.
Roaring Tide Productions
Archimatix User Guide
!11
Sản phẩm thủy triều gầm
Hướng dẫn sử dụng Archimatix
!11
Page 14
2. The Archimatix Library
2. Thư viện Archimatix
The Library Window
Cửa sổ thư viện
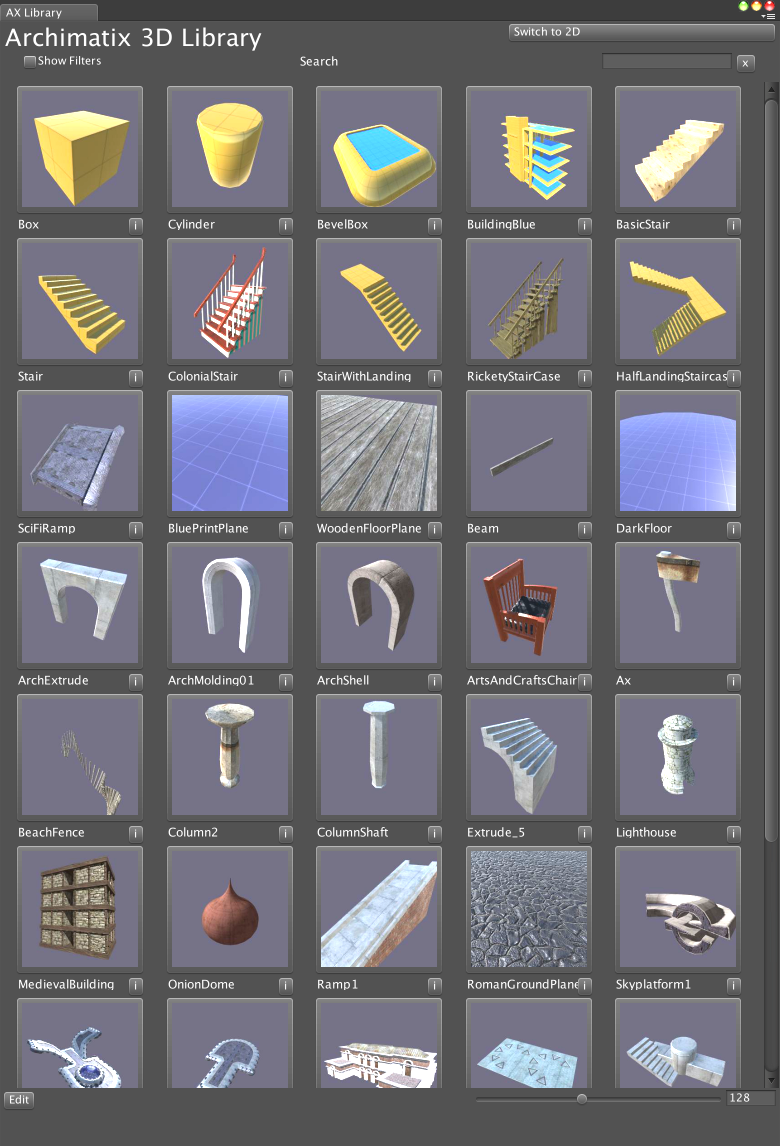
The Library window displays a grid of the items
archived in the Library. Each item may be thought
of as a Parametric Prop, a smart object that you
can add to your model, complete with its own
Scene View handles as parameters.
Cửa sổ Thư viện hiển thị một lưới các mục
được lưu trữ trong Thư viện. Mỗi mục có thể được nghĩ
dưới dạng Prop tham số, một đối tượng thông minh mà bạn
có thể thêm vào mô hình của bạn, hoàn chỉnh với mô hình của riêng nó
Chế độ xem cảnh xử lý dưới dạng tham số.
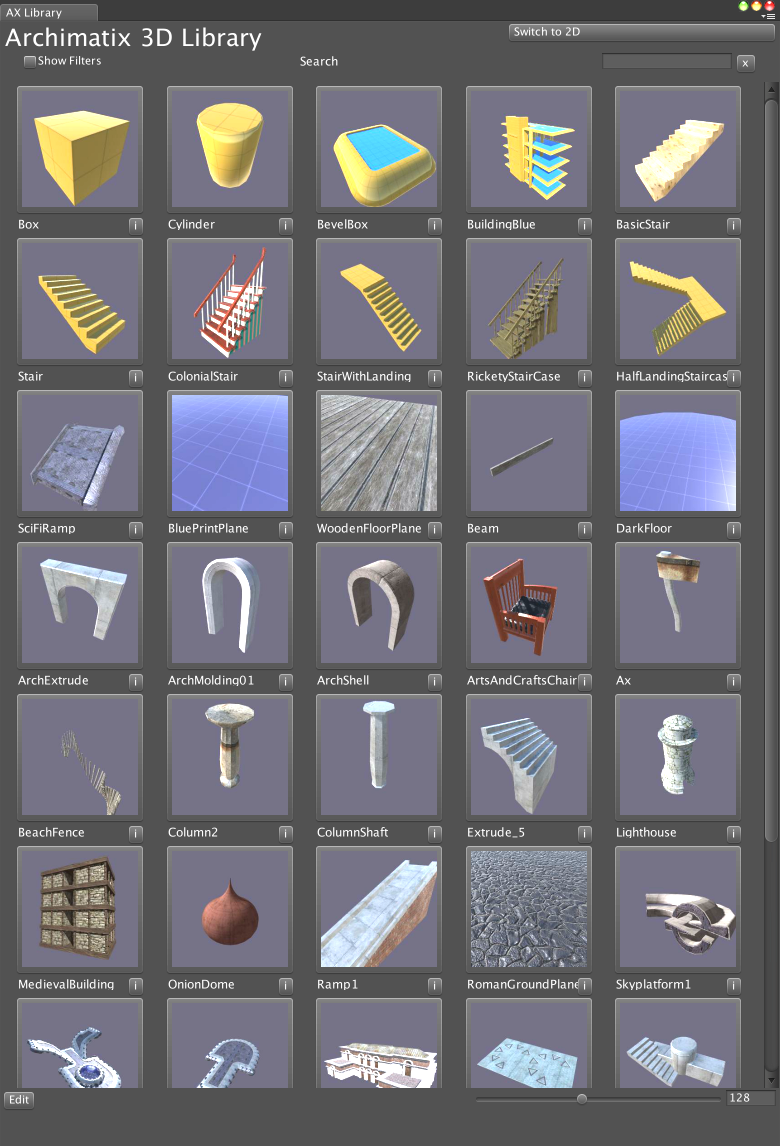
You can search and filter the items in the Library
by keywords and other metadata tags associated
with each item.
Bạn có thể tìm kiếm và lọc các mục trong Thư viện
theo từ khóa và các thẻ siêu dữ liệu khác được liên kết
với từng mục.
To try the Library out, let’s
appease Robot Kyle by
checking out the
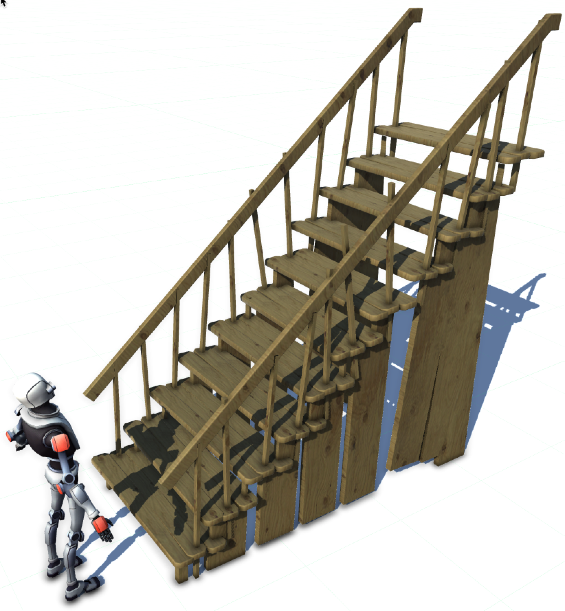
RicketyStaircase item from the
Library, adding it to our scene.
Để dùng thử Thư viện, hãy
xoa dịu Robot Kyle bằng cách
kiểm tra
Vật phẩm Cầu thang Rickety từ
Thư viện, thêm nó vào cảnh của chúng tôi.

Step 2.2: At top of the Library
Bước 2.2: Ở đầu Thư viện
window, click in the
search field and type “stair.”
cửa sổ, bấm vào
trường tìm kiếm và gõ “cầu thang”.
Step 2.3:
In the filtered results now displayed,
locate the RicketyStaircase and click on
it.
Bước 2.3:
Trong các kết quả đã lọc hiện được hiển thị,
xác định vị trí Cầu thang Rickety và nhấp vào
nó.

The RicketyStaircase should now be selected in your scene.
Bây giờ RicketyStaircase sẽ được chọn trong cảnh của bạn.
Unlike the BasicStair, which had only one Mesher node (the Extrude), this RicketyStaircase is
more complex, composed of several Shapes, Mesher and Repeater nodes. These parts are all
brought together in a Grouper node.
Không giống như BasicStair chỉ có một nút Mesher (Extrude), RicketyStaircase này là
phức tạp hơn, bao gồm một số nút Shapes, Mesher và Repeater. Những bộ phận này đều
được tập hợp lại trong một nút Grouper.



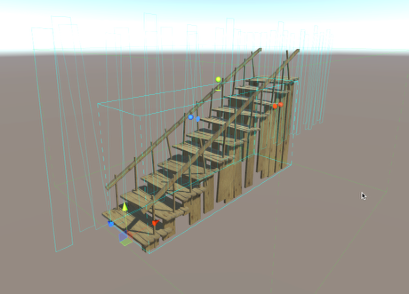
Step 2.4:
Click and drag the red, green and blue
handles visible around the
RicketyStaircase to control its run, height
and width parameters.
Bước 2.4:
Nhấp và kéo màu đỏ, xanh lá cây và xanh dương
tay cầm có thể nhìn thấy xung quanh
RicketyCầu thang để kiểm soát đường đi, chiều cao của nó
và các thông số chiều rộng.
You should be creating different variations of the
RicketyStaircase. Notice that the step treads, rail
posts and side boards are being “jittered” with
Perlin noise to give that rickety effect.
Bạn nên tạo ra các biến thể khác nhau của
RicketyCầu thang. Chú ý rằng các bậc thang, đường ray
bài viết và bảng phụ đang bị “bối rối” với
Tiếng ồn Perlin để tạo ra hiệu ứng ọp ẹp đó.
The boards are created by a repeating 2D Rectangle
with Jitter, and then extruded.
Các bảng được tạo bằng Hình chữ nhật 2D lặp lại
với Jitter, và sau đó được ép đùn.
Roaring Tide Productions
Archimatix User Guide
!12
Sản phẩm thủy triều gầm
Hướng dẫn sử dụng Archimatix
!12
Page 15

2. The Archimatix Library
2. Thư viện Archimatix

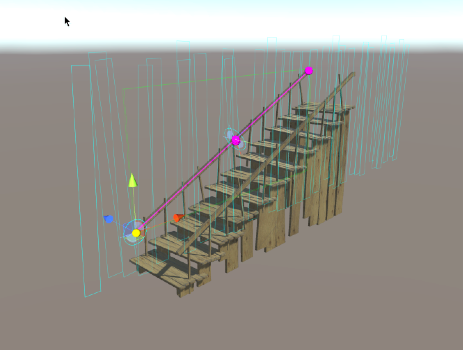
You can find more handles to control the
RicketyStaircase by clicking on various parts
of the model.
Bạn có thể tìm thêm tay cầm để điều khiển
RicketyCầu thang bằng cách nhấp vào các phần khác nhau
của mô hình.

Step 2.5: Click on one of the stair rails.
Bước 2.5: Click vào một trong các lan can cầu thang.
Click and drag the point handle
at the top end of the rail to
modify the run and height of the
staircase.
Bấm và kéo điểm điều khiển
ở đầu trên cùng của đường ray để
sửa đổi đường chạy và chiều cao của
cầu thang.

It is fun to manipulate multiple parameters
with one handle. Like with the BasicStair, this handle at the top of the rail is modifying both
run and height.
Thật thú vị khi thao tác nhiều tham số
với một tay cầm. Giống như BasicStair, tay cầm ở đầu thanh ray này đang sửa đổi cả
chạy và chiều cao.

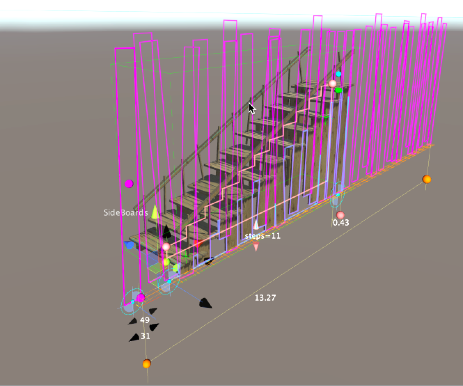
Step 2.6:
Click on the sideboards of the
staircase.
Bước 2.6:
Bấm vào các bảng phụ của
cầu thang.
The handles that appear when you click on
the sideboards are numerous because they
are made of a number of subnodes. Note
the stair profile Shape with top point
handles at the top and bottom of the stair.
Các tay cầm xuất hiện khi bạn nhấp vào
tủ búp phê có rất nhiều vì chúng
được tạo thành từ một số nút con. Lưu ý
biên dạng cầu thang Hình dạng với điểm trên cùng
tay cầm ở đầu và cuối cầu thang.


Step 2.7:
Click on the control point on
the first (lowest) step and drag to
alter the rise parameter (and the
number of steps).
Bước 2.7:
Bấm vào điểm điều khiển trên
bước đầu tiên (thấp nhất) và kéo tới
thay đổi tham số tăng (và
số bước).

Let’s alter the spacing of the sideboards
themselves.
Hãy thay đổi khoảng cách của các tủ bên
chính họ.
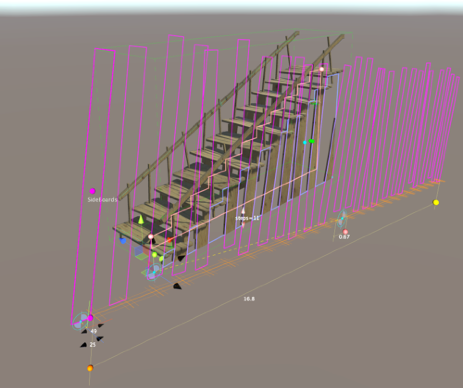

Step 2.8:
Drag the cell size handle of the
LinearRepeater2D that spaces the
sideboard Rectangle Shape. Also,
try dragging the cyan circle to
rotate the repeater.
Bước 2.8:
Kéo bộ điều khiển kích thước ô của
LinearRepeater2D tạo khoảng trống cho
tủ bên hình chữ nhật. Ngoài ra,
hãy thử kéo vòng tròn màu lục lam tới
xoay bộ lặp.
You should see the boards changing in real
time as you adjust the repeater handles. This
RicketyStaircase prop is driven by two
Repeaters, the LinearRepeater2D to space the
sideboard Shape and a StepRepeater to
distribute the tread boards. As you may have
guessed, the node graph for the RicketyStaircase is a bit more elaborate than that for the
BasicStair.
Bạn sẽ thấy các bảng thay đổi thực tế
thời gian khi bạn điều chỉnh tay cầm bộ lặp. Cái này
Chống đỡ cầu thang Rickety được điều khiển bởi hai
Bộ lặp, LinearRepeater2D để tạo khoảng trống cho
Hình dạng tủ bên và StepRepeater để
phân phối các bảng lốp. Như bạn có thể có
đoán, biểu đồ nút cho RicketyStaircase phức tạp hơn một chút so với biểu đồ nút của
Cầu thang cơ bản.
Roaring Tide Productions
Archimatix User Guide
!13
Sản phẩm thủy triều gầm
Hướng dẫn sử dụng Archimatix
!13
Page 16
2. The Archimatix Library
2. Thư viện Archimatix
Before leaving the Library, let’s check out one more feature of working with Library items:
creating stamped or “frozen” versions of models.
Trước khi rời Thư viện, hãy xem thêm một tính năng nữa khi làm việc với các mục Thư viện:
tạo ra các phiên bản mô hình được đóng dấu hoặc “đóng băng”.
Step 2.11: Create a new scene. Find the ArtsAndCraftsChair in the
Bước 2.11: Tạo cảnh mới. Tìm ArtsAndCraftsChair trong

Library and click on it to add it to your model.
Thư viện và nhấp vào nó để thêm nó vào mô hình của bạn.
Step 2.12: Modify the chair by dragging its handles.
Bước 2.12: Sửa đổi ghế bằng cách kéo tay cầm của nó.
Step 2.13: Click on the “Stamp” button in the footer control panel at
Bước 2.13: Click vào nút “Stamp” ở bảng điều khiển chân trang tại
the bottom of the Scene View.
phía dưới của Chế độ xem cảnh.

At this point you have two chairs, one that is a “frozen” copy and the original parametric
object, which remains selected. The frozen copy no longer needs Archimatix.
Tại thời điểm này, bạn có hai chiếc ghế, một chiếc là bản sao “đóng băng” và thông số ban đầu
đối tượng vẫn được chọn. Bản sao đông lạnh không còn cần Archimatix nữa.
Step 2.14: Move the parametric object away using the Transform handle. Click anywhere on
Bước 2.14: Di chuyển đối tượng tham số đi bằng cách sử dụng nút Transform. Bấm vào bất cứ nơi nào trên
the object and manipulate the handles
that are displayed.
đối tượng và thao tác các tay cầm
được hiển thị.
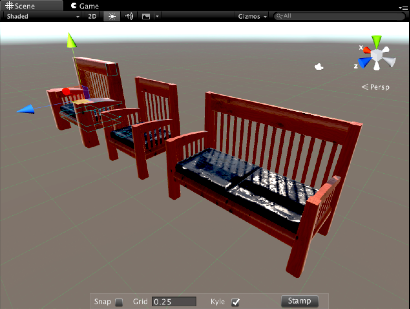
Archimatix features “cycle selecting,” whereby
repeatedly clicking on an object selects
“downstream” nodes until eventually the model
itself is selected. If you would like to select the
entire parametric object at anytime, you can do so
in the Hierarchy window.
Archimatix có tính năng “chọn chu kỳ”, theo đó
nhấp chuột liên tục vào một đối tượng sẽ chọn
các nút “hạ lưu” cho đến khi mô hình cuối cùng
chính nó được chọn. Nếu bạn muốn chọn
toàn bộ đối tượng tham số bất cứ lúc nào, bạn có thể làm như vậy
trong cửa sổ Thứ bậc.
To see stamping in action, please try this tutorial.
Để xem hoạt động dập, vui lòng thử hướng dẫn này.
Roaring Tide Productions
Archimatix User Guide
!14
Sản phẩm thủy triều gầm
Hướng dẫn sử dụng Archimatix
!14
Page 17


Getting Into Shapes
Bắt vào hình dạng
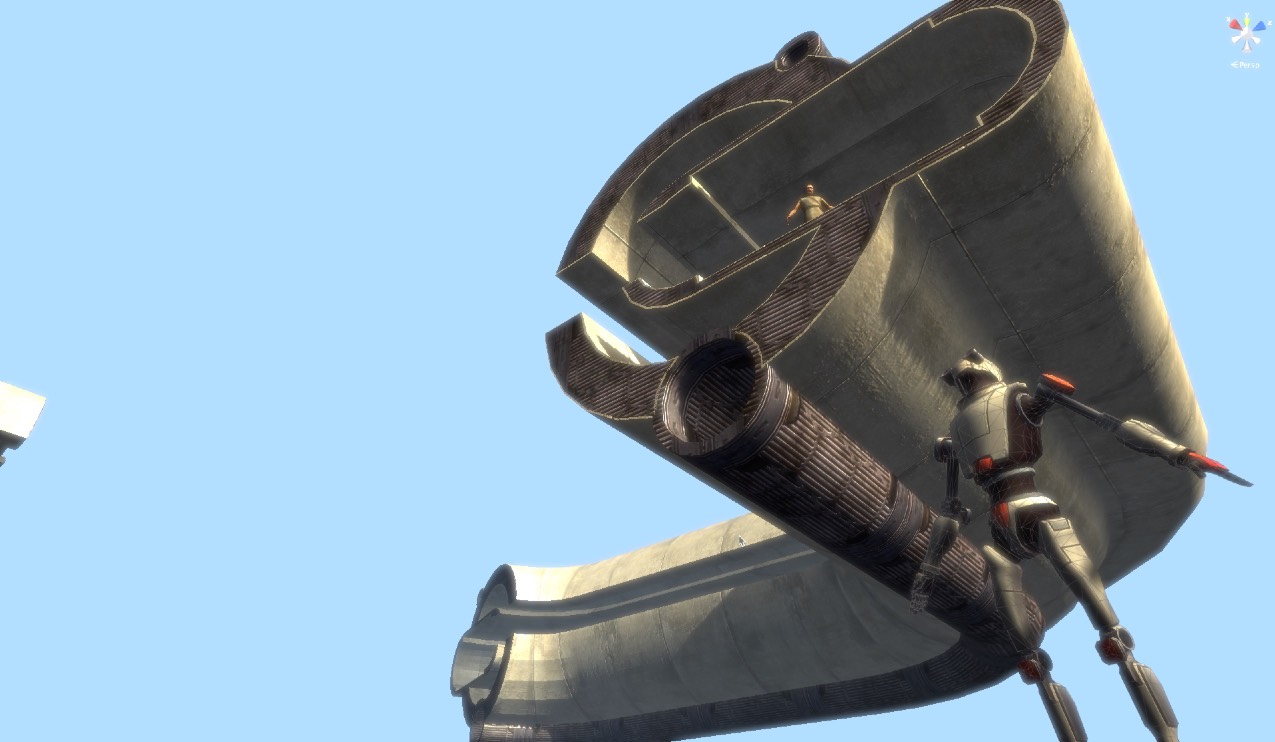
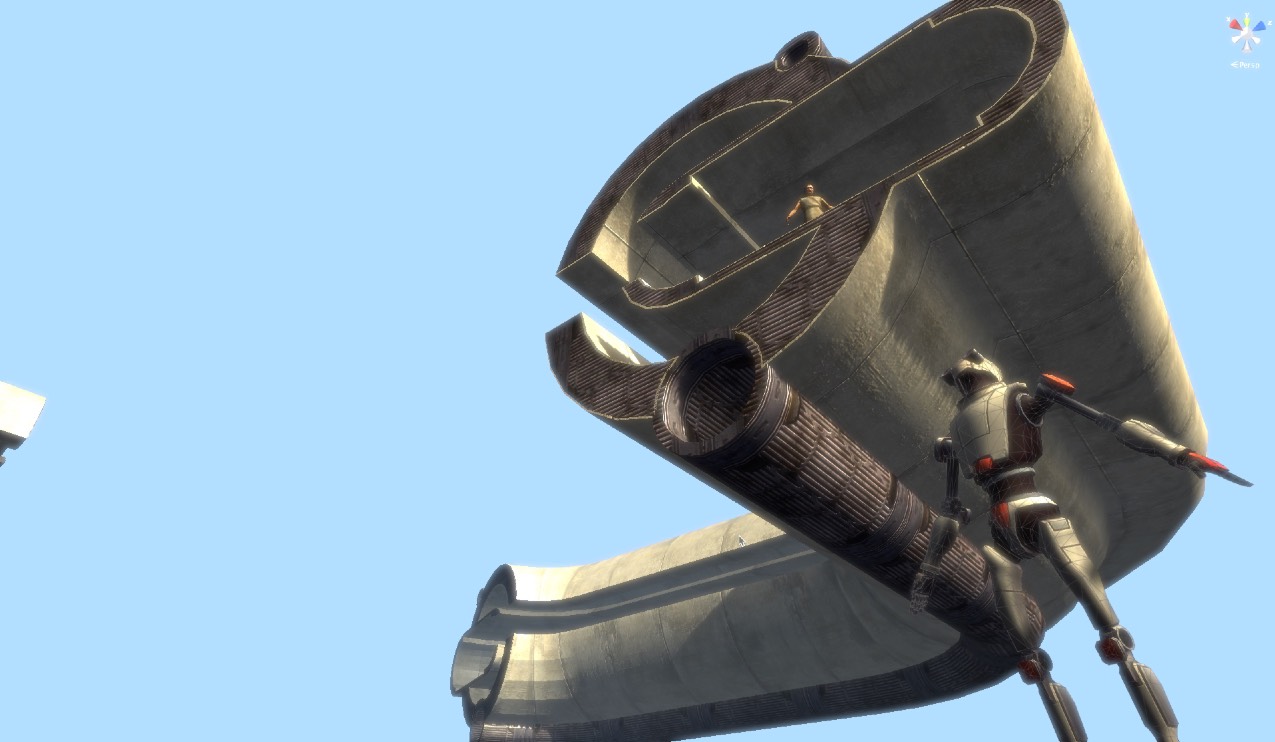
The Last Human thinks that Robot Kyle
has him under surveillance, when, in
fact, Kyle is contemplating what merged
Shapes define the cross section of the
skyplatform above.
Con Người Cuối Cùng nghĩ rằng Robot Kyle
có anh ta dưới sự giám sát, khi nào, trong
thực tế, Kyle đang suy nghĩ về việc sáp nhập
Hình dạng xác định mặt cắt ngang của
skyplatform ở trên.
3. Getting into Shapes
3. Bắt đầu tạo hình
Although Archimatix is an amazing tool for
generating 3D meshes, one of its key strengths is
its ability to manipulate 2D Shapes. With rich
Shape modification features, including thicken,
offset, rounding and boolean merge, Shapes provide a
powerful basis for generating 3D forms.
Mặc dù Archimatix là một công cụ tuyệt vời để
tạo lưới 3D, một trong những điểm mạnh chính của nó là
khả năng thao tác Hình dạng 2D của nó. Với sự giàu có
Các tính năng sửa đổi hình dạng, bao gồm làm dày,
offset, làm tròn và hợp nhất boolean, Shapes cung cấp một
cơ sở mạnh mẽ để tạo ra các hình thức 3D.
In Archimatix, Shapes too are parametric objects.
As we already saw with the stair Shape, when you
select a Shape, or an object that uses a Shape, you
will see Shape handles.
Trong Archimatix, Hình dạng cũng là đối tượng tham số.
Như chúng ta đã thấy với Hình cầu thang, khi bạn
chọn một Hình dạng hoặc một đối tượng sử dụng Hình dạng, bạn
sẽ thấy các ô điều khiển Hình dạng.
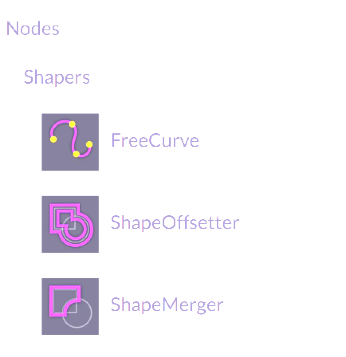
Shapers are nodes that operate on Shapes.
Shapers là các nút hoạt động trên Shapes.
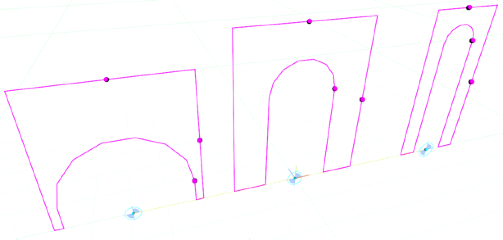
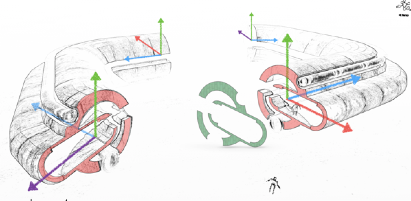
These three arch variants are really the same
ArchShape checked out from the Library. They have
been created by playing with the point handles.
Ba biến thể vòm này thực sự giống nhau
ArchShape đã kiểm xuất từ Thư viện. Họ có
được tạo ra bằng cách chơi với các điểm điều khiển.
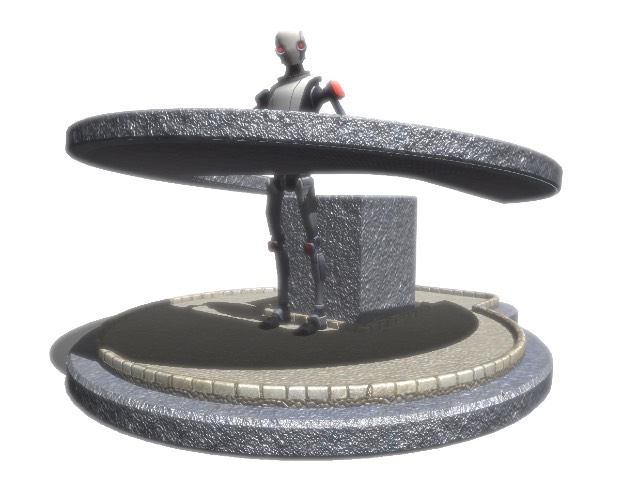
The skyplatform above is made with a
composite Shape (the product of a
boolean addition and subtraction of
several simple Shapes) as a section swept
around a Plan Shape.
Skyplatform ở trên được tạo bằng một
Hình dạng tổng hợp (sản phẩm của một
phép cộng và phép trừ boolean của
một số Hình dạng đơn giản) như một phần được quét
xung quanh một Hình dạng Kế hoạch.
Now let’s explore the power of Shapes.
Bây giờ hãy cùng khám phá sức mạnh của Hình dạng.
Roaring Tide Productions
Archimatix User Guide
!15
Sản phẩm thủy triều gầm
Hướng dẫn sử dụng Archimatix
!15
Page 18

3. Getting Into Shapes
3. Tạo hình
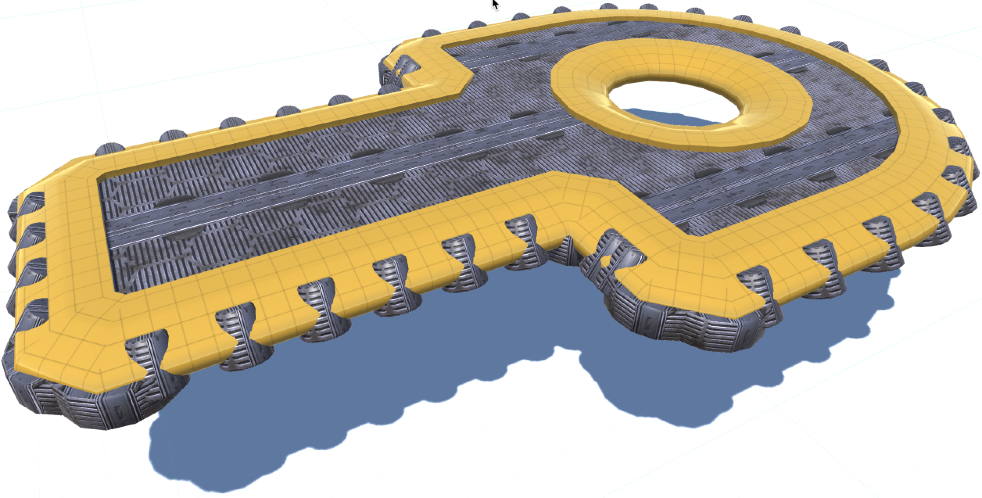
This time, instead of selecting an object from the Archimatix Library, let’s start with a demo
scene. Smart Objects' states are saved in the scenes themselves. Loading a scene containing
Smart Objects also loads their parametric relationships and values.
Lần này, thay vì chọn một đối tượng từ Thư viện Archimatix, hãy bắt đầu với bản demo
cảnh. Trạng thái của Đối tượng thông minh được lưu trong chính cảnh đó. Đang tải một cảnh có chứa
Đối tượng thông minh cũng tải các mối quan hệ tham số và giá trị của chúng.



Step 3.1:
Using Unity’s Project panel, open the scene:
Archimatix/Scenes/SciFiPlatform
Bước 3.1:
Sử dụng bảng Project của Unity, mở cảnh:
Archimatix/Cảnh/Nền tảng khoa học viễn tưởng
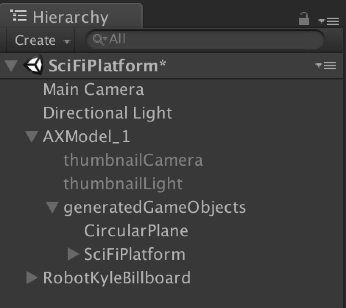
This scene has one Archimatix models in the Hierarchy
called AXModel. This is the main GameObject that
manages the parametric model in the scene. If you
expand the foldout, you will see a thumbnailCamera and a
thumbnailLight, both of which are inactive and are used
to render node thumbnails. The generatedGameObjects
item holds all of the temporary GameObjects created by
Archimatix. You can not select these temporary objects
here will select the node that generated them.
Cảnh này có một mô hình Archimatix trong Hệ thống phân cấp
được gọi là AXModel. Đây là GameObject chính
quản lý mô hình tham số trong cảnh. Nếu bạn
mở rộng thư mục, bạn sẽ thấy một hình thu nhỏCamera và một
thu nhỏLight, cả hai đều không hoạt động và được sử dụng
để hiển thị hình thu nhỏ của nút. Các GameObject được tạo
item chứa tất cả các GameObject tạm thời được tạo bởi
Archimatix. Bạn không thể chọn những đối tượng tạm thời này
ở đây sẽ chọn nút đã tạo ra chúng.
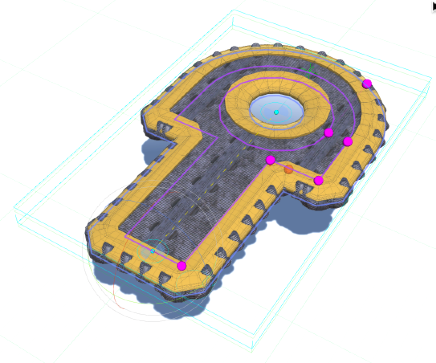
Step 3.2:
Select the platform in Scene View to reveal its
handles.
Bước 3.2:
Chọn nền tảng trong Chế độ xem cảnh để hiển thị
tay cầm.
Roaring Tide Productions
Archimatix User Guide
!16
Sản phẩm thủy triều gầm
Hướng dẫn sử dụng Archimatix
!16
Page 19

3. Getting Into Shapes
3. Tạo hình
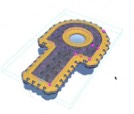
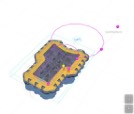
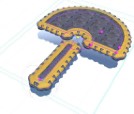
Step 3.3:
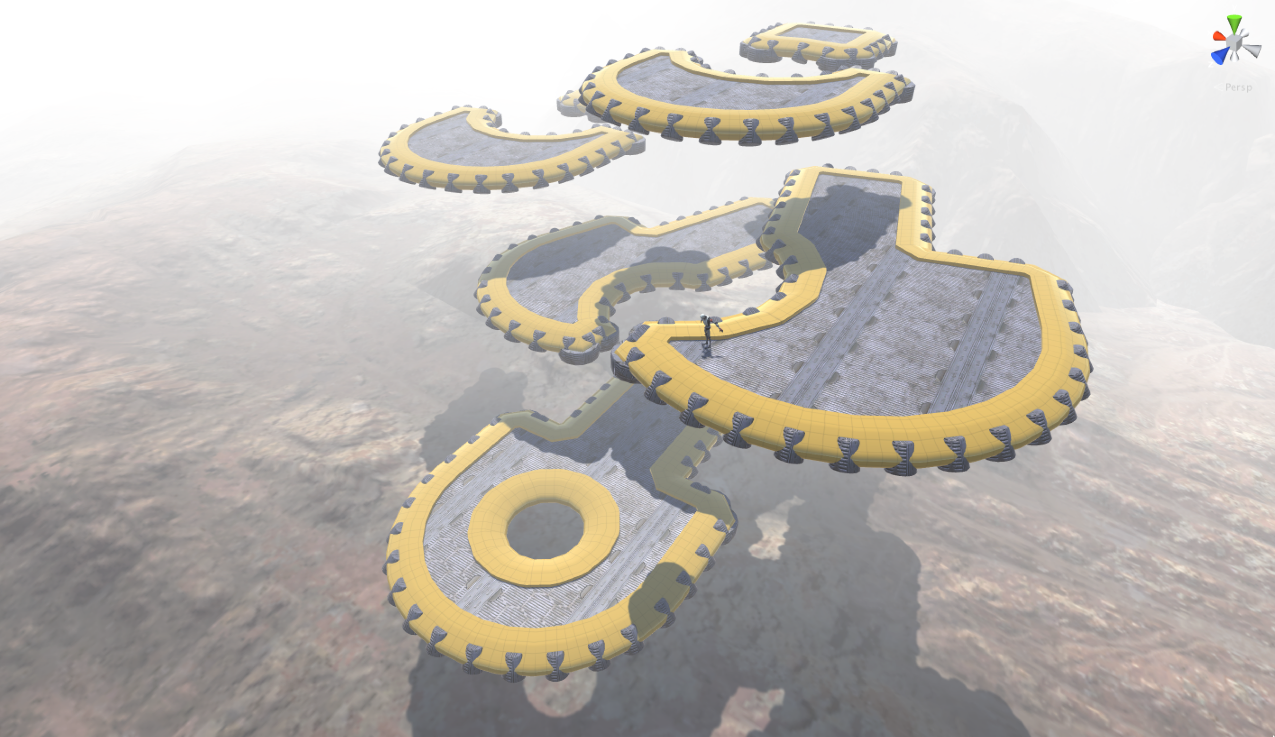
Drag the magenta point handles to create variations of the SciFiPlatform like
these:
Bước 3.3:
Kéo các điểm điều khiển điểm màu đỏ tươi để tạo các biến thể của SciFiPlatform như
những điều này:
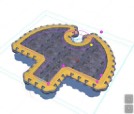
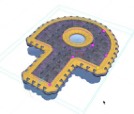
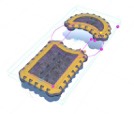
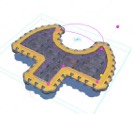
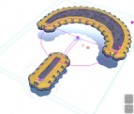
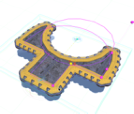
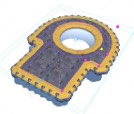
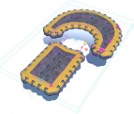
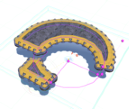
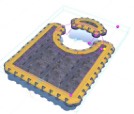
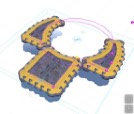
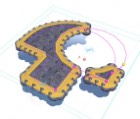
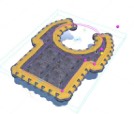
Don’t forget that you can grab the Circle’s centroid to displace it.
Đừng quên rằng bạn có thể lấy trọng tâm của Vòng tròn để dịch chuyển nó.
This isn’t the first time
Robot Kyle has needed to
take a leap of faith… and for
some reason, he thinks it
won’t be the last!
Đây không phải là lần đầu tiên
Robot Kyle cần phải
hãy có một bước nhảy vọt về niềm tin… và vì
vì lý do nào đó, anh ấy nghĩ vậy
sẽ không phải là người cuối cùng!

Roaring Tide Productions
Archimatix User Guide
!17
Sản phẩm thủy triều gầm
Hướng dẫn sử dụng Archimatix
!17
Page 20
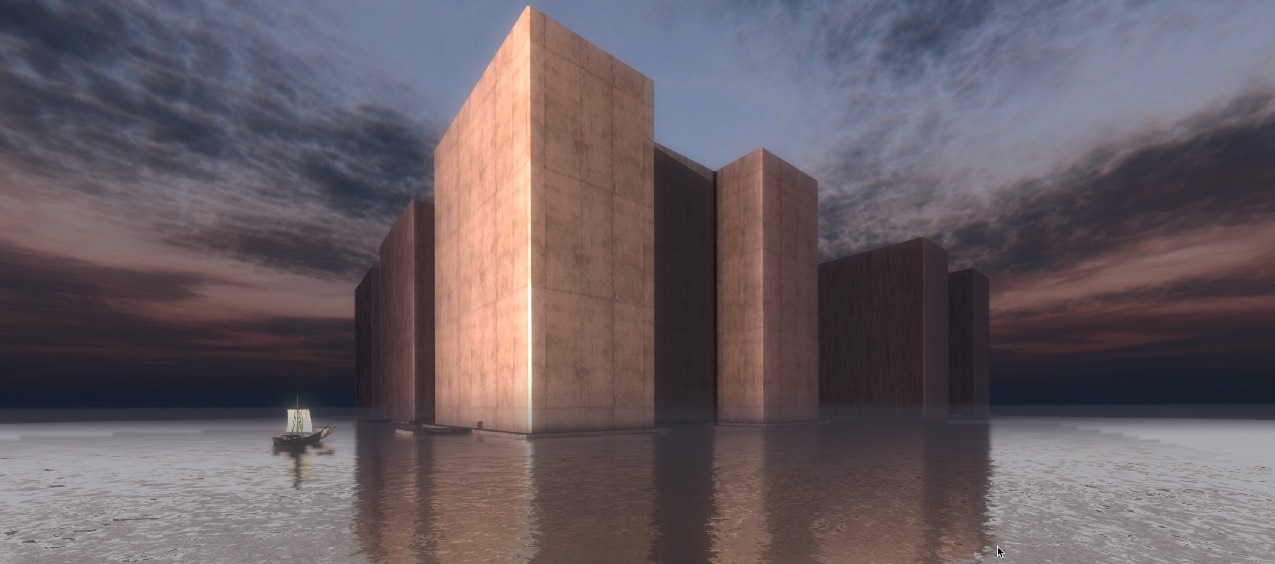


Fighting an overwhelming desire to turn back, Robot Kyle sails cautiously
toward the Island of the Robot-With-No-Name. He knows in his mechanical
heart that these towering edifices are merely I-Shapes fed into an Extrude
Mesher, but their sheer verticality and oppressive mass unnerve him as they
pierce the horizon.
Đấu tranh với mong muốn quay trở lại mãnh liệt, Robot Kyle thận trọng chèo thuyền
về phía Đảo Robot Không Tên. Anh ấy biết trong cơ khí của mình
tâm rằng những tòa nhà cao chót vót này chỉ đơn thuần là những Hình chữ I được đưa vào Extrude
Mesher, nhưng độ thẳng đứng và khối lượng áp bức của chúng khiến anh lo lắng khi chúng
xuyên qua đường chân trời.
4. Just Meshing Around
4. Chỉ cần đan lưới xung quanh
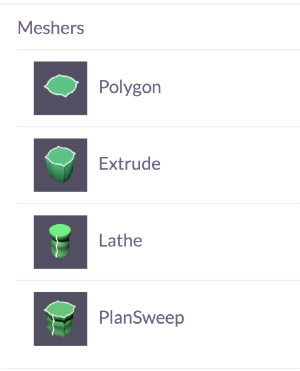
Archimatix has four main types of Meshers that transform
2D Shapes into 3D forms. The Polygon simply triangulates a
2D Shape, turning it into a flat mesh. The Extrude Mesher
takes a Plan Shape and lofts it to a certain height. The
Lathe takes a single Section Shape and spins it around an
axis at a certain radius. Finally, the PlanSweep Mesher takes
a Section Shape and sweeps it around a Plan Shape.
Archimatix có bốn loại Meshers chính có khả năng biến đổi
Hình dạng 2D thành dạng 3D. Đa giác chỉ đơn giản là tam giác hóa một
Hình dạng 2D, biến nó thành một lưới phẳng. Máy đùn đùn
lấy một Hình dạng Kế hoạch và nâng nó lên một độ cao nhất định. các
Máy tiện lấy một Hình dạng Phần duy nhất và quay nó xung quanh một
trục có bán kính nhất định. Cuối cùng, PlanSweep Mesher thực hiện
một Hình dạng Phần và quét nó xung quanh Hình dạng Sơ đồ.
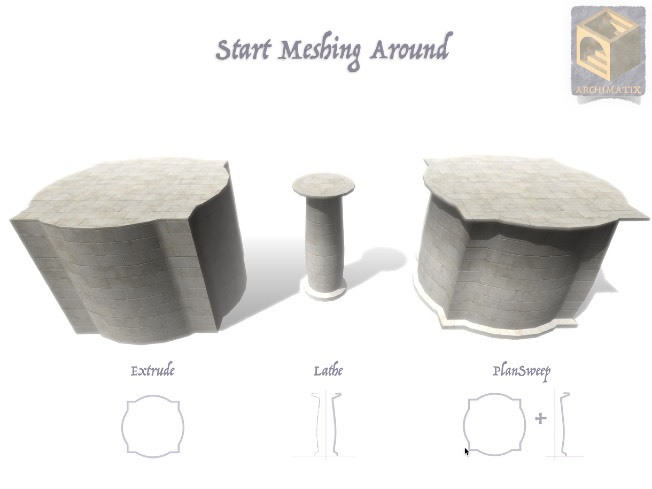
Meshers are represented
in the node graph by the
above nodes.
Meshers được đại diện
trong biểu đồ nút bởi
các nút trên.
Roaring Tide Productions
Archimatix User Guide
!18
Sản phẩm thủy triều gầm
Hướng dẫn sử dụng Archimatix
!18
Page 21

4. Just Meshing Around
4. Chỉ cần đan lưới xung quanh
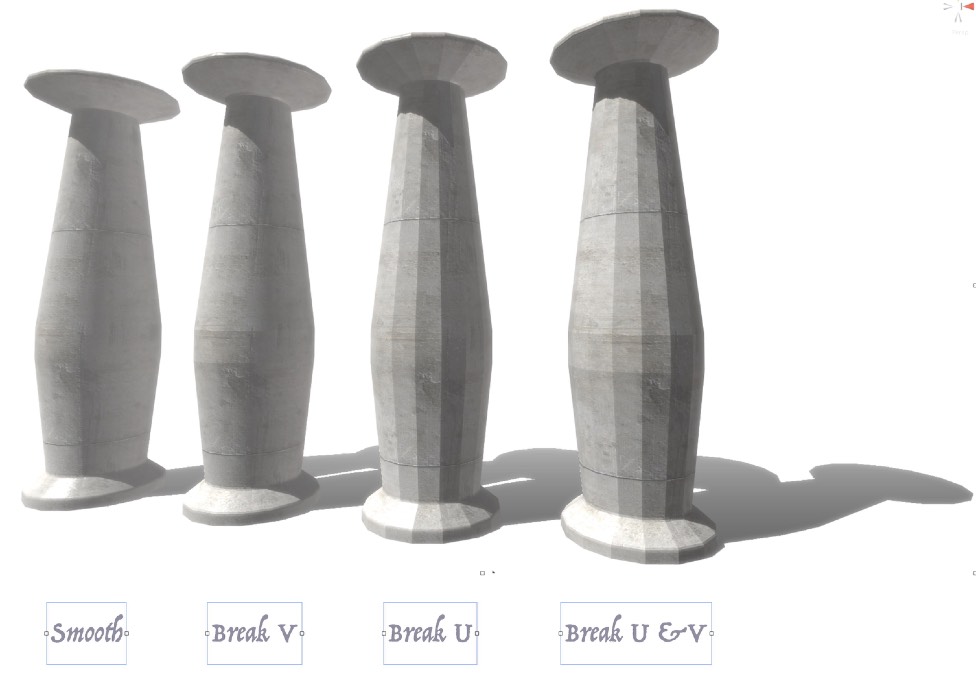

Archimatix Meshers use the logic of their geometry to automatically generate uv’s,
determining whether faces appear smooth or faceted.
Archimatix Meshers sử dụng logic hình học của chúng để tự động tạo ra tia cực tím,
xác định xem khuôn mặt có vẻ mịn hay nhiều mặt.
You can control how the normals respond to the curvature of the input Shapes, as well as
define the break angles separately, in Plan and Section. The image above shows identical
columns with different break angle settings. The first column has high break angle values;
the middle two have high break angle values on only one axis; and the last column has low
break angle values on all axes. You can also scale and shift textures that you have applied to
the sides and/or caps for these meshes.
Bạn có thể kiểm soát cách các đường chuẩn phản ứng với độ cong của Hình dạng đầu vào, cũng như
xác định các góc gãy riêng biệt trong Mặt bằng và Mặt cắt. Hình ảnh trên cho thấy giống hệt nhau
các cột có cài đặt góc gãy khác nhau. Cột đầu tiên có giá trị góc gãy cao;
hai cái ở giữa có giá trị góc đứt cao chỉ trên một trục; và cột cuối cùng có mức thấp
giá trị góc gãy trên tất cả các trục. Bạn cũng có thể chia tỷ lệ và thay đổi kết cấu mà bạn đã áp dụng
các mặt và/hoặc nắp của các mắt lưới này.
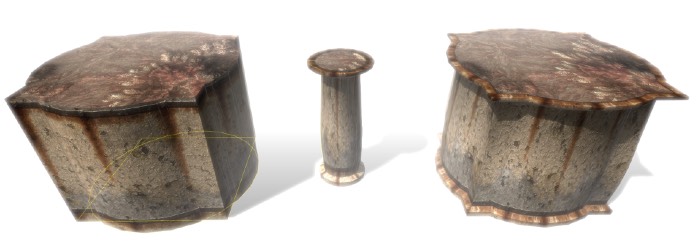
These controls are only accessible from the Node Graph Editor, which will be introduced
shortly!
Các điều khiển này chỉ có thể truy cập được từ Trình chỉnh sửa đồ thị nút, sẽ được giới thiệu
trong thời gian ngắn!
But first, let’s play with these Meshers to see how they behave.
Nhưng trước tiên, hãy chơi với những Meshers này để xem chúng cư xử như thế nào.
Roaring Tide Productions
Archimatix User Guide
!19
Sản phẩm thủy triều gầm
Hướng dẫn sử dụng Archimatix
!19
Page 22


4. Just Meshing Around
4. Chỉ cần đan lưới xung quanh
Step 4.1:
Open the scene Archimatix/Demo Scenes/MeshingAround.
Bước 4.1:
Mở cảnh Archimatix/Cảnh demo/MeshingAround.
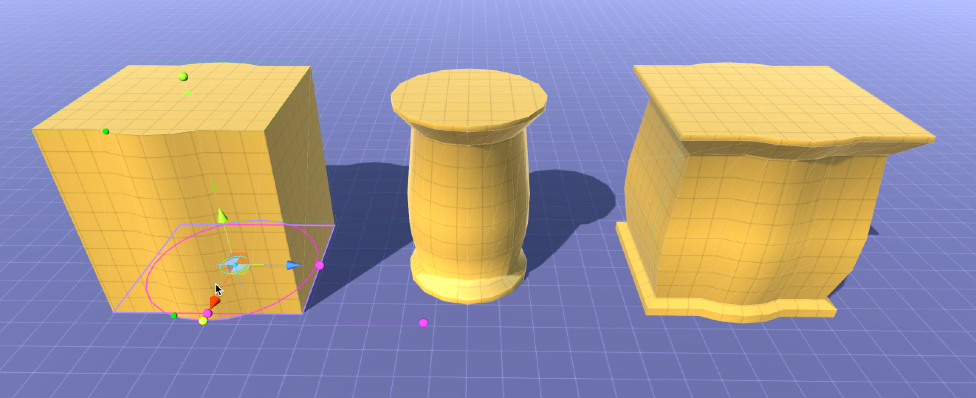




Step 4.2:
Click on the Extrude Mesher and manipulate the point handle for the radius of the
Circle.
Bước 4.2:
Nhấp vào Extrude Mesher và thao tác tay cầm điểm cho bán kính của
Vòng tròn.
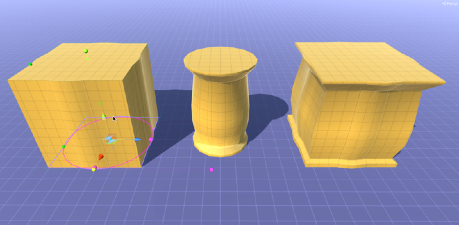
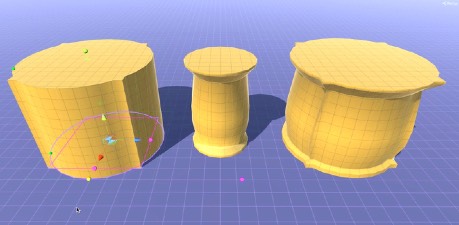

When the Circle is smaller, the Square is dominant.
With a bigger radius, the Circle is dominant.
Khi Vòng tròn nhỏ hơn, Hình vuông chiếm ưu thế.
Với bán kính lớn hơn, Vòng tròn chiếm ưu thế.
As you vary the radius of the Circle, the PlanSweep object changes as well. This is because
the same Plan Shape is being fed into both the Extrude and PlanSweep Meshers.
Khi bạn thay đổi bán kính của Vòng tròn, đối tượng PlanSweep cũng thay đổi. Điều này là do
Hình dạng Kế hoạch tương tự đang được đưa vào cả Extrude và PlanSweep Meshers.
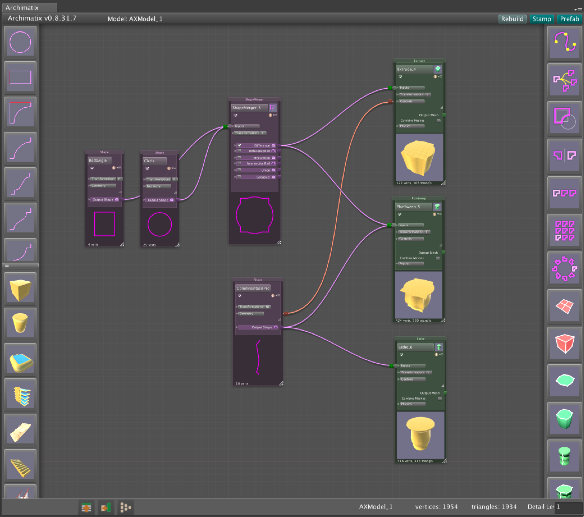
A sneak peek at the node
graph for this model shows
that, indeed, the Plan Shape
is shared by the Extrude
and the PlanSweep, while
the Section Shape is shared
by the PlanSweep and the
Lathe. The red connector is
linking the height
parameters of the Section
Shape and the Extrude
Height.
Xem nhanh nút
biểu đồ cho mô hình này cho thấy
đó thực sự là Hình dạng Kế hoạch
được chia sẻ bởi Extrude
và PlanSweep, trong khi
Hình dạng phần được chia sẻ
bởi PlanSweep và
Máy tiện. Đầu nối màu đỏ là
liên kết chiều cao
các thông số của phần
Hình dạng và đùn
Chiều cao.
Roaring Tide Productions
Archimatix User Guide
!20
Sản phẩm thủy triều gầm
Hướng dẫn sử dụng Archimatix
!20
Page 23


4. Just Meshing Around
4. Chỉ cần đan lưới xung quanh
Step 4.3:
Select the Lathe object and modify the point handle at the top of the Section.
Bước 4.3:
Chọn đối tượng Máy tiện và sửa đổi điểm điều khiển ở đầu Phần.

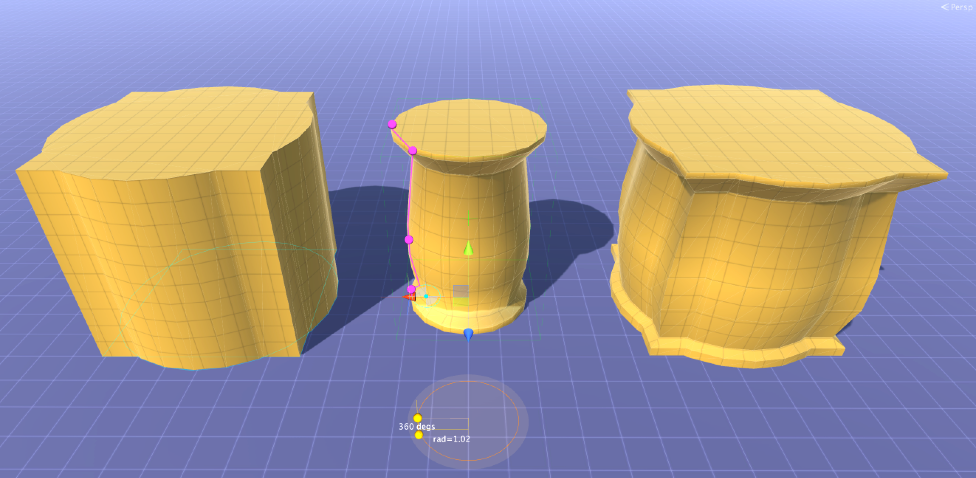




Step 4.4:
Drag the point handle at the midpoint of the Section curve of the Lathe.
Bước 4.4:
Kéo điểm điều khiển tại điểm giữa của đường cong Tiết diện của Máy tiện.
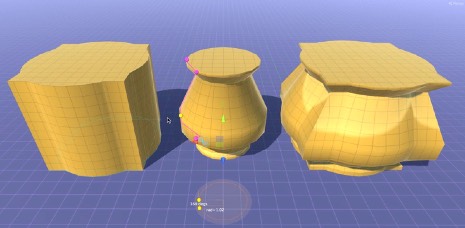
The midpoint of the Section is drawn outward.
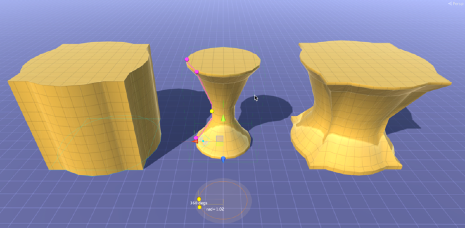
The midpoint of the Section is drawn inward.
Điểm giữa của Mặt cắt được vẽ ra ngoài.
Điểm giữa của Mặt cắt được vẽ vào trong.
The heights of all three objects adjust together. This is because the Extrude Mesher’s Height
parameter is “related” to the height parameter of the Section Shape. The Relation between
them (expressed by the red connector line in the Node Graph Editor image on the
preceding page) has “equals” expressions. We’ll learn more about Relations and their
expressions in Chapter 8.
Độ cao của cả ba vật thể điều chỉnh cùng nhau. Điều này là do chiều cao của Extrude Mesher
tham số “có liên quan” đến tham số chiều cao của Hình dạng Phần. Mối quan hệ giữa
chúng (được biểu thị bằng đường kết nối màu đỏ trong hình ảnh Trình chỉnh sửa biểu đồ nút trên
trang trước) có biểu thức "bằng". Chúng ta sẽ tìm hiểu thêm về Quan hệ và
biểu thức ở Chương 8.
It’s fun to play with the Section curves of the Lathe and the PlanSweep objects, but what
about poor old Extrude – will it always be consigned to sheer walls? As it turns out, Extrude
has some extra handles up its sleeve for tapering and beveling.
Thật thú vị khi chơi với các đường cong Phần của các đối tượng Lathe và PlanSweep, nhưng điều gì
về Extrude cũ tội nghiệp – liệu nó có luôn được gắn vào những bức tường tuyệt đối không? Hóa ra, Extrude
có thêm một số tay cầm ở phía trên ống tay áo để làm thon và vát mép.
Let’s take a quick look at these Extrude handles.
Chúng ta hãy xem nhanh các tay cầm Extrude này.
Roaring Tide Productions
Archimatix User Guide
!21
Sản phẩm thủy triều gầm
Hướng dẫn sử dụng Archimatix
!21
Page 24

4. Just Meshing Around
4. Chỉ cần đan lưới xung quanh
Step 4.5:
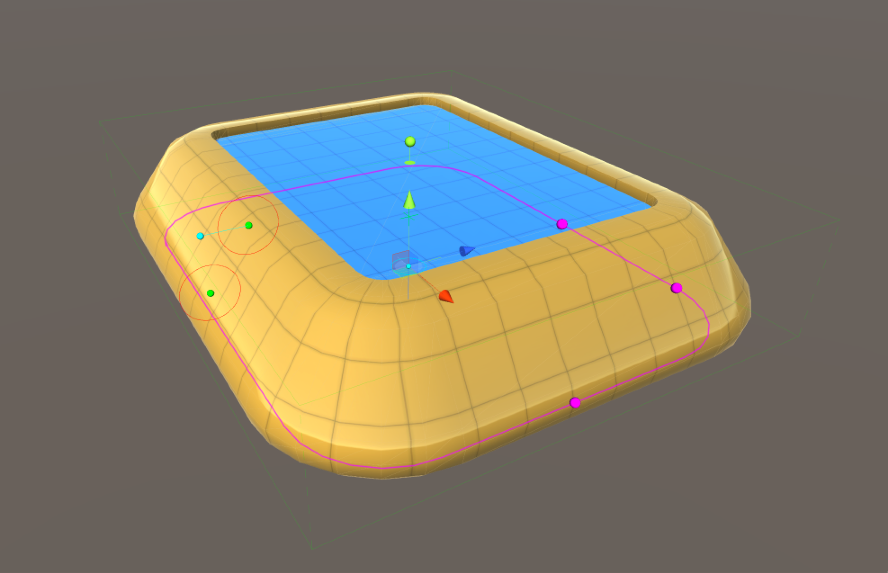
Create a new scene and instantiate the BevelBox from the Library.
Bước 4.5:
Tạo cảnh mới và khởi tạo BevelBox từ Thư viện.
X-dir: Taper
X-dir (alt)
BevelRadiusTop
Y-dir: Extrude Height
X-dir: Côn
X-dir (alt)
Góc xiênBán kính trên cùng
Y-dir: Chiều cao đùn
Extrude Height
Chiều cao đùn

Plan Shape
point handles
Hình dạng kế hoạch
điểm xử lý

Bevel Segments
Phân đoạn vát
X-dir: Offset
Y-dir: BevelRadiusBottom
X-dir: Offset
Y-dir: BevelRadiusBottom
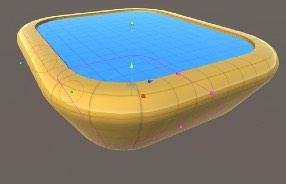
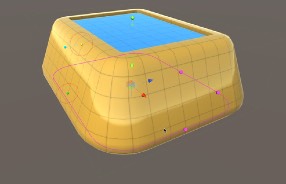
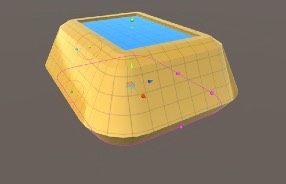
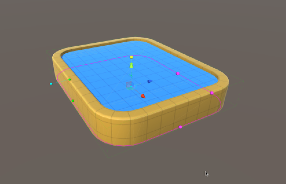
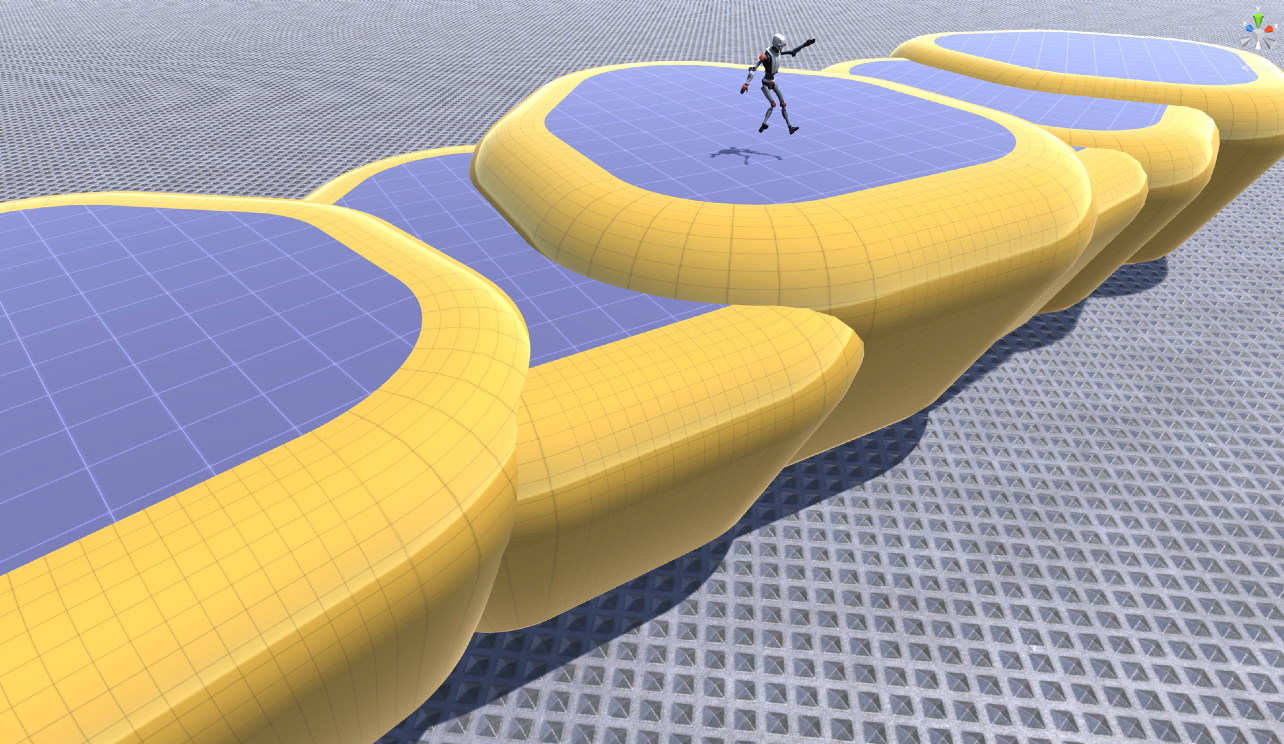
Although it may look like a more complex object, the BevelBox Library item is really just an
Extrude Mesher with the Bevel Top radius and Taper adjusted. The depression in the Top Cap
is set from the Lip Top parameter in conjunction with the Lip Edge parameter found in the
Inspector.
Mặc dù nó có thể trông giống một đối tượng phức tạp hơn nhưng mục Thư viện BevelBox thực sự chỉ là một
Extrude Mesher với bán kính Bevel Top và Taper được điều chỉnh. Sự trầm cảm ở Top Cap
được thiết lập từ tham số Lip Top kết hợp với tham số Lip Edge được tìm thấy trong
Thanh tra.
Step 4.6:
Vary the handles to make variations like these:
Bước 4.6:
Thay đổi các tay cầm để tạo các biến thể như sau:
Robot Kyle is a little disappointed that these models are not as bouncy as they look!
Robot Kyle hơi thất vọng vì những mô hình này không bồng bềnh như vẻ ngoài của chúng!
Roaring Tide Productions
Archimatix User Guide
!22
Sản phẩm thủy triều gầm
Hướng dẫn sử dụng Archimatix
!22
Page 25

4. Just Meshing Around
4. Chỉ cần đan lưới xung quanh
Taking Lathe for a Spin!
Lấy máy tiện để quay!
Circular forms are common in nature and in
architecture. The Lathe Mesher is useful for creating
round objects, such as barrels, tables and towers. It
rotates a single Shape around a center axis at some
radius.
Các hình thức tròn là phổ biến trong tự nhiên và trong
kiến trúc. Lathe Mesher rất hữu ích cho việc tạo
các vật thể tròn, chẳng hạn như thùng, bàn và tháp. Nó
xoay một Hình dạng đơn quanh một trục trung tâm ở một điểm nào đó
bán kính.

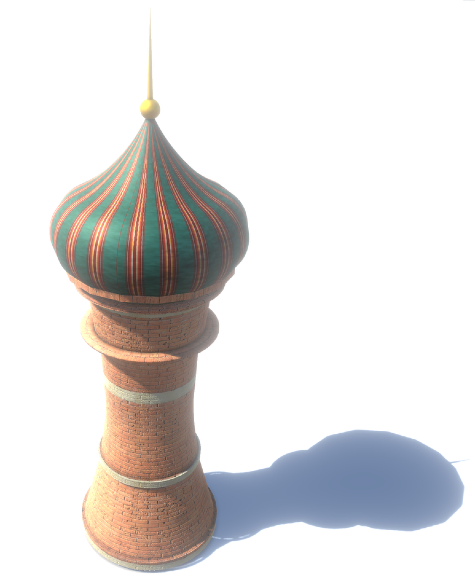
A great example of a lathed object is a tower with a
dome.
Một ví dụ tuyệt vời về một vật được tiện là một tòa tháp có
mái vòm.

Step 4.7: Open the scene TowerWithOnionDome
Bước 4.7: Mở khung cảnh TowerWithOnionDome
from the folder Archimatix/Scenes.
từ thư mục Archimatix/Scenes.
Step 4.8: Click on the dome of the tower and drag
Bước 4.8: Click vào mái vòm của tháp và kéo
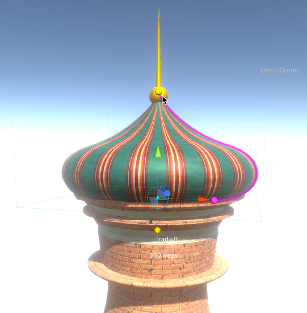

the top handle of the section curve to
flatten the dome a bit.
tay cầm trên cùng của phần đường cong tới
làm phẳng mái vòm một chút.
This curve is a parametric Shape with a certain logic,
namely, it offers only two parameter handles (at either
end of the Shape) and makes assumptions about how
the curve between the two points should be generated.
Although this parametric curve is not as general or
flexible as a FreeCurve, it is likely to always produce
results that look like an “onion dome,” such as those
found in Eastern Europe or the Near East.
Đường cong này là một Hình dạng tham số có logic nhất định,
cụ thể là nó chỉ cung cấp hai bộ điều khiển tham số (tại một trong hai
cuối của Hình dạng) và đưa ra các giả định về cách
đường cong giữa hai điểm sẽ được tạo ra.
Mặc dù đường cong tham số này không chung chung hoặc
linh hoạt như một FreeCurve, nó có khả năng luôn tạo ra
kết quả trông giống như “vòm củ hành”, chẳng hạn như những kết quả
được tìm thấy ở Đông Âu hoặc Cận Đông.

Step 4.9: Click on the middle of the brick shaft of
Bước 4.9: Click vào giữa trục gạch của
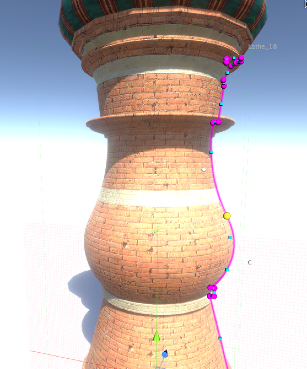
the tower and drag the center handle.
tháp và kéo tay cầm ở giữa.

The center handle is a Bezier handle, so you can drag
its center point or the points at the end of the tangent
handles that extend from the central point.
Tay cầm ở giữa là tay cầm Bezier nên bạn có thể kéo
điểm trung tâm của nó hoặc các điểm ở cuối tiếp tuyến
tay cầm kéo dài từ điểm trung tâm.
This Shape is a FreeCurve that allows you to manipulate
any vertex handle in a free-form way. While it is the
most general type of Shape that Archimatix offers,
there are no assumptions about the logic of the final
outcome, meaning that the design is completely up to
you. Over time, you will develop a sense of when to use
a parametric Shape or a FreeCurve Shape.
Hình dạng này là FreeCurve cho phép bạn thao tác
bất kỳ đỉnh xử lý nào theo cách tự do. Trong khi nó là
loại Hình dạng chung nhất mà Archimatix cung cấp,
không có giả định nào về tính logic của kết quả cuối cùng
kết quả, có nghĩa là thiết kế hoàn toàn phụ thuộc vào
bạn. Theo thời gian, bạn sẽ phát triển ý thức về thời điểm sử dụng
Hình dạng tham số hoặc Hình dạng FreeCurve.
The Lathe is a common and powerful tool for generating standard Unity meshes from Shapes.
A more general and powerful Mesher is the PlanSweep Mesher.
Máy tiện là một công cụ phổ biến và mạnh mẽ để tạo các lưới Unity tiêu chuẩn từ Hình dạng.
Một Mesher tổng quát và mạnh mẽ hơn là PlanSweep Mesher.
Roaring Tide Productions
Archimatix User Guide
!23
Sản phẩm thủy triều gầm
Hướng dẫn sử dụng Archimatix
!23
Page 26

4. Just Meshing Around
4. Chỉ cần đan lưới xung quanh
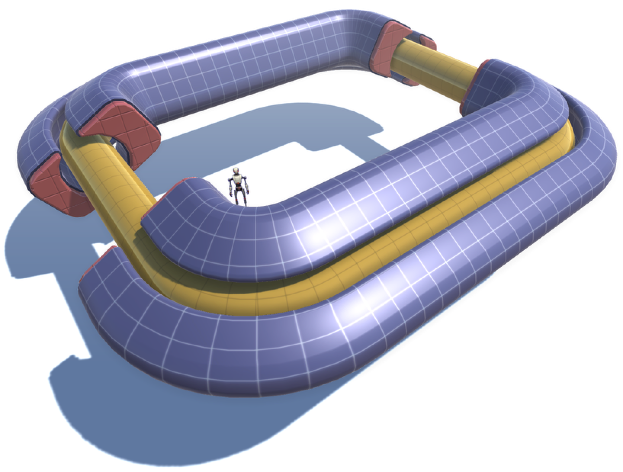
Meshes with Sweeping Changes
Lưới có thay đổi quét
The PlanSweep Mesher is perhaps one of
Archimatix’s greatest features. It sweeps a
Section Shape around a Plan Shape.
Combined with ShapeMerger, the results
can be particularly exciting!
PlanSweep Mesher có lẽ là một trong những
Các tính năng lớn nhất của Archimatix. Nó quét một
Phần Hình dạng xung quanh Hình dạng Kế hoạch.
Kết hợp với ShapeMerger, kết quả
có thể đặc biệt thú vị!
Step 4.10: Open the scene
Bước 4.10: Mở cảnh
PlanSweepTube from the folder
Archimatix/Scenes.
PlanSweepTube từ thư mục
Archimatix/Cảnh.

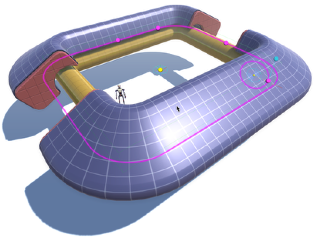
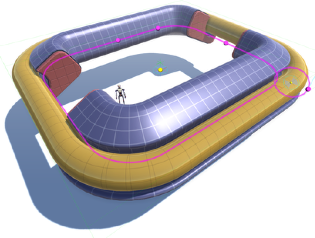
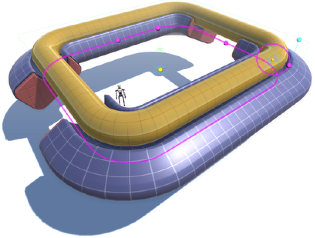
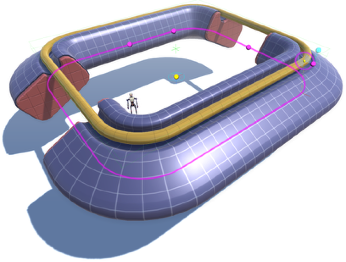
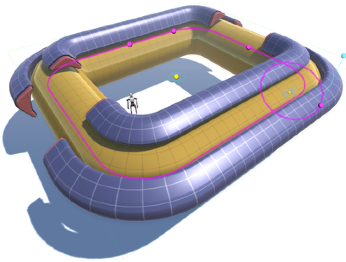
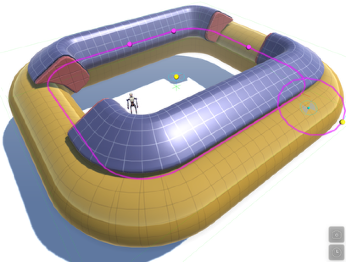
Step 4.11: Click on the yellow tube to reveal
Bước 4.11: Click vào ống màu vàng để lộ ra
the tool for the tubes Section Shape.
công cụ dành cho phần Hình dạng ống.
Step 4.12: Use the center point handle of the disc to
Bước 4.12: Dùng điểm trung tâm của đĩa để
drag the yellow tube in and out of the
purple tube.
kéo ống màu vàng vào và ra khỏi
ống màu tím.
Roaring Tide Productions
Archimatix User Guide
!24
Sản phẩm thủy triều gầm
Hướng dẫn sử dụng Archimatix
!24
Page 27
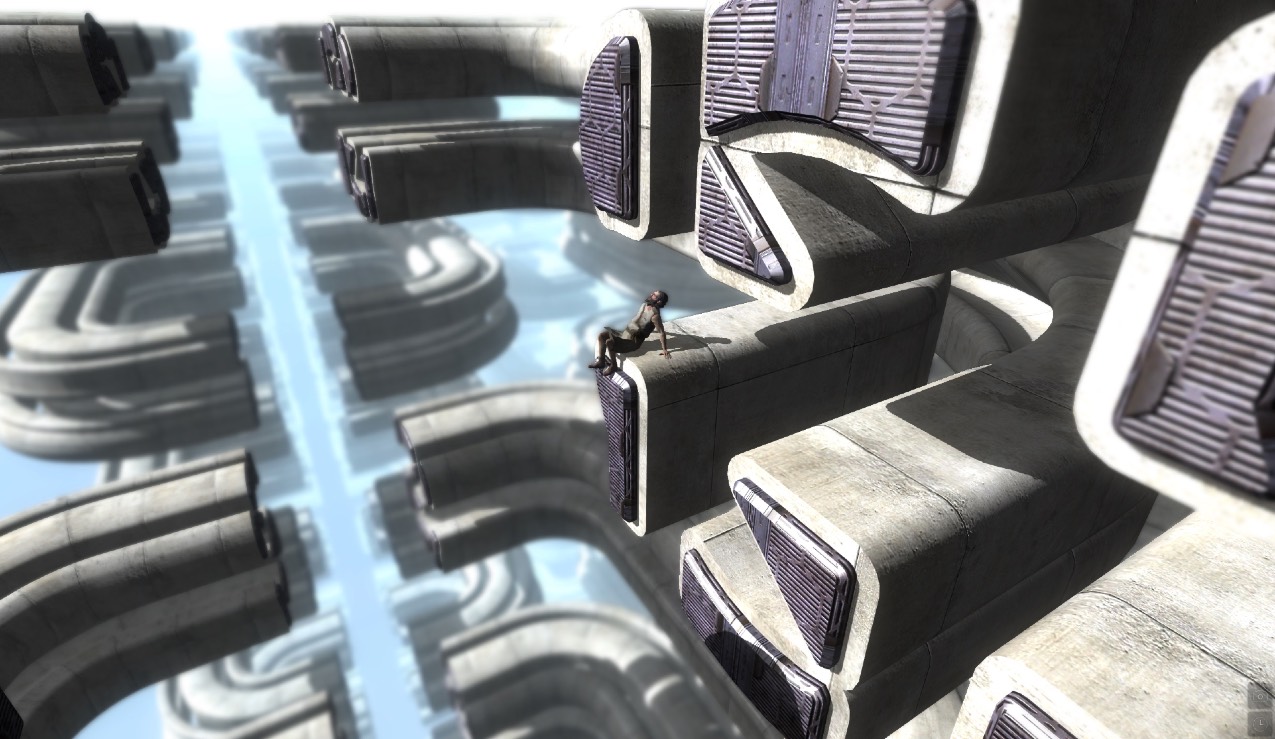


Ah, per chance to dream… of
GridRepeaters!
À, có cơ hội để mơ… về
GridRepeater!
5. Repeating Yourself
5. Lặp lại chính mình
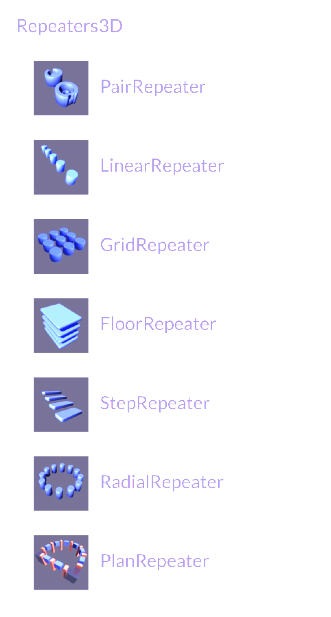
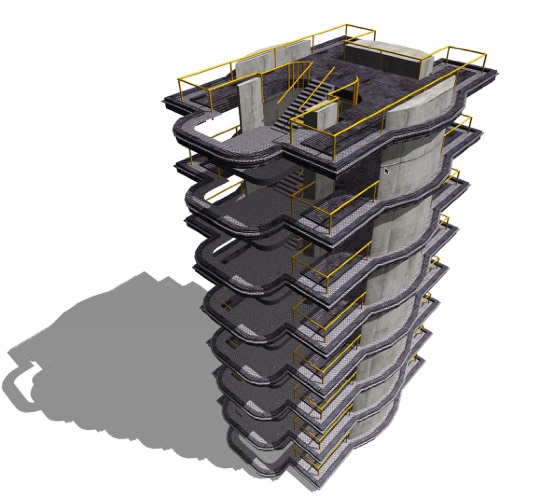
Repeaters in Archimatix allow you to distribute instances of
any AX-generated mesh or Unity Prefab in various
patterns, including grids, radial arrays and symmetrical
pairs. We have already seen an example of 2D Repeaters in
the sideboard of the RicketyStaircase. Now, let’s explore
repetition in 3D.
Bộ lặp trong Archimatix cho phép bạn phân phối các phiên bản của
bất kỳ lưới hoặc Unity Prefab nào được tạo bởi AX ở nhiều dạng khác nhau
các mẫu, bao gồm lưới, mảng xuyên tâm và đối xứng
cặp. Chúng ta đã thấy một ví dụ về Bộ lặp 2D trong
tủ bên của Cầu thang Rickety. Bây giờ hãy cùng khám phá
sự lặp lại trong 3D.
Roaring Tide Productions
Archimatix User Guide
!25
Sản phẩm thủy triều gầm
Hướng dẫn sử dụng Archimatix
!25
Page 28

5. Repeating Yourself
5. Lặp lại chính mình
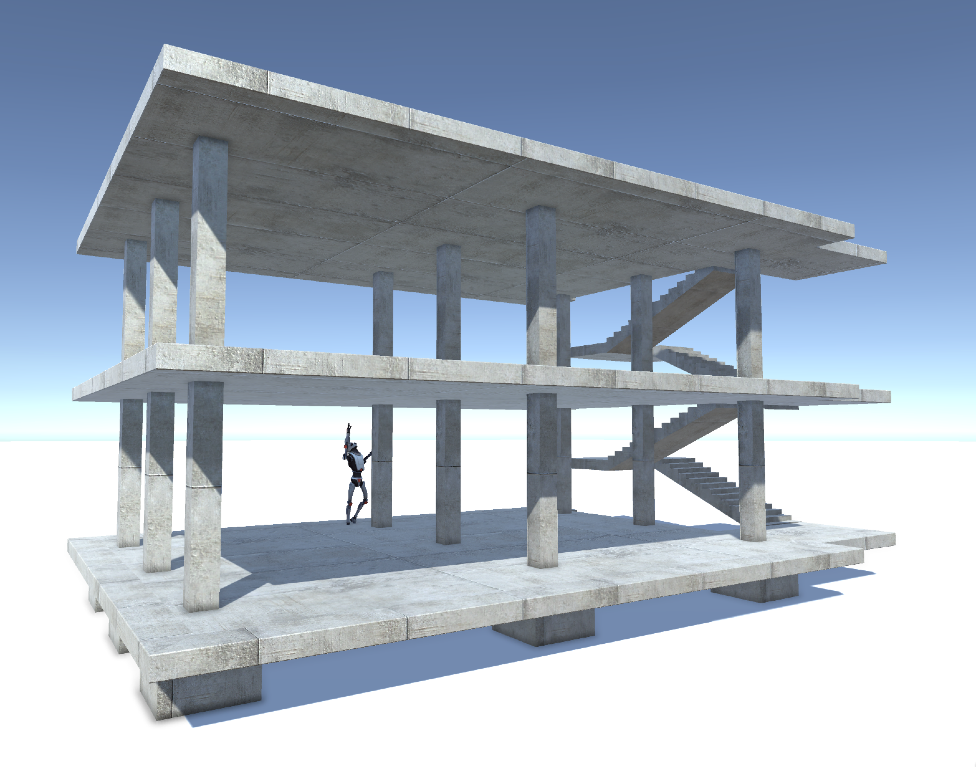

The early 20th-century architect Le Corbusier explored the possibilities of new building
materials such as concrete. Calling a house a “machine for living,” he proposed the Maison
Dom-ino, a structure that represented the essence of domestic space: floors, columns and
stairs. While the Domino House looks a bit drafty, this essential structure provides a great
example of repetition using a GridRepeater
and a FloorRepeater.
Kiến trúc sư đầu thế kỷ 20 Le Corbusier đã khám phá những khả năng của tòa nhà mới
vật liệu như bê tông. Gọi ngôi nhà là “cỗ máy sinh hoạt”, ông đề xuất Maison
Dom-ino, một cấu trúc thể hiện bản chất của không gian trong nhà: sàn, cột và
cầu thang. Mặc dù Ngôi nhà Domino trông có vẻ hơi tồi tàn nhưng cấu trúc thiết yếu này mang đến một không gian tuyệt vời.
ví dụ về việc lặp lại bằng GridRepeater
và một FloorRepeater.
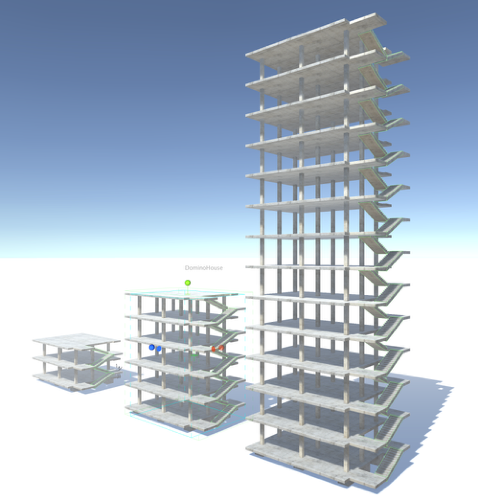
Step 5.1:
Create a new scene and
instantiate the DominoHouse
from the Library.
Bước 5.1:
Tạo cảnh mới và
khởi tạo DominoHouse
từ Thư viện.

Step 5.2:
Click and drag on the green
handle at the top of the structure.
Bước 5.2:
Nhấp và kéo vào màu xanh lá cây
xử lý ở phía trên cùng của cấu trúc.
As you drag the handle upwards, the
FloorRepeater SizeY parameter increases and, to
maintain a preferred story height, the
FloorRepeater adds more floors. The
actualStory heights vary slightly as the number
of floors increases. Notice how the stair instances
grow or shrink to match the story height.The Extrude
Height of the GridRepeated column is increased to match the
overall SizeY.
Khi bạn kéo tay cầm lên trên,
Tham số FloorRepeater SizeY tăng và, để
duy trì chiều cao câu chuyện ưa thích,
FloorRepeater thêm nhiều tầng hơn. các
Chiều cao thực tế của Story thay đổi một chút tùy theo số lượng
số tầng tăng lên. Chú ý cách các trường hợp cầu thang
phát triển hoặc thu nhỏ để phù hợp với chiều cao của câu chuyện.The Extrude
Chiều cao của cột GridRepeated được tăng lên để phù hợp với
Kích thước tổng thể Y.
Roaring Tide Productions
Archimatix User Guide
!26
Sản phẩm thủy triều gầm
Hướng dẫn sử dụng Archimatix
!26
Page 29

5. Repeating Yourself
5. Lặp lại chính mình
Repetition with a Plan
Lặp lại với một kế hoạch
A powerful form of
repetition in Archimatix
uses a Plan Shape to
distribute objects along its
path. For example, a window
unit can be placed around the Shape
of a building.
Một hình thức mạnh mẽ của
sự lặp lại trong Archimatix
sử dụng Hình dạng Kế hoạch để
phân phối các đối tượng dọc theo nó
con đường. Ví dụ, một cửa sổ
đơn vị có thể được đặt xung quanh Hình dạng
của một tòa nhà.
Step 5.3:
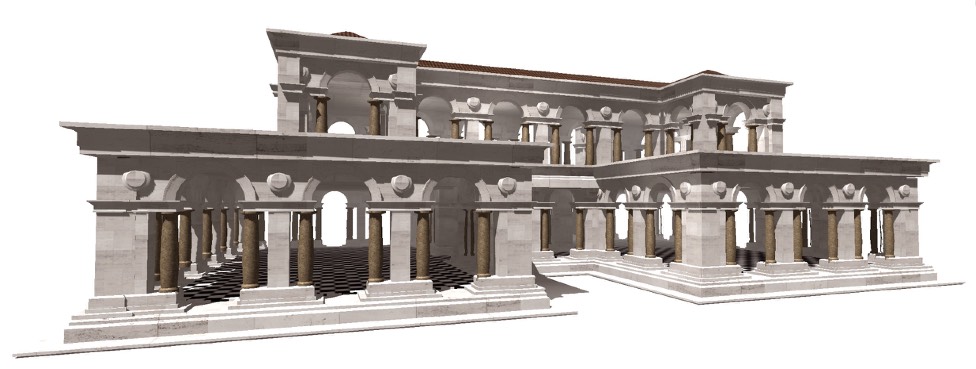
Open the scene VillaRomano from
the Scenes folder located in the Archimatix
folder.
Bước 5.3:
Mở cảnh VillaRomano từ
thư mục Cảnh nằm trong Archimatix
thư mục.

Step 5.4:
Click on the foundation plinth of the building to display
the handles of the Shapes that are merged to make the Plan of
the building.
Bước 5.4:
Click vào phần chân móng của tòa nhà để hiển thị
tay cầm của các Hình dạng được hợp nhất để tạo nên Sơ đồ
tòa nhà.
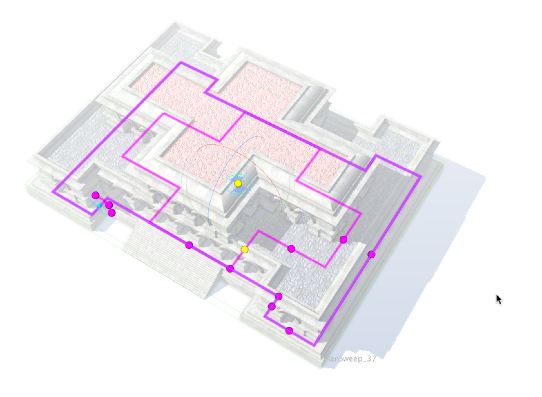
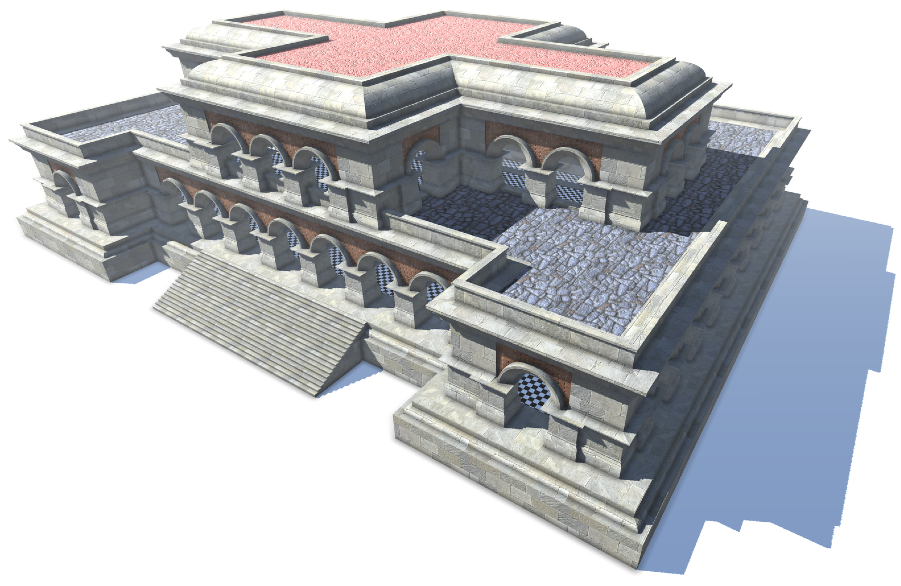
The Plan of this villa is a composite of two Shapes, an I-Shape and a
Cross Shape. The Cross Shape is used as the plan for the second
story of the building, and it is also merged with the I-Shape to
form the first story Plan.
Sơ đồ của biệt thự này là sự kết hợp của hai Hình dạng, Hình chữ I và Hình dạng
Hình chữ thập. Hình Chữ Thập được sử dụng làm kế hoạch cho lần thứ hai
câu chuyện của tòa nhà và nó cũng được hợp nhất với I-Shape để
hình thành kế hoạch câu chuyện đầu tiên.

Step 5.5:
Adjust the handle at the side of the Cross Shape
and drag it toward the center until only one arch
is on the front face of the upper story.
Bước 5.5:
Điều chỉnh tay cầm ở cạnh hình Chữ Thập
và kéo nó về phía giữa cho đến khi chỉ còn một vòm
nằm ở mặt trước của tầng trên.

Step 5.6:
Adjust the handle at the end of the Cross Shape and drag it
outside of the perimeter of the I-Shape.
Bước 5.6:
Điều chỉnh tay cầm ở cuối Hình chữ thập và kéo nó
bên ngoài chu vi của Hình chữ I.
When you drag the end handle of the Cross Shape, you should notice that the first
story Plan is now the combination of the two Shapes.
Khi bạn kéo chốt cuối của Hình chữ thập, bạn sẽ nhận thấy rằng chốt đầu tiên
Kế hoạch câu chuyện bây giờ là sự kết hợp của hai Hình dạng.
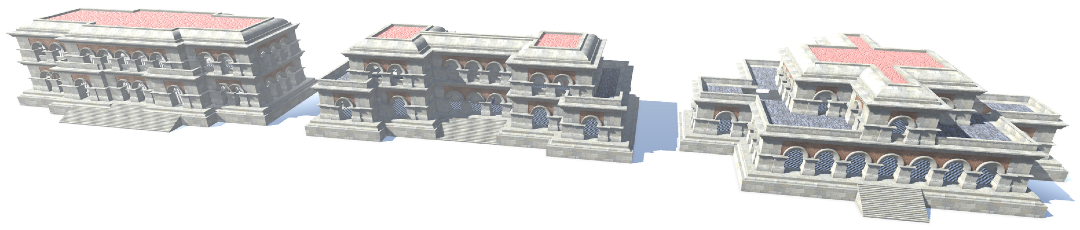
Step 5.7:
Continue to adjust various handles to make alternative forms such as the ones
depicted below.
Bước 5.7:
Tiếp tục điều chỉnh các tay cầm khác nhau để tạo các hình thức thay thế, chẳng hạn như các hình
được mô tả dưới đây.
Roaring Tide Productions
Archimatix User Guide
!27
Sản phẩm thủy triều gầm
Hướng dẫn sử dụng Archimatix
!27
Page 30

5. Repeating Yourself
5. Lặp lại chính mình
Flat Out Repetition
Sự lặp lại phẳng phiu
Most of the 3D Repeaters have 2D
counterparts. These 2D Repeaters
are particularly powerful for
elaborate Shape merging. A good
example of this using a PlanRepeater2D
node included in the Scene folder is
BastionMerge.
Hầu hết các Bộ lặp 3D đều có 2D
đối tác. Những bộ lặp 2D này
đặc biệt mạnh mẽ đối với
Sự hợp nhất hình dạng phức tạp. tốt
ví dụ về điều này bằng cách sử dụng PlanRepeater2D
nút có trong thư mục Cảnh là
BastionMerge.
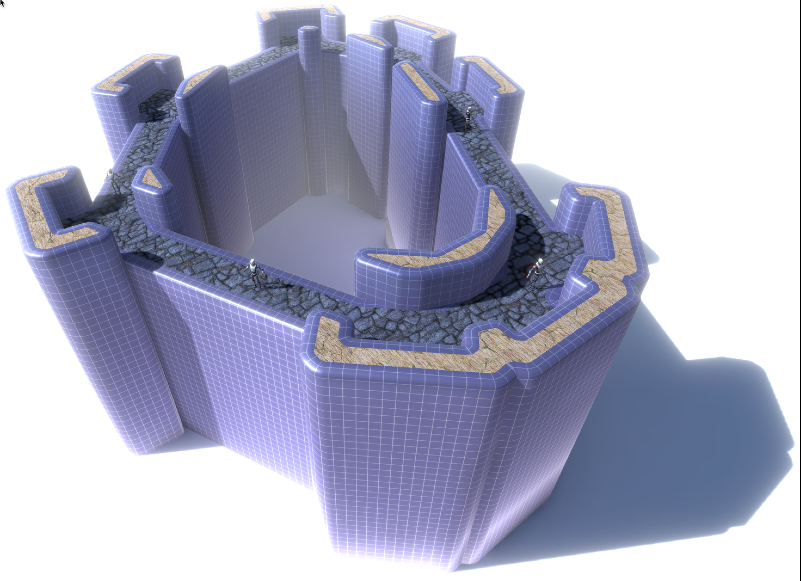
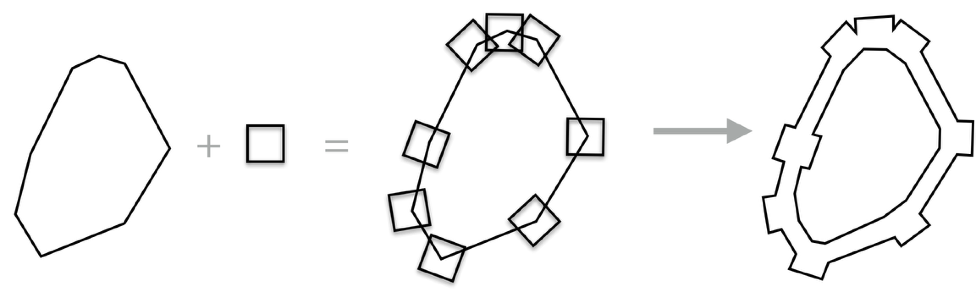
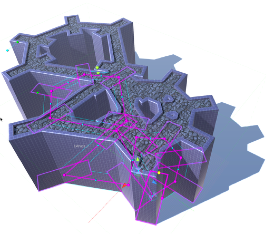
BastionMerge uses a Plan Shape that
represents a sort of castle wall outline and
another plan for a bastion that gets repeated at
each node of the wall Shape. In the example at right, the
fortress plan is a FreeformCurve, and the bastion Plan is a square.
The PlanRepeater2D generates a new Shape that is the product of
each Rectangle Shape copied and transformed to each vertex of the
fortress Plan. Then the fortress Plan itself is “thickened,” producing a composite Shape seen
on the right in the diagram below. This composite plan is then extruded.
BastionMerge sử dụng Hình dạng kế hoạch
đại diện cho một loại phác thảo bức tường lâu đài và
một kế hoạch khác cho một pháo đài được lặp lại ở
mỗi nút của hình dạng bức tường. Trong ví dụ bên phải,
sơ đồ pháo đài là FreeformCurve và sơ đồ pháo đài là hình vuông.
PlanRepeater2D tạo ra một Hình dạng mới là sản phẩm của
mỗi Hình chữ nhật được sao chép và chuyển đổi sang từng đỉnh của
kế hoạch pháo đài Sau đó bản thân Sơ đồ pháo đài được “dày lên”, tạo ra một Hình dạng tổng hợp nhìn thấy được
ở bên phải trong sơ đồ dưới đây. Kế hoạch tổng hợp này sau đó được ép đùn.

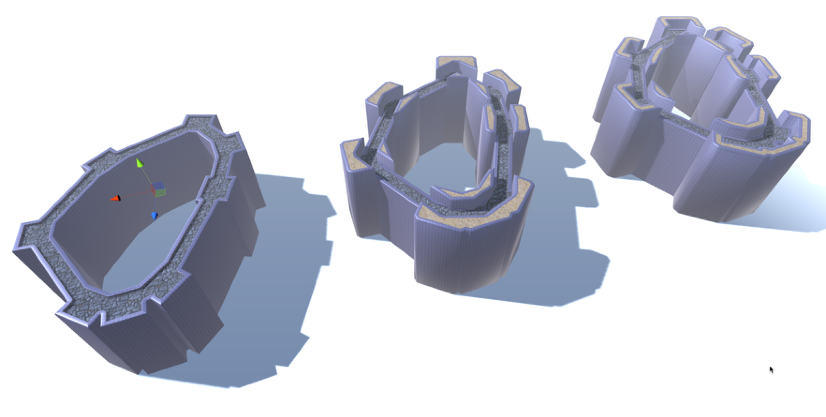
Step 5.8:
Open the scene BastionMerge from the Scenes folder located in the Archimatix
folder. In the scene, you will find three versions of the BastionMerge fortress.
Bước 5.8:
Mở cảnh BastionMerge từ thư mục Cảnh nằm trong Archimatix
thư mục. Trong cảnh này, bạn sẽ tìm thấy ba phiên bản của pháo đài BastionMerge.
Roaring Tide Productions
Archimatix User Guide
!28
Sản phẩm thủy triều gầm
Hướng dẫn sử dụng Archimatix
!28
Page 31

5. Repeating Yourself
5. Lặp lại chính mình
Step 5.9:
Click on the stone pathway atop the main wall of the first (simplest) fortress.
When the Shape handles appear, click and drag a node of the wall Shape to make
variations similar to the ones depicted below. Clicking on purple point handles
will move a vertex, while clicking and dragging a cyan handle will create a new
vertex.
Bước 5.9:
Nhấp vào con đường lát đá trên bức tường chính của pháo đài đầu tiên (đơn giản nhất).
Khi các tay cầm Hình dạng xuất hiện, hãy nhấp và kéo một nút của Hình dạng trên tường để tạo
các biến thể tương tự như những biến thể được mô tả dưới đây. Nhấp vào điểm điều khiển màu tím
sẽ di chuyển một đỉnh, trong khi nhấp và kéo tay cầm màu lục lam sẽ tạo một đỉnh mới
đỉnh.



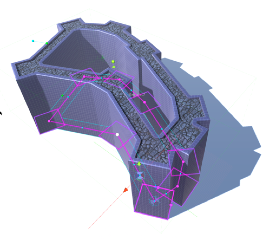
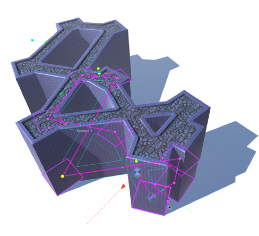

Moving vertices.
Crossing vertices.
Adding vertices and
adjusting the
Rectangles’ handles.
Các đỉnh di chuyển.
Vượt qua các đỉnh.
Cộng các đỉnh và
điều chỉnh
Tay cầm của hình chữ nhật.
Notice that, as you modify the Plan Shapes of the fortress
wall and the bastion Rectangle, the outline of the
composite Shape is expressed in the parapet wall,
which is parallel to the outline and forms a
continuous path through the bastions. If this
fortress had used a 3D PlanRepeater, each bastion
would have its own parapet. While the latter may
be preferred in some cases, the power of 2D
Repeaters is in the generation of complex
forms.
Lưu ý rằng, khi bạn sửa đổi Hình dạng sơ đồ của pháo đài
bức tường và pháo đài Hình chữ nhật, đường viền của
Hình dạng tổng hợp được thể hiện ở bức tường lan can,
song song với đường viền và tạo thành một
con đường liên tục xuyên qua các pháo đài. Nếu điều này
pháo đài đã sử dụng 3D PlanRepeater, mỗi pháo đài
sẽ có lan can riêng. Trong khi cái sau có thể
được ưu tiên trong một số trường hợp, sức mạnh của 2D
Bộ lặp đang ở thế hệ phức tạp
các hình thức.
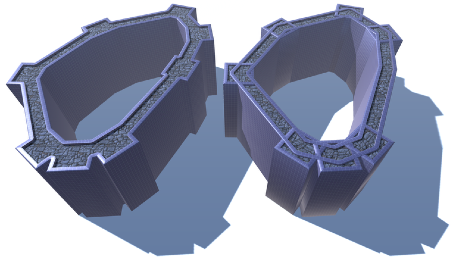
Comparison
between fortresses using a PlanRepeater2D (left)
versus a 3D PlanRepeater (right).
So sánh
giữa các pháo đài bằng PlanRepeater2D (trái)
so với 3D PlanRepeater (phải).
When the “thickened” wall Shape is subtracted
from the repeated bastions, a more distinct
pathway is made with openings in solid
bastions that are aligned with the wall. In the
other two fortress variations in the scene,
more Shape merging has allowed for separate
bastion walls that have openings that respond
to the fortress wall Shape.
Khi hình dạng bức tường “dày” bị trừ đi
từ các pháo đài lặp đi lặp lại, một sự khác biệt hơn
con đường được thực hiện với các lỗ mở trong rắn
các pháo đài thẳng hàng với bức tường. trong
hai biến thể pháo đài khác trong bối cảnh,
thêm Việc hợp nhất hình dạng đã cho phép tách biệt
bức tường pháo đài có lỗ mở đáp ứng
đến hình dạng bức tường pháo đài.
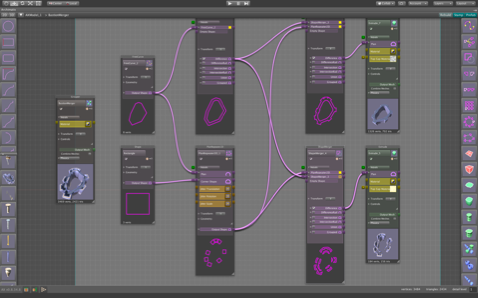

In the next chapter, you will be introduced to
the Node Graph Editor. Once you are familiar
with editing the logic of forms using nodes, it
will be useful to return to the BastionMerge
scene and see how it was organized.
Trong chương tiếp theo, bạn sẽ được giới thiệu
Trình chỉnh sửa biểu đồ nút. Một khi bạn đã quen
với việc chỉnh sửa logic của các biểu mẫu bằng cách sử dụng các nút, nó
sẽ hữu ích khi quay lại BastionMerge
cảnh và xem nó được tổ chức như thế nào.
Roaring Tide Productions
Archimatix User Guide
!29
Sản phẩm thủy triều gầm
Hướng dẫn sử dụng Archimatix
!29
Page 32



6. It’s All What You Node
As we mentioned earlier, the parametric
objects that you have been trying were all
created with the Node Graph Editor. It’s
high time we pull back the curtain and
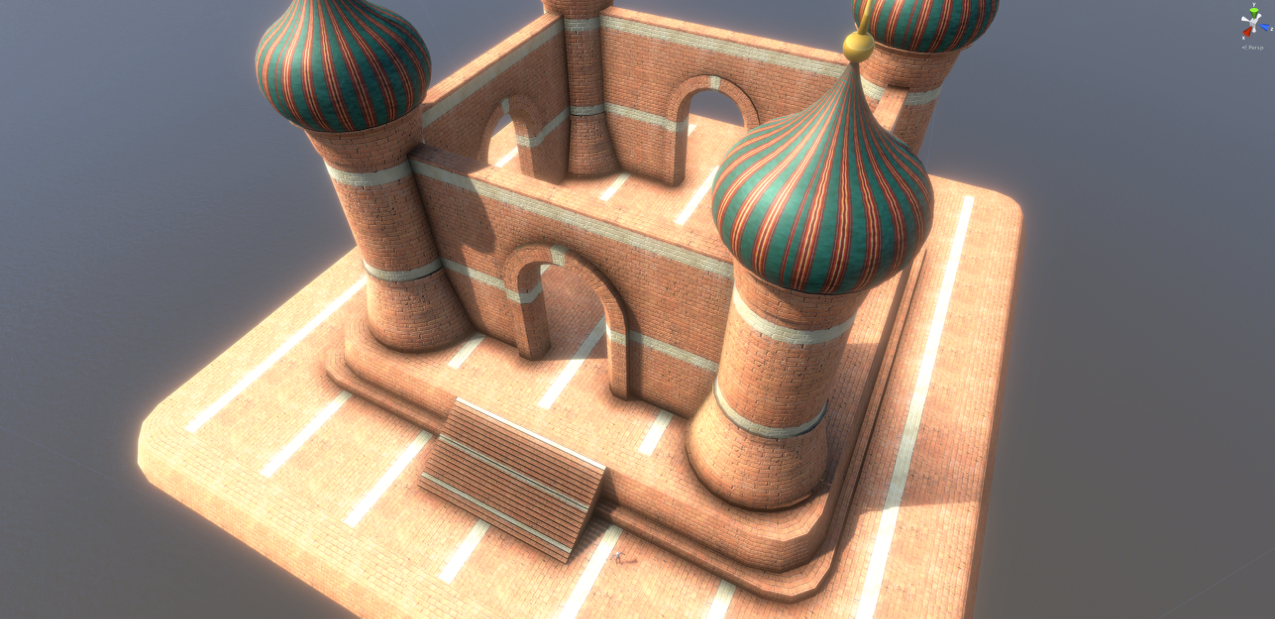
see how a castle, such as the one depicted
above, can be modeled with relatively
few nodes.
6. Đó là tất cả những gì bạn nút
Như chúng tôi đã đề cập trước đó, tham số
tất cả các đối tượng mà bạn đã thử đều
được tạo bằng Trình chỉnh sửa biểu đồ nút. Đó là
đã đến lúc chúng ta kéo tấm màn lại và
xem cách một lâu đài, chẳng hạn như lâu đài được mô tả
ở trên, có thể được mô hình hóa tương đối
vài nút.






To get started, let’s open up the Node
Graph Editor window.
Để bắt đầu, hãy mở Node
Cửa sổ soạn thảo đồ thị.
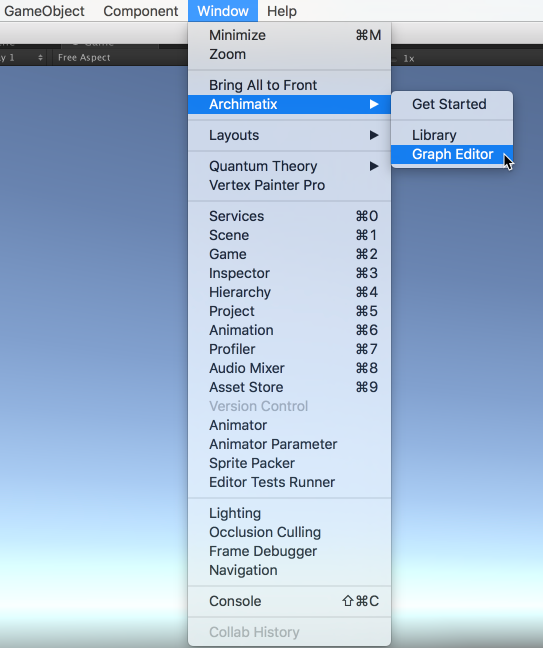
Step 6.1:
Create a new scene and open the Node Graph
Editor window with the Unity menu by choosing Window > Archimatix >
Graph Editor.
Bước 6.1:
Tạo một cảnh mới và mở Biểu đồ nút
Cửa sổ soạn thảo với menu Unity bằng cách chọn Window > Archimatix >
Trình chỉnh sửa đồ thị.

Roaring Tide Productions
Archimatix User Guide
!30
Sản phẩm thủy triều gầm
Hướng dẫn sử dụng Archimatix
!30
Page 33

6. The Node Graph Editor
6. Trình chỉnh sửa biểu đồ nút
Anatomy of the Node Graph Editor Window
Cấu trúc của cửa sổ soạn thảo biểu đồ nút
Before jumping in with node creation, let’s take a look at the main areas of the Node Graph
Editor window.
Trước khi bắt đầu tạo nút, chúng ta hãy xem các khu vực chính của Biểu đồ nút
Cửa sổ soạn thảo.
Model Output
Model Menu
Đầu ra mô hình
Thực đơn mẫu
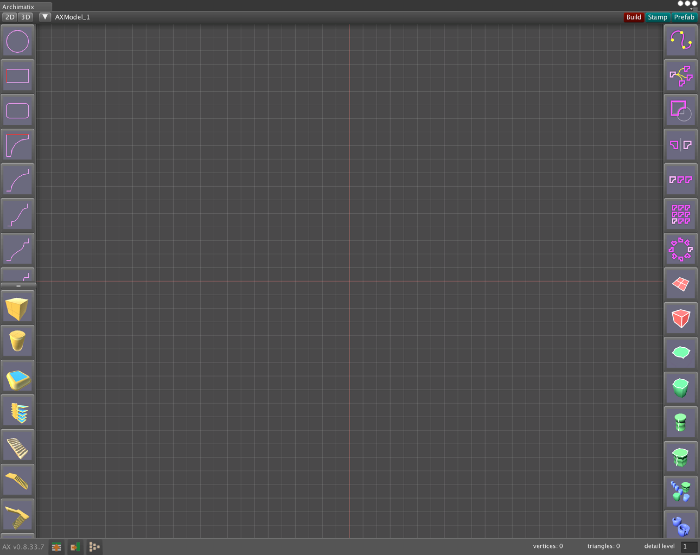
2D Library
Nodes
Thư viện 2D
Nút

Function
Nodes
chức năng
Nút
3D Library
Nodes
Thư viện 3D
Nút
Detail Level
for LOD
Mức độ chi tiết
cho LOD
Model Statistics
Graph Tools
Thống kê mô hình
Công cụ đồ thị
Canvas
Vải bạt
The Node Graph Editor window is organized as a canvas area surrounded by tool menus. To
the left and right of the canvas are menus which are used to add nodes to the canvas. The
left sidebar features items from the Archimatix Library. Theses items are divided into 2D
and 3D items. The right sidebar displays functional nodes, nodes that take some input,
process that input and then make the results available to other nodes through an output
socket.
Cửa sổ Node Graph Editor được tổ chức dưới dạng một vùng canvas được bao quanh bởi các menu công cụ. Đến
bên trái và bên phải của khung vẽ là các menu được sử dụng để thêm các nút vào khung vẽ. các
thanh bên trái có các mục từ Thư viện Archimatix. Các mục này được chia thành 2D
và các vật phẩm 3D. Thanh bên phải hiển thị các nút chức năng, các nút nhận một số đầu vào,
xử lý đầu vào đó và sau đó cung cấp kết quả cho các nút khác thông qua đầu ra
ổ cắm.
Along the top you will find model controls. The Group Address is a “bread crumb trail” that
expands as you open subnode groups. The three buttons on the upper right give you options
for model output. The “Build” of the model usually happens automatically when you
complete a parameter change. The “Stamp” button creates a “frozen” version of the model
that no longer needs Archimatix in the project. A stamped model can then be modified in
other modeling packages such as ProBuilder or Megafiers. Finally, the Prefab button saves the
Ở phía trên, bạn sẽ tìm thấy các điều khiển mô hình. Địa chỉ Nhóm là một “dấu vết bánh mì”
mở rộng khi bạn mở các nhóm nút con. Ba nút ở phía trên bên phải cung cấp cho bạn các tùy chọn
cho đầu ra của mô hình. Quá trình “Xây dựng” mô hình thường diễn ra tự động khi bạn
hoàn thành việc thay đổi tham số. Nút “Stamp” tạo phiên bản “đóng băng” của mô hình
không còn cần Archimatix trong dự án nữa. Sau đó, một mô hình được đóng dấu có thể được sửa đổi trong
các gói mô hình hóa khác như ProBuilder hoặc Megafiers. Cuối cùng, nút Prefab sẽ lưu
Roaring Tide Productions
Archimatix User Guide
!31
Sản phẩm thủy triều gầm
Hướng dẫn sử dụng Archimatix
!31
Page 34

6. The Node Graph Editor
6. Trình chỉnh sửa biểu đồ nút
model’s meshes to Unity’s AssetDatabase and creates a standard Unity Prefab. This Prefab is
also “frozen” and no longer parametric.
mô hình liên kết với AssetDatabase của Unity và tạo Unity Prefab tiêu chuẩn. Nhà lắp ghép này là
cũng “đóng băng” và không còn tham số.
The bottom bar under the canvas features tools for cleaning up the graph in the canvas and
provides quantitative feedback about your model, such as vertices and triangle counts.
Thanh dưới cùng bên dưới khung vẽ có các công cụ để làm sạch biểu đồ trong khung vẽ và
cung cấp phản hồi định lượng về mô hình của bạn, chẳng hạn như số đỉnh và số lượng tam giác.
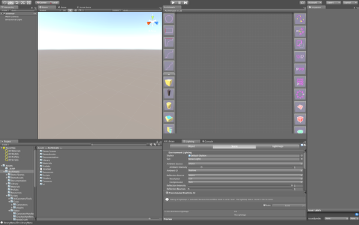
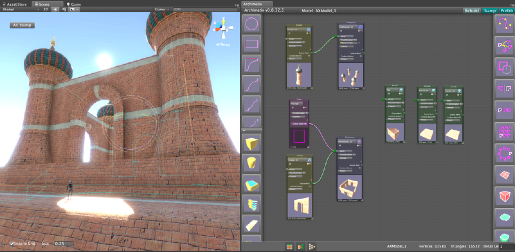
You will be using the Node Graph Editor window a lot
as you create smart models with Archimatix. Take a
moment to find a place to dock it. It works well to have
the Scene View window and the Node Graph Editor
window the same size and side by side. The image on
the right provides an example layout suited to modeling
with Archimatix.
Bạn sẽ sử dụng cửa sổ Node Graph Editor rất nhiều
khi bạn tạo các mô hình thông minh bằng Archimatix. Lấy một
khoảnh khắc để tìm một nơi để neo nó. Nó hoạt động tốt để có
cửa sổ Chế độ xem cảnh và Trình chỉnh sửa biểu đồ nút
cửa sổ có cùng kích thước và cạnh nhau. Hình ảnh trên
bên phải cung cấp bố cục ví dụ phù hợp với mô hình hóa
với Archimatix.


Now that you have an overview of the Node Graph
Editor, it’s time to jump in!
Bây giờ bạn đã có cái nhìn tổng quan về Biểu đồ nút
Biên tập viên, đã đến lúc bắt đầu!
Step 6.2:
Start a new scene and click on the Circle node icon in the left sidebar menu.
Bước 6.2:
Bắt đầu một cảnh mới và nhấp vào biểu tượng nút Vòng tròn trong menu thanh bên trái.
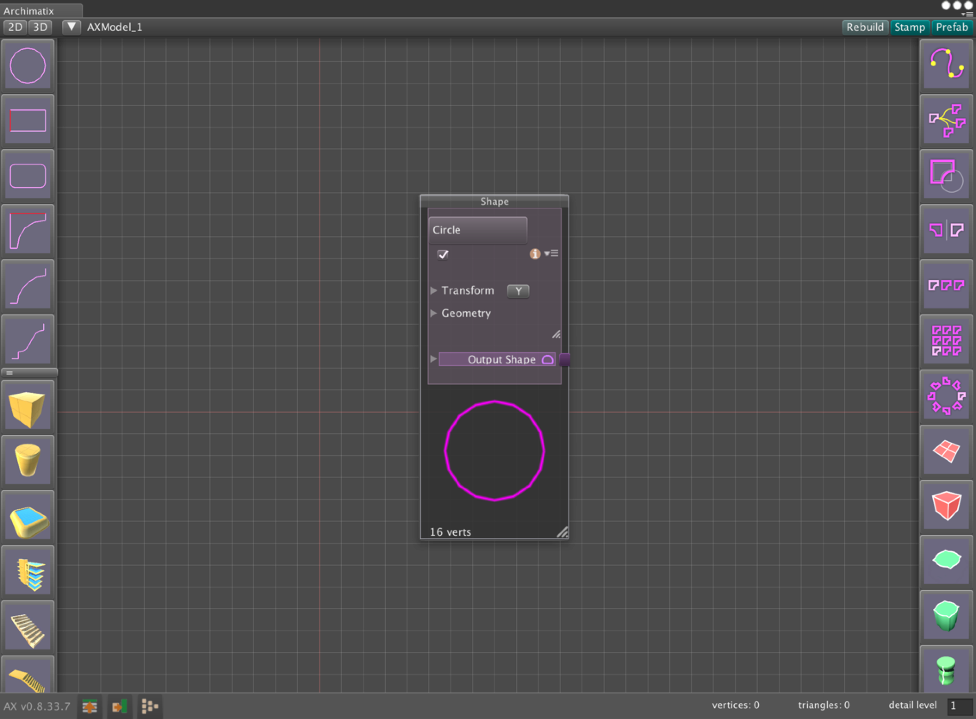

A Circle node will appear on the canvas and be framed in the Node Graph Editor window.
The 2D circle it produces will be framed in your scene.
Nút Vòng tròn sẽ xuất hiện trên khung vẽ và được đóng khung trong cửa sổ Trình chỉnh sửa biểu đồ nút.
Vòng tròn 2D mà nó tạo ra sẽ được đóng khung trong cảnh của bạn.
Roaring Tide Productions
Archimatix User Guide
!32
Sản phẩm thủy triều gầm
Hướng dẫn sử dụng Archimatix
!32
Page 35

6. The Node Graph Editor
6. Trình chỉnh sửa biểu đồ nút
You can pan and zoom the canvas to get a better view of the node palette for the Circle node
you instantiated.
Bạn có thể xoay và thu phóng khung vẽ để có cái nhìn rõ hơn về bảng nút cho nút Vòng tròn
bạn đã khởi tạo.
Step 6.3:
Use the scroll wheel on your mouse to zoom the canvas in and out. On a touch
trackpad, you can use two-finger scrolling to zoom. Try RMB-drag to pan the
canvas around.
Bước 6.3:
Sử dụng bánh xe cuộn trên chuột để phóng to và thu nhỏ khung vẽ. Trên một cú chạm
bàn di chuột, bạn có thể sử dụng thao tác cuộn bằng hai ngón tay để thu phóng. Hãy thử kéo RMB để xoay
vải xung quanh.
Now that we can zoom into the Node Graph Editor, let’s take a closer look at the Node
Palette.
Bây giờ chúng ta có thể phóng to Trình chỉnh sửa biểu đồ nút, hãy xem xét kỹ hơn về Nút
Bảng màu.
Anatomy of a 2D Node Palette
Giải phẫu của bảng nút 2D

Web Link
for more Info
Node Type
Liên kết web
để biết thêm thông tin
Loại nút
Title Bar
Thanh tiêu đề
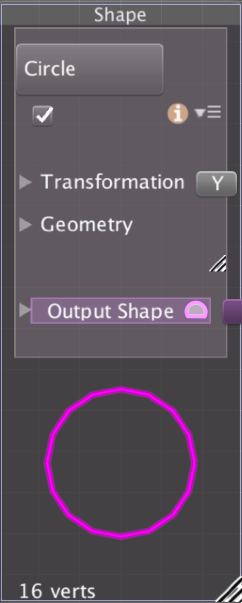
Active
Toggle
Đang hoạt động
Chuyển đổi
Node
Palette
Menu
Nút
Bảng màu
Thực đơn
Transforms
Foldout
chuyển đổi
gấp lại
Axis
Orientation
Trục
định hướng
Geometry
Control
Parameters
Foldout
Hình học
Kiểm soát
Thông số
gấp lại
Output
Socket
đầu ra
Ổ cắm

Output
Modifiers
Foldout
đầu ra
công cụ sửa đổi
gấp lại
Open / Close
Shape Toggle
Mở / Đóng
Chuyển đổi hình dạng
Vertice
Count
Đỉnh
Đếm
Resize
Palette
Thay đổi kích thước
Bảng màu
Thumbnail
Hình thu nhỏ
Roaring Tide Productions
Archimatix User Guide
!33
Sản phẩm thủy triều gầm
Hướng dẫn sử dụng Archimatix
!33
Page 36

segs
phân đoạn
6. The Node Graph Editor
6. Trình chỉnh sửa biểu đồ nút
The Circle node has 16 sides, or segments, and a radius of 2 units,
by default. Let’s adjust these values.
Nút Vòng tròn có 16 cạnh hoặc đoạn và bán kính 2 đơn vị,
theo mặc định. Hãy điều chỉnh các giá trị này.
radius
bán kính
Step 6.4:
Open the Geometry Control Parameters Foldout and modify
the radius to 2.5 and segs to 6 to make the Circle a hexagon.
Bước 6.4:
Mở Thư mục Tham số Kiểm soát Hình học và sửa đổi
bán kính thành 2,5 và phân đoạn thành 6 để biến Hình tròn thành hình lục giác.
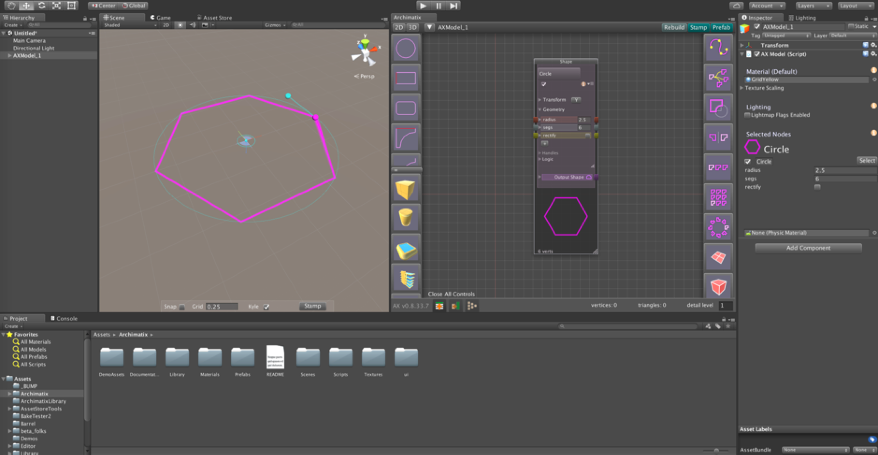



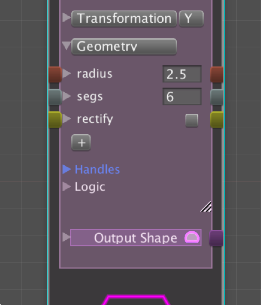
You will notice that some parameter fields in the node palette
are redundant with the fields listed in the Inspector, with an
important difference. Each parameter in the Node Palette has a
socket on either side of it. These sockets, which are color-coded
based on the type of parameter data (red: float; blue: int; yellow:
bool) allow you to link parameters from this node to parameters
from other nodes.
Bạn sẽ nhận thấy rằng một số trường tham số trong bảng nút
dư thừa với các trường được liệt kê trong Thanh tra, với một
sự khác biệt quan trọng. Mỗi tham số trong Bảng nút có một
ổ cắm ở hai bên của nó. Các ổ cắm này được mã hóa màu
dựa trên loại dữ liệu tham số (đỏ: float; xanh: int; vàng:
bool) cho phép bạn liên kết các tham số từ nút này với các tham số
từ các nút khác.



The radius and segs parameters are the two basic values needed to
generate vertices for the Shape. These vertices constitute the final output
of the Shape.
Các tham số bán kính và phân đoạn là hai giá trị cơ bản cần thiết để
tạo các đỉnh cho Hình dạng. Các đỉnh này tạo thành đầu ra cuối cùng
của Hình dạng.
The rectify parameter comes in handy when dealing with an odd number of segs. If the Shape
is rectified, the Circle is turned so that one facet is parallel to the
X-axis, rather than starting with a vertex falling on the X-axis.
This comes into play for Shapes with small segment counts, such
as a pentagon.
Tham số chỉnh sửa có ích khi xử lý số lượng phân đoạn lẻ. Nếu hình dạng
được chỉnh sửa, Vòng tròn được xoay sao cho một mặt song song với
Trục X, thay vì bắt đầu bằng một đỉnh nằm trên trục X.
Điều này áp dụng cho các Hình dạng có số lượng phân đoạn nhỏ, chẳng hạn như
như một ngũ giác.
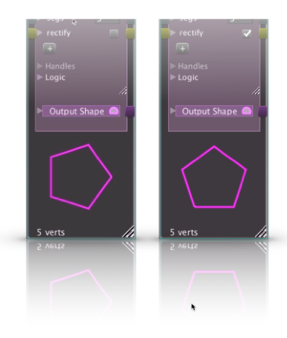
The handles and Logic foldouts, which enable you to customize
or create your own Shape behaviors and control handles, are
covered in the advanced topic of coding parametric Shapes using
AX Script. More information on this topic can be found here.
Các tay cầm và các nếp gấp Logic, cho phép bạn tùy chỉnh
hoặc tạo các hành vi Hình dạng và bộ điều khiển điều khiển của riêng bạn, là
được đề cập trong chủ đề nâng cao về mã hóa Hình dạng tham số bằng cách sử dụng
Tập lệnh AX. Thông tin thêm về chủ đề này có thể được tìm thấy ở đây.
Roaring Tide Productions
Archimatix User Guide
!34
Sản phẩm thủy triều gầm
Hướng dẫn sử dụng Archimatix
!34
Page 37

6. The Node Graph Editor
6. Trình chỉnh sửa biểu đồ nút
The Circle Shape has a Circle handle, which features two sub-handles: a point handle locked
to the X-axis, which controls the radius parameter, and a Tangent handle that is
perpendicular to the X-axis and controls the segs parameter. The rectify parameter does not
have a scene handle, and can only be checked in the Inspector or on the node palette.
Hình tròn có một tay cầm Hình tròn, trong đó có hai tay cầm phụ: một tay cầm điểm bị khóa
tới trục X, điều khiển tham số bán kính và tay cầm Tiếp tuyến được
vuông góc với trục X và điều khiển tham số segs. Tham số hiệu chỉnh không
có trình xử lý cảnh và chỉ có thể được kiểm tra trong Thanh tra hoặc trên bảng nút.
Each node in Archimatix has specific
parameters, handles and logic. While
often the specifics of a node can be
learned quickly enough through
experimentation, many nodes have
documentation pages at the support
site, archimatix.com.
Mỗi nút trong Archimatix có đặc điểm riêng
các tham số, xử lý và logic. Trong khi
thông thường các chi tiết cụ thể của một nút có thể
đã học đủ nhanh thông qua
thử nghiệm, nhiều nút có
trang tài liệu tại bộ phận hỗ trợ
trang web, Archimatix.com.

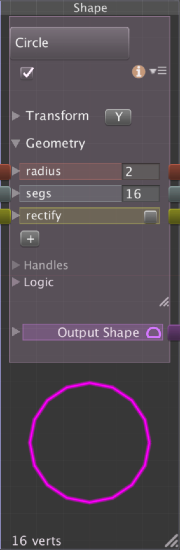




To quickly get to the
documentation for a node
you are working with, you
can click on the
information icon just below
the title of the node. In the
example shown in the image on the
right, a click to the information icon
on the Circle node has popped up a
Web browser and directed us to the
URL for the Circle Shape’s
documentation.
Để nhanh chóng đạt được
tài liệu cho một nút
bạn đang làm việc cùng, bạn
có thể bấm vào
biểu tượng thông tin ngay bên dưới
tiêu đề của nút. trong
ví dụ được hiển thị trong hình ảnh trên
phải, nhấp chuột vào biểu tượng thông tin
trên nút Vòng tròn đã xuất hiện một
trình duyệt web và hướng dẫn chúng tôi đến
URL cho Hình tròn
tài liệu.


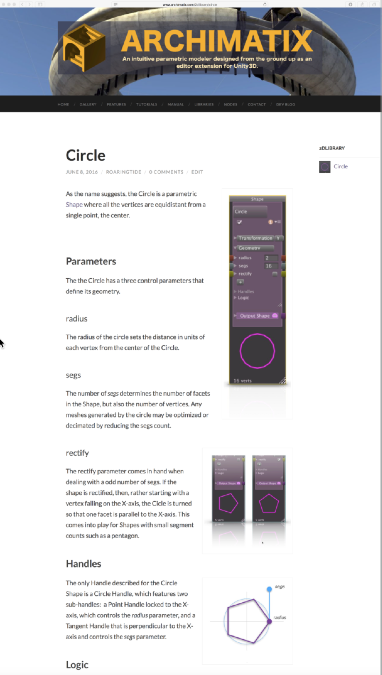

Step 6.5:
Click on the information icon for
the Circle Shape and familiarize
yourself with the Archimatix
support site.
Bước 6.5:
Bấm vào biểu tượng thông tin để
Hình tròn và làm quen
chính bạn với Archimatix
trang web hỗ trợ.
If a specific node does not have a
page yet, then the information icon
will link to a general page about that
class of node – for example, the
Circle is a Shape node.
Nếu một nút cụ thể không có
trang chưa, sau đó là biểu tượng thông tin
sẽ liên kết đến một trang chung về điều đó
lớp nút – ví dụ:
Vòng tròn là một nút Hình dạng.
Next, let’s make a mesh of this thing!
Tiếp theo, hãy tạo một lưới cho thứ này!
Roaring Tide Productions
Archimatix User Guide
!35
Sản phẩm thủy triều gầm
Hướng dẫn sử dụng Archimatix
!35
Page 38

6. The Node Graph Editor
6. Trình chỉnh sửa biểu đồ nút
Meshing with the Node Graph
Chia lưới với biểu đồ nút
Having a 2D Shape node in the scene is a great start, but nodes don’t do much in isolation.
Generally two or more nodes work together to generate meshes. As it is with any team
organization, communication is important. Nodes communicate with each other in two
ways: 1. Connections between inputs and outputs; and 2. Relations that are defined by
mathematical expressions. As nodes are connected to each other in non-mutually exclusive
ways, a network of logical relations forms, making a graph data structure. While a graph may
seem like a challenging thing to master, it is really not that difficult. To start, we can just
keep creating nodes and connecting their outputs and inputs.
Có nút Hình dạng 2D trong cảnh là một khởi đầu tuyệt vời, nhưng các nút không thực hiện được nhiều tác vụ riêng lẻ.
Nói chung, hai hoặc nhiều nút làm việc cùng nhau để tạo ra các mắt lưới. Như với bất kỳ đội nào
tổ chức, giao tiếp là quan trọng. Các nút giao tiếp với nhau theo hai
cách: 1. Kết nối giữa đầu vào và đầu ra; và 2. Các mối quan hệ được xác định bởi
biểu thức toán học. Vì các nút được kết nối với nhau theo cách không loại trừ lẫn nhau
cách, mạng lưới các dạng quan hệ logic, tạo nên cấu trúc dữ liệu đồ thị. Trong khi một đồ thị có thể
có vẻ như là một điều khó khăn để thành thạo, nhưng nó thực sự không khó đến thế. Để bắt đầu, chúng ta có thể chỉ
tiếp tục tạo các nút và kết nối đầu ra và đầu vào của chúng.
Since we have the Circle in the scene already, let’s use it to generate a mesh by feeding its
output to the input of an Extrude node, a Mesher node that takes an input Shape, doubles the
Shape at some extrude distance or height, and creates a mesh between the two. As we shall
see, the product of this nodal teamwork will be a Cylinder.
Vì chúng ta đã có Vòng tròn trong cảnh, hãy sử dụng nó để tạo lưới bằng cách nạp nó
đầu ra thành đầu vào của nút Extrude, nút Mesher lấy Hình dạng đầu vào, nhân đôi
Tạo hình ở một khoảng cách hoặc chiều cao đùn nào đó và tạo ra một lưới giữa hai bên. Như chúng ta sẽ
Hãy xem, sản phẩm của tinh thần đồng đội nút này sẽ là một Xi lanh.

Step 6.6:
Click on the purple button, or socket, on the lower right side of the Circle node
that is labeled “Output Shape.” Release the mouse button, and move the mouse to
the right sidebar. Use your scroll wheel to scroll through the list of nodes in the
sidebar until you see the Extrude node, and click on it.
Bước 6.6:
Nhấp vào nút màu tím hoặc ổ cắm ở phía dưới bên phải của nút Vòng tròn
được gắn nhãn “Hình dạng đầu ra”. Nhả nút chuột và di chuyển chuột đến
thanh bên phải. Sử dụng bánh xe cuộn để cuộn qua danh sách các nút trong
thanh bên cho đến khi bạn nhìn thấy nút Extrude và nhấp vào nút đó.
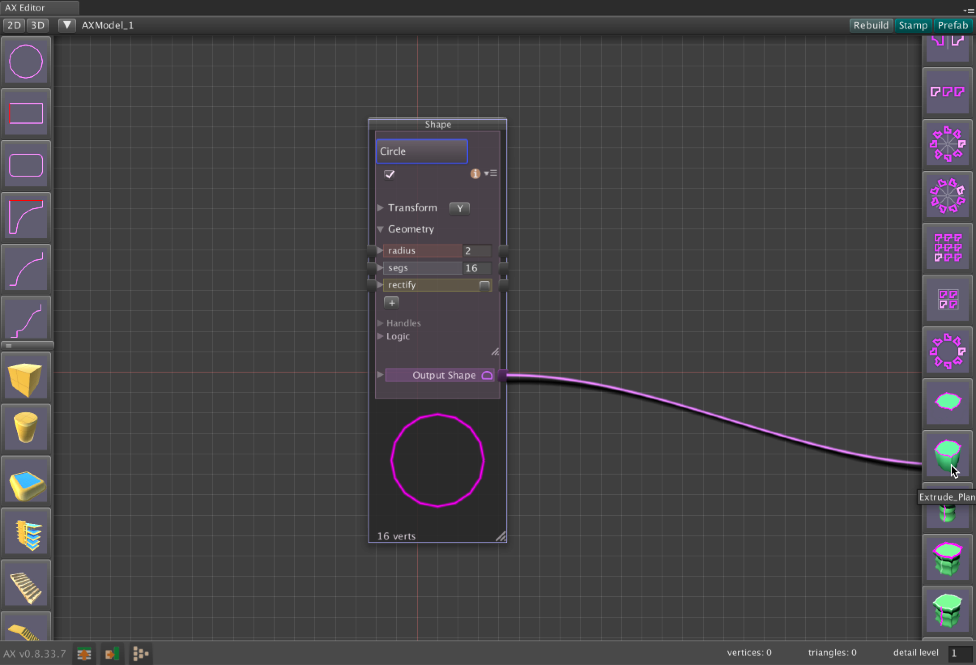

Roaring Tide Productions
Archimatix User Guide
!36
Sản phẩm thủy triều gầm
Hướng dẫn sử dụng Archimatix
!36
Page 39

6. The Node Graph Editor
6. Trình chỉnh sửa biểu đồ nút
A new Extrude node will appear in your graph with a connection line automatically rigged up
between the Circle node’s output and the Extrude node’s “Plan” Shape input socket.
Một nút Extrude mới sẽ xuất hiện trong biểu đồ của bạn với đường kết nối được tự động thiết lập
giữa đầu ra của nút Circle và ổ cắm đầu vào Hình dạng “Plan” của nút Extrude.
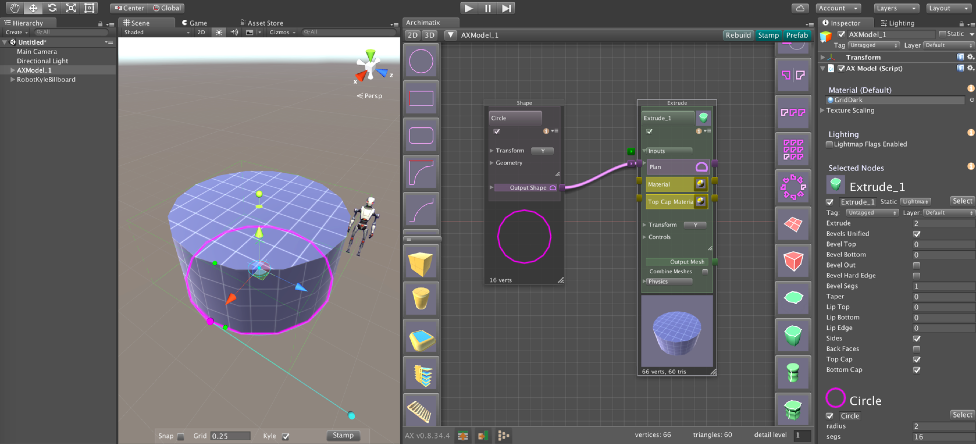



With the addition of the Extrude node and the input-output connection between them, you
have officially created a graph!
Với việc bổ sung nút Extrude và kết nối đầu vào-đầu ra giữa chúng, bạn
đã chính thức tạo ra một biểu đồ!

Now we see that the Cylinder Library Item is really just a two-node graph created in the
Node Graph Editor.
Bây giờ chúng ta thấy rằng Mục thư viện hình trụ thực sự chỉ là một biểu đồ hai nút được tạo trong
Trình chỉnh sửa biểu đồ nút.
You may click and drag on the window title bar or thumbnail of either node to rearrange
them on the canvas. As you drag, the node moves freely. When you let go, it will snap to the
underlying canvas grid.
Bạn có thể nhấp và kéo trên thanh tiêu đề cửa sổ hoặc hình thu nhỏ của một trong hai nút để sắp xếp lại
chúng trên canvas. Khi bạn kéo, nút sẽ di chuyển tự do. Khi bạn thả ra, nó sẽ bám vào
lưới canvas bên dưới.
In the Scene View, you will notice that the Extrude is displaying its handles and the handles
of the upstream Circle node (as we saw in the SciFi Platform and the BevelBox examples
already). But now that we have the Node Graph Editor open, we have more controls
available in the node palette. For example, we can see the Material inputs and the mesh
output parameters.
Trong Scene View, bạn sẽ nhận thấy rằng Extrude đang hiển thị các chốt điều khiển và các chốt điều khiển của nó.
của nút Vòng tròn ngược dòng (như chúng ta đã thấy trong các ví dụ về Nền tảng khoa học viễn tưởng và BevelBox
rồi). Nhưng bây giờ chúng ta đã mở Node Graph Editor, chúng ta có nhiều điều khiển hơn
có sẵn trong bảng nút. Ví dụ: chúng ta có thể thấy các đầu vào Vật liệu và lưới
các thông số đầu ra.
Let’s zoom into the Extrude node to take a closer look at it.
Hãy phóng to nút Extrude để xem xét kỹ hơn về nó.
Roaring Tide Productions
Archimatix User Guide
!37
Sản phẩm thủy triều gầm
Hướng dẫn sử dụng Archimatix
!37
Page 40

6. The Node Graph Editor
6. Trình chỉnh sửa biểu đồ nút
Anatomy of an Extrude Node
Giải phẫu của một nút đùn
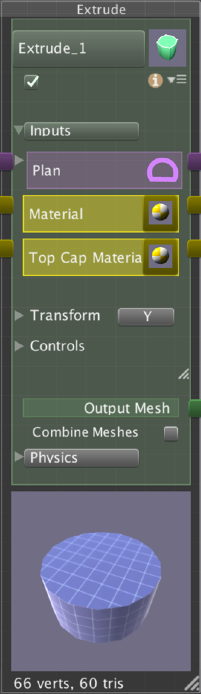
Open/Close
Shape
Toggle
Mở/Đóng
hình dạng
Chuyển đổi
Inputs Foldout
Đầu vào
Input
Shape
đầu vào
hình dạng
New
MaterialTool
Node Button
Mới
Công cụ vật liệu
Nút nút
Material
Inputs
Chất liệu
Đầu vào

Output Mesh
Socket
Lưới đầu ra
Ổ cắm
Physics
Foldout
Vật lý
gấp lại
Combine Meshes
Toggle
Kết hợp mắt lưới
Chuyển đổi
Vertices &
Triangles Stats
Đỉnh &
Thống kê tam giác
With the Inputs foldout expanded, we can see various options for inputs. In the case of the
Extrude node, we have a Plan Shape and two Material inputs. The first Material input will be
the main material for all the surfaces of the Extrude. A MaterialTool node connected to the
Top Cap Material input will be the material for the Top Cap and Bottom Cap of the Extrude.
Khi phần Đầu vào được mở rộng, chúng ta có thể thấy nhiều tùy chọn khác nhau cho đầu vào. Trong trường hợp của
Nút đùn, chúng ta có Hình dạng Sơ đồ và hai đầu vào Vật liệu. Đầu vào Vật liệu đầu tiên sẽ là
vật liệu chính cho tất cả các bề mặt của Extrude. Nút MaterialTool được kết nối với
Đầu vào Top Cap Material sẽ là nguyên liệu cho Top Cap và Bottom Cap của Extrude.
When clicked, the new MaterialTool node button will create a new MaterialTool node and
connect it to the Extrude node. Alternatively, you can connect a MaterialTool node already in
the graph to either of the MaterialTool node inputs.
Khi được nhấp vào, nút nút MaterialTool mới sẽ tạo nút MaterialTool mới và
kết nối nó với nút Extrude. Ngoài ra, bạn có thể kết nối nút MaterialTool đã có trong
biểu đồ tới một trong các đầu vào nút MaterialTool.
The “Combine Meshes” toggle signals to the node that it should combine any meshes that it
creates into a single mesh per material. In the future, there will be an option to have one
mesh with submeshes for each material.
Nút chuyển đổi “Kết hợp các mắt lưới” báo hiệu cho nút rằng nó sẽ kết hợp bất kỳ mắt lưới nào mà nó
tạo thành một lưới duy nhất cho mỗi vật liệu. Trong tương lai, sẽ có một lựa chọn để có một
lưới với các mắt lưới phụ cho từng vật liệu.
The Physics modifiers found in the Physics foldout allow you to specify the type of collider
you would like the output of the Mesher to have. There is also an option to add a RigidBody
and make it kinematic.
Các công cụ sửa đổi Vật lý được tìm thấy trong thư mục Vật lý cho phép bạn chỉ định loại máy va chạm
bạn muốn có đầu ra của Mesher. Ngoài ra còn có một tùy chọn để thêm RigidBody
và làm cho nó có tính động học.
Roaring Tide Productions
Archimatix User Guide
!38
Sản phẩm thủy triều gầm
Hướng dẫn sử dụng Archimatix
!38
Page 41

6. The Node Graph Editor
6. Trình chỉnh sửa biểu đồ nút

Comparing Input Foldouts
So sánh các thư mục đầu vào
Unlike the Shape node, Mesher nodes like Extrude have multiple inputs. The node’s inputs
help to define its particular mesh-generating functionality. For example, the Extrude Mesher
needs a Plan Shape on which to operate, and it can optionally take a main MaterialTool and a
Top Cap Material as inputs.
Không giống như nút Shape, các nút Mesher như Extrude có nhiều đầu vào. Đầu vào của nút
giúp xác định chức năng tạo lưới cụ thể của nó. Ví dụ: Máy đùn đùn
cần một Hình dạng Sơ đồ để vận hành và nó có thể tùy chọn lấy một MaterialTool chính và một
Vật liệu Top Cap làm đầu vào.
We can quickly get a sense of the types of Meshers we have in Archimatix by comparing their
inputs.
Chúng ta có thể nhanh chóng hiểu được các loại Meshers có trong Archimatix bằng cách so sánh chúng
đầu vào.
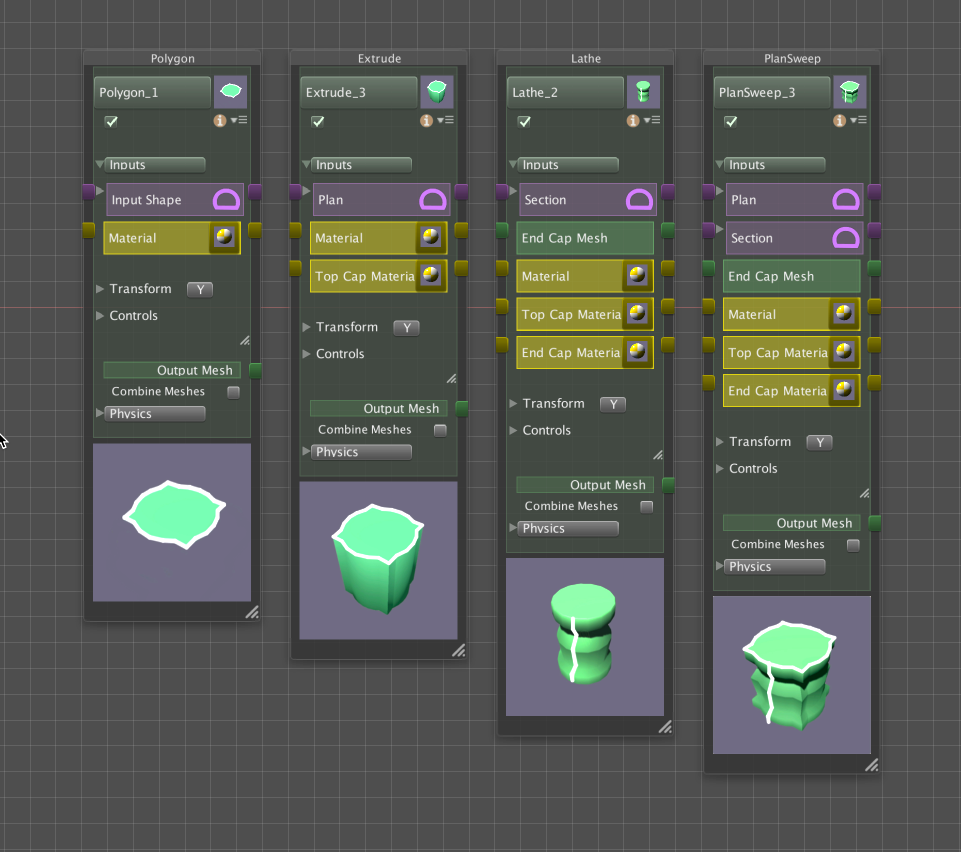

With additional complexity, we need more Shape and material input options. Otherwise,
looking at the lower half of the four Meshers, we see that they all share an Output Mesh,
Combine Mesh toggles and a Physics controls foldout.
Với độ phức tạp cao hơn, chúng ta cần nhiều tùy chọn đầu vào Hình dạng và vật liệu hơn. Nếu không,
nhìn vào nửa dưới của bốn Meshers, chúng ta thấy rằng tất cả chúng đều có chung một Mesh đầu ra,
Kết hợp các nút bật/tắt Lưới và màn hình điều khiển Vật lý.
Roaring Tide Productions
Archimatix User Guide
!39
Sản phẩm thủy triều gầm
Hướng dẫn sử dụng Archimatix
!39
Page 42

6. The Node Graph Editor
6. Trình chỉnh sửa biểu đồ nút
Backfaces
Mặt sau
Meshers allow you to choose which surface you would like to be visible. For example, in an
Extrude Mesher, you can disable the Top Cap and Bottom Cap. You can also choose to turn on
the Backfaces if you want a thin-shelled form or a thin railing. Turning Backfaces on is also
convenient for inverting meshes to use as interior environments.
Meshers cho phép bạn chọn bề mặt nào bạn muốn hiển thị. Ví dụ, trong một
Extrude Mesher, bạn có thể vô hiệu hóa Top Cap và Bottom Cap. Bạn cũng có thể chọn bật
Mặt sau nếu bạn muốn dạng vỏ mỏng hoặc lan can mỏng. Bật Backfaces cũng được
thuận tiện cho việc đảo ngược các mắt lưới để sử dụng làm môi trường nội thất.
Step 6.7:
In a new scene, instantiate a
Rectangle from the 2D Library.
Connect the Rectangle’s output to an
Extrude node item in the right
sidebar menu.
Bước 6.7:
Trong một cảnh mới, khởi tạo một
Hình chữ nhật từ Thư viện 2D.
Kết nối đầu ra của Hình chữ nhật với một
Đùn mục nút ở bên phải
menu thanh bên.
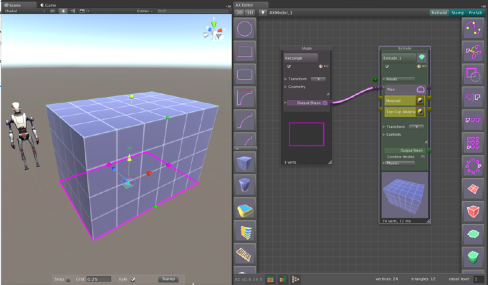




You can have the Sides and the Backfaces visible
together, but the caps are only either normal or
inverted. They are inverted only when the
Backfaces are on.
Bạn có thể nhìn thấy các Mặt và Mặt sau
cùng nhau, nhưng mũ chỉ bình thường hoặc
đảo ngược. Chúng chỉ đảo ngược khi
Mặt sau đang bật.
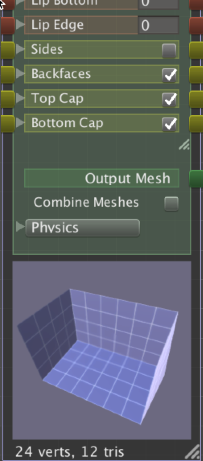
Step 6.8: Expand the Controls foldout on the Extrude node, and turn the
Bước 6.8: Mở rộng nếp gấp Điều khiển trên nút Extrude và xoay nút

Sides off and the Backfaces on.
Tắt các mặt và bật Mặt sau.
You now have the beginnings of an interior model. If you orbit the model
in the scene, you will be looking into the space, but without seeing any of
the exterior surfaces of the walls or floors.
Bây giờ bạn đã có sự khởi đầu của một mô hình nội thất. Nếu bạn quay quanh mô hình
trong khung cảnh này, bạn sẽ nhìn vào không gian nhưng không thấy bất kỳ thứ gì
bề mặt bên ngoài của tường hoặc sàn.
Step 6.9: Instantiate a Circle Shape and connect its output to the Plan
Bước 6.9: Khởi tạo Hình tròn và kết nối đầu ra của nó với Sơ đồ
input of the Extrude node with a RMB-double-click (Windows)
or command-click (OS X), automatically creating a ShapeMerger
node in between. Move the Circle and resize it to build out the
interior space.
đầu vào của nút Extrude bằng cách nhấp đúp vào RMB (Windows)
hoặc bấm lệnh (OS X), tự động tạo ShapeMerger
nút ở giữa. Di chuyển Vòng tròn và thay đổi kích thước của nó để xây dựng
không gian nội thất.
You can continue to add Shapes, making the interior space larger and
larger.
Bạn có thể tiếp tục thêm Hình dạng, làm cho không gian bên trong rộng hơn và
lớn hơn.
You cannot currently cut holes in the sides of
an Extrude. Instead, Archimatix works with a
philosophy of 2D Boolean operations and an
additive process of meshes. This is closer to
real-world building practices, where a window
is not really cut out of a wall, but, rather, the
mass of the wall is built up and the window
opening an area where no material was added.
Hiện tại bạn không thể cắt lỗ ở các cạnh của
một máy đùn. Thay vào đó, Archimatix hoạt động với một
triết lý của các phép toán Boolean 2D và một
quá trình bổ sung của lưới. Điều này gần hơn với
thực tiễn xây dựng trong thế giới thực, nơi có cửa sổ
không thực sự được cắt ra từ một bức tường, mà đúng hơn là
khối lượng của bức tường được xây dựng và cửa sổ
mở một khu vực không có vật liệu nào được thêm vào.
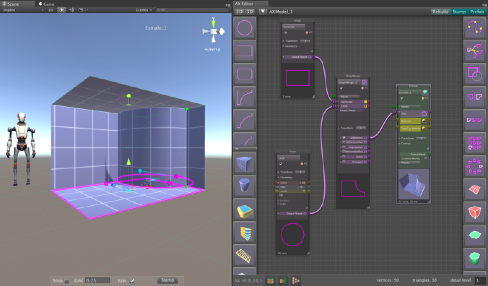

Let’s take a look at an opening made through
2D Shape merging.
Chúng ta hãy nhìn vào một phần mở đầu được thực hiện thông qua
Hợp nhất hình dạng 2D.
Roaring Tide Productions
Archimatix User Guide
!40
Sản phẩm thủy triều gầm
Hướng dẫn sử dụng Archimatix
!40
Page 43

6. The Node Graph Editor
6. Trình chỉnh sửa biểu đồ nút
Meshing Off the Rails
Chia lưới khỏi đường ray
In addition to exterior and interior models, a common case that uses both at the same time
is a thin railing. Archimatix is well-suited to making thick railings, but for buildings with a
low level of detail, a thin railing can save triangles.
Ngoài các mẫu ngoại thất và nội thất, một trường hợp phổ biến là sử dụng cả hai mẫu cùng lúc
là một lan can mỏng. Archimatix rất phù hợp để làm lan can dày, nhưng đối với các tòa nhà có bề mặt
mức độ chi tiết thấp, lan can mỏng có thể cứu được hình tam giác.
Step 6.10: From the scene on the previous page, turn the Top Cap and Bottom Cap off and
Bước 6.10: Từ cảnh ở trang trước, tắt Top Cap và Bottom Cap và
turn the Sides on, leaving Backfaces on as well. Adjust the height of the Extrude to
be about waist-high on Robot Kyle.
bật Sides và cũng bật Backfaces. Điều chỉnh chiều cao của Extrude thành
cao ngang thắt lưng trên Robot Kyle.
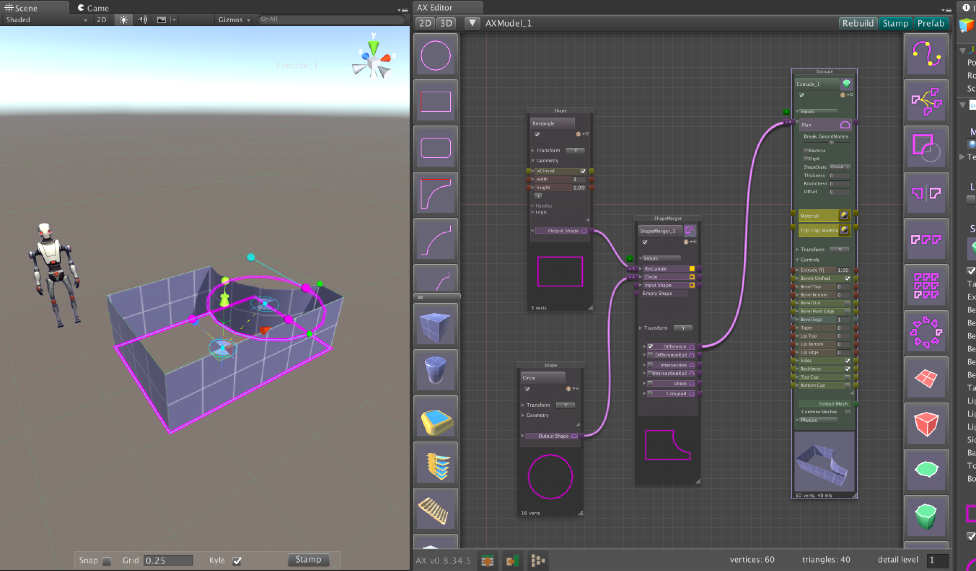


You can continue to add Shapes to the ShapeMerger and move them around or modify their
parameters. But, at the moment, we see that there is no way for Robot Kyle to get inside of
this fenced area.
Bạn có thể tiếp tục thêm Hình dạng vào ShapeMerger và di chuyển chúng xung quanh hoặc sửa đổi chúng.
các thông số. Tuy nhiên, hiện tại, chúng tôi thấy rằng Robot Kyle không có cách nào vào được bên trong
khu vực có rào chắn này.
The simplest way to open the fenced area is to open the Plan Shape. This can be done in one
of two places, either in the Difference output of the ShapeMerger or in the Plan input of the
Extrude. It makes most sense to leave the ShapeMerger output alone, since that Shape could
be reused to generate a floor under the fenced area. This leaves the Plan input as the best
option. Altering a Shape at an input point is essentially a just-in-time alteration that has no
effect on the upstream source Shapes.
Cách đơn giản nhất để mở khu vực có rào chắn là mở Plan Shape. Điều này có thể được thực hiện trong một
của hai vị trí, trong đầu ra Khác biệt của ShapeMerger hoặc trong đầu vào Kế hoạch của
Đùn. Điều hợp lý nhất là để nguyên đầu ra ShapeMerger, vì Shape đó có thể
được tái sử dụng để tạo ra một tầng dưới khu vực có rào chắn. Điều này khiến đầu vào Kế hoạch là tốt nhất
tùy chọn. Thay đổi Hình dạng tại điểm đầu vào về cơ bản là thay đổi kịp thời, không có
ảnh hưởng đến các Hình dạng nguồn ngược dòng.
Roaring Tide Productions
Archimatix User Guide
!41
Sản phẩm thủy triều gầm
Hướng dẫn sử dụng Archimatix
!41
Page 44

6. The Node Graph Editor
6. Trình chỉnh sửa biểu đồ nút
Step 6.11: Click on the Open/Close Shape toggle in the Extrude’s Plan input parameter.
Bước 6.11: Nhấp vào nút chuyển đổi Mở/Đóng hình dạng trong tham số đầu vào của Extrude's Plan.

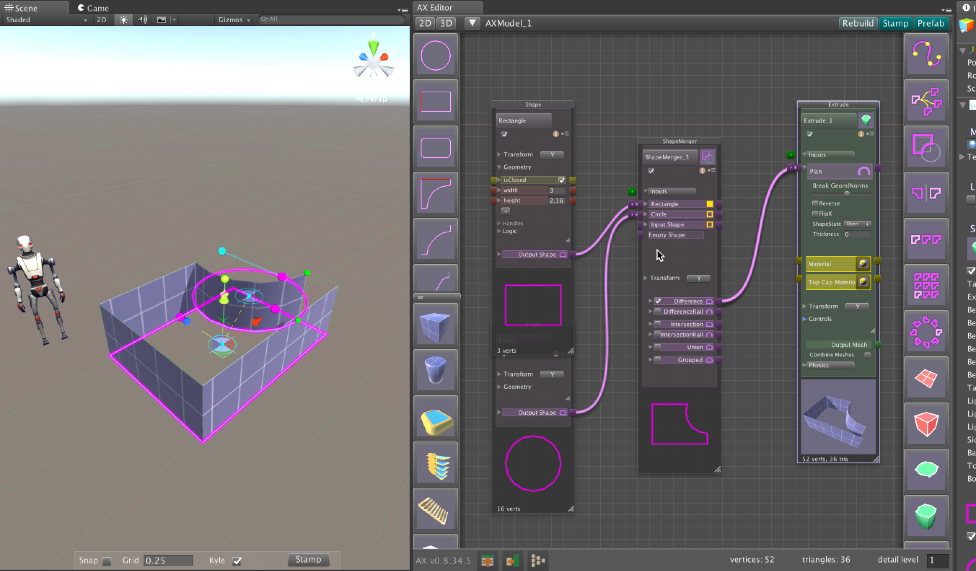


We see that, by opening the Plan Shape, we now have a part of the rail missing, in this case,
right next to the quarter-circle. The problem with simply opening the Shape is that we
cannot easily control where the opening is or allow for multiple openings. To remedy this,
we can use the DifferenceRail of a new ShapeMerger to intentionally cut out parts of the rail.
The DifferenceRail is a Shape composed of the lines of the solid Shapes in the ShapeMerger
inputs without any lines contributed by the void Shapes.
Chúng ta thấy rằng, bằng cách mở Plan Shape, bây giờ chúng ta đã thiếu một phần của đường ray, trong trường hợp này,
ngay bên cạnh một phần tư vòng tròn. Vấn đề với việc mở Shape đơn giản là chúng ta
không thể dễ dàng kiểm soát vị trí mở hoặc cho phép mở nhiều lần. Để khắc phục điều này,
chúng ta có thể sử dụng DifferentRail của ShapeMerger mới để cố tình cắt bỏ các phần của đường ray.
Đường ray khác biệt là một Hình dạng bao gồm các đường của các Hình dạng rắn trong ShapeMerger
đầu vào mà không có bất kỳ dòng nào được đóng góp bởi Hình dạng trống.
Step 6.12: Click on the connector cable from the ShapeMerger output to the Extrude. While
Bước 6.12: Click vào cable kết nối từ đầu ra ShapeMerger đến Extrude. Trong khi
it is selected, hit the Delete key to remove it (Cmd-Delete on OS X).
nó được chọn, nhấn phím Xóa để xóa nó (Cmd-Delete trên OS X).
Step 6.13: Click on the ShapeMerger
Bước 6.13: Click vào ShapeMerger
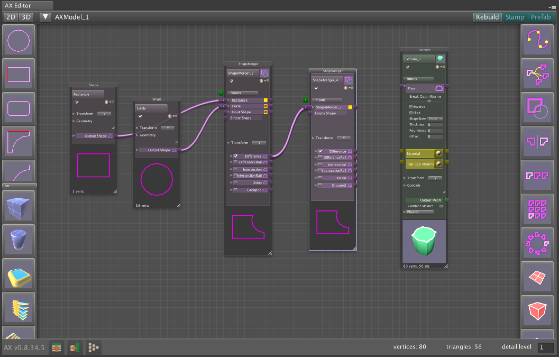
to select it, and then click
on the ShapeMerger icon
in the right-hand sidebar
menu. A new ShapeMerger
will be created and
automatically connected
to the Difference output of
the first ShapeMerger.
để chọn nó, rồi bấm vào
trên biểu tượng ShapeMerger
ở thanh bên phải
thực đơn. Một ShapeMerger mới
sẽ được tạo ra và
tự động kết nối
đến đầu ra khác biệt của
ShapeMerger đầu tiên.

Roaring Tide Productions
Archimatix User Guide
!42
Sản phẩm thủy triều gầm
Hướng dẫn sử dụng Archimatix
!42
Page 45


6. The Node Graph Editor
6. Trình chỉnh sửa biểu đồ nút
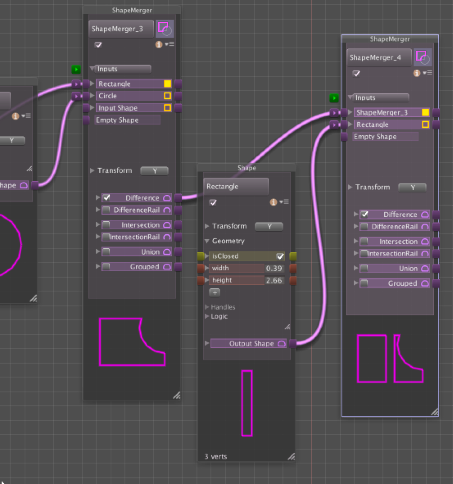
Now you should have the original ShapeMerger
feeding into a new ShapeMerger. It is with this
new one that we will trim out openings using a
new void Shape.
Bây giờ bạn đã có ShapeMerger gốc
nạp vào ShapeMerger mới. Đó là với cái này
cái mới mà chúng tôi sẽ cắt bỏ các lỗ hở bằng cách sử dụng
Hình dạng trống mới.
Step 6.14: With the new ShapeMerger selected,
Bước 6.14: Với ShapeMerger mới được chọn,
instantiate a Rectangle from the 2D
Library items in the left-hand
sidebar. The Rectangle will be
automatically fed into the new
ShapeMerger.
khởi tạo Hình chữ nhật từ 2D
Các mục thư viện ở bên trái
thanh bên. Hình chữ nhật sẽ là
tự động đưa vào cái mới
ShapeMerger.

At first, the Rectangle will probably be too large
and leave little of your Shape left.
Lúc đầu, Hình chữ nhật có thể sẽ quá lớn
và để lại một ít Hình dạng của bạn.

Step 6.15: Resize the Rectangle so that it is
Bước 6.15: Thay đổi kích thước hình chữ nhật sao cho phù hợp
removing a sliver of your Plan Shape.
loại bỏ một phần của Hình dạng Kế hoạch của bạn.
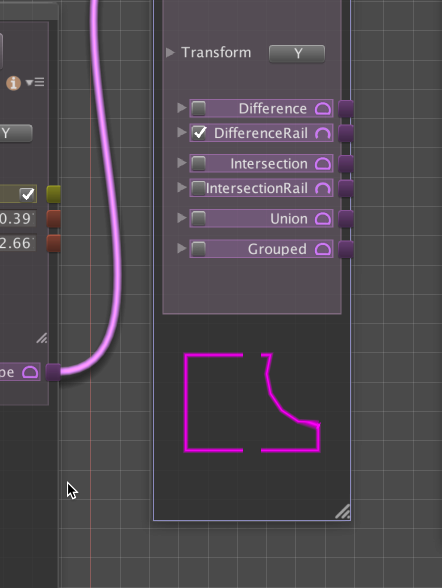
Step 6.16: Click on the checkbox to the left of
Bước 6.16: Click vào ô đánh dấu bên trái
the DifferenceRail output to display
the result of that Boolean operation.
đầu ra DifferentRail để hiển thị
kết quả của phép toán Boolean đó.

Using the original merged Shape, we now see
the DifferenceRail, an “Open” Shape that is
essentially a “rail.” Such a rail Shape can be used
to create thin and thick railings and walls with
openings.
Sử dụng Hình dạng đã hợp nhất ban đầu, bây giờ chúng ta thấy
Đường ray khác biệt, một Hình dạng “Mở” được
về cơ bản là một “đường ray”. Hình dạng đường ray như vậy có thể được sử dụng
để tạo ra các lan can và tường mỏng và dày bằng
lỗ hở.
Note that the checkbox that you clicked to
display the DifferenceRail output of the merge is
only for displaying that output parameter’s
Shape in the node’s thumbnail. You can hook
different nodes simultaneously to any and all of
the outputs of the ShapeMerger.
Lưu ý rằng hộp kiểm mà bạn đã nhấp vào
hiển thị đầu ra DifferentRail của việc hợp nhất là
chỉ để hiển thị tham số đầu ra đó
Hình dạng trong hình thu nhỏ của nút. Bạn có thể móc
các nút khác nhau đồng thời tới bất kỳ và tất cả các
kết quả đầu ra của ShapeMerger.
We can use the rail Shape we created in various
Meshers, as we shall see in some examples
presently.
Chúng ta có thể sử dụng Hình dạng đường ray mà chúng ta đã tạo theo nhiều cách khác nhau
Meshers, như chúng ta sẽ thấy trong một số ví dụ
hiện tại.
Roaring Tide Productions
Archimatix User Guide
!43
Sản phẩm thủy triều gầm
Hướng dẫn sử dụng Archimatix
!43
Page 46

6. The Node Graph Editor
6. Trình chỉnh sửa biểu đồ nút
Step 6.17: Connect the DifferenceRail output of the new ShapeMerger to the Extrude node.
Bước 6.17: Kết nối đầu ra DifferentRail của ShapeMerger mới với nút Extrude.
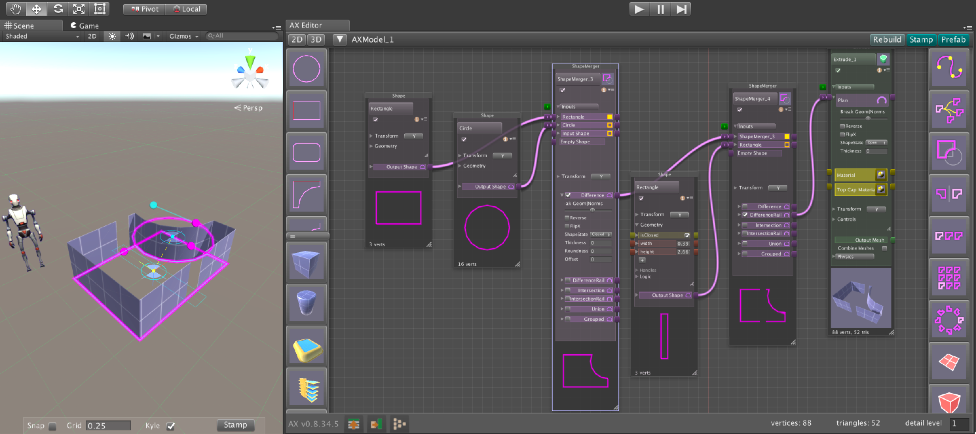



Now Robot Kyle will be able to enter the railed area, but we had better add a floor to
provide some footing. This is where the original ShapeMerger output can come into play and
demonstrate how powerful the non-mutually exclusive aspect of the node graph can be.
Bây giờ Robot Kyle sẽ có thể đi vào khu vực có đường ray, nhưng tốt hơn chúng ta nên thêm một tầng vào
cung cấp một số chỗ đứng. Đây là nơi đầu ra ShapeMerger ban đầu có thể phát huy tác dụng và
chứng minh khía cạnh không loại trừ lẫn nhau của biểu đồ nút có thể mạnh mẽ đến mức nào.

Step 6.18: Click on the Difference output of the first ShapeMerger, and then click on the
Bước 6.18: Nhấp vào đầu ra Khác biệt của ShapeMerger đầu tiên, sau đó nhấp vào
Extrude icon in the right-hand sidebar menu.
Biểu tượng đùn trong menu thanh bên phải.
Step 6.19: Click and drag the lower green point handle on the Extrude to offset the Plan so
Bước 6.19: Nhấp và kéo điểm điều khiển điểm màu xanh lá cây phía dưới trên Extrude để bù đắp cho Plan sao cho
that it is larger than the railing.
rằng nó lớn hơn lan can.

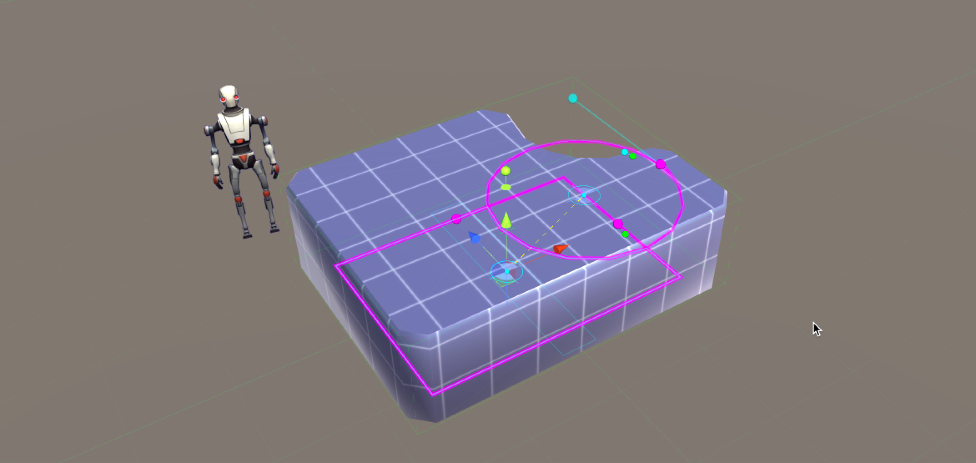
Roaring Tide Productions
Archimatix User Guide
!44
Sản phẩm thủy triều gầm
Hướng dẫn sử dụng Archimatix
!44
Page 47


6. The Node Graph Editor
6. Trình chỉnh sửa biểu đồ nút
Step 6.20: Adjust the height of the Extrude until it appears to be a thin floor slab.
Bước 6.20: Điều chỉnh chiều cao của Extrude cho đến khi nó trông giống như một tấm sàn mỏng.

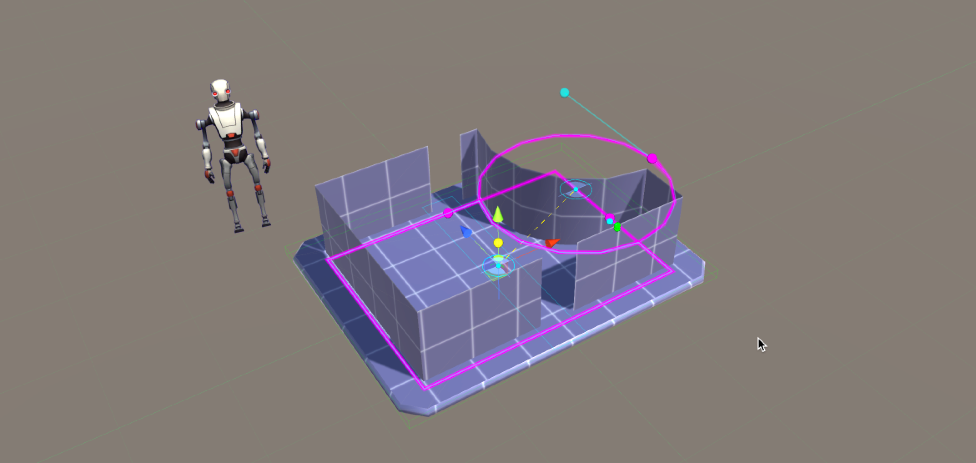

Step 6.21: Select the original Rectangle in the Node Graph Editor and make the fenced-in
Bước 6.21: Chọn Hình chữ nhật ban đầu trong Trình chỉnh sửa biểu đồ nút và tạo hàng rào
area larger, then select the new cutting Rectangle and make the opening larger.
diện tích lớn hơn, sau đó chọn hình chữ nhật cắt mới và làm cho lỗ mở lớn hơn.


1
1
2
2
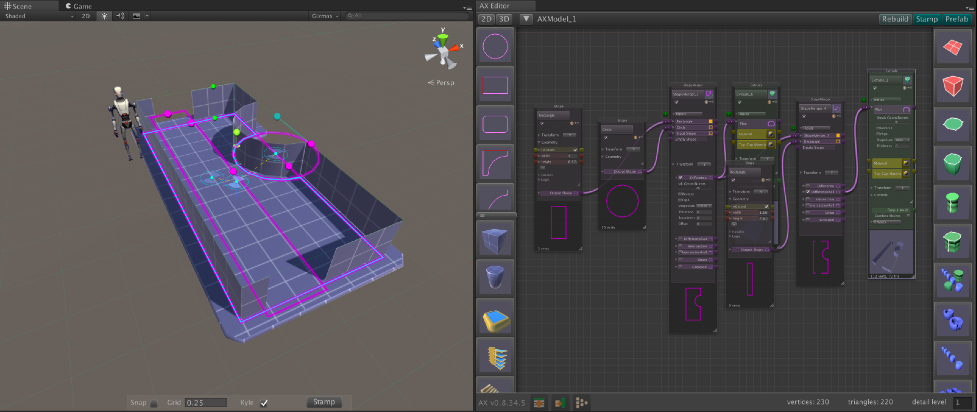


We can see that, as the node graph becomes more developed, we can modify various handles
in the scene with a ripple effect. For example, at this point, modifying the first Rectangle’s
handles alters both the railing and the floor.
Chúng ta có thể thấy rằng, khi biểu đồ nút trở nên phát triển hơn, chúng ta có thể sửa đổi nhiều tay cầm khác nhau
trong cảnh có hiệu ứng gợn sóng. Ví dụ: tại thời điểm này, việc sửa đổi Hình chữ nhật đầu tiên
tay cầm làm thay đổi cả lan can và sàn nhà.
Roaring Tide Productions
Archimatix User Guide
!45
Sản phẩm thủy triều gầm
Hướng dẫn sử dụng Archimatix
!45
Page 48

6. The Node Graph Editor
6. Trình chỉnh sửa biểu đồ nút

Let’s use the DifferenceRail Shape to create a thick handrail atop the current surface.
Hãy sử dụng DifferentRail Shape để tạo một lan can dày trên bề mặt hiện tại.
Step 6.22: Click on the DifferenceRail to start a connection and then scroll the
Bước 6.22: Nhấp vào DifferentRail để bắt đầu kết nối và sau đó cuộn
right sidebar down until you see the PlanSweep_Plan Mesher icon, and
click on it. A connection will automatically be created. A mesh will
not appear in the scene until we provide the PlanSweep node with a
Section Shape.
thanh bên phải xuống cho đến khi bạn nhìn thấy biểu tượng PlanSweep_Plan Mesher và
bấm vào nó. Một kết nối sẽ tự động được tạo. Một tấm lưới sẽ
không xuất hiện trong hiện trường cho đến khi chúng tôi cung cấp cho nút PlanSweep một
Hình dạng phần.

Step 6.23: Instantiate a RoundedRectangle from the 2D Library sidebar and
Bước 6.23: Tạo một Hình chữ nhật tròn từ thanh bên Thư viện 2D và
connect the output of this node to the Section input of the PlanSweep.
kết nối đầu ra của nút này với đầu vào Phần của PlanSweep.
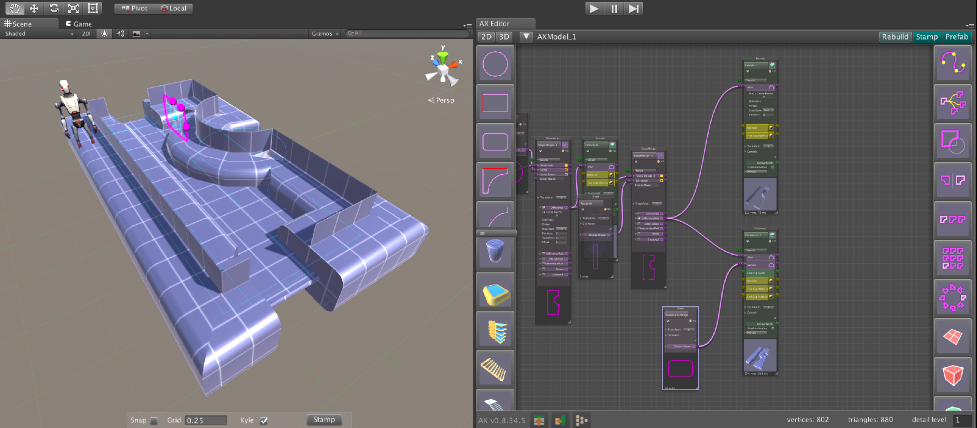



The DifferenceRail output is now used to generate two different meshes. The PlanSweep
Mesher is currently at the base of the railing and is too large to be a handrail. To make the
RoundedRectangle Shape smaller, it is far better to adjust its parameters than to scale it using
the Shape’s transform controls. This is because, in parametric modeling, the values of
parameters are important in building logical relationships. If we simply scale the Shape, then
the parameters, which retain their value, will not reflect the size.
Đầu ra DifferentRail hiện được sử dụng để tạo hai lưới khác nhau. Kế hoạch quét
Mesher hiện đang ở chân lan can và quá lớn để làm lan can. Để làm cho
Hình chữ nhật tròn Hình dạng nhỏ hơn, việc điều chỉnh các tham số của nó sẽ tốt hơn nhiều so với việc chia tỷ lệ bằng cách sử dụng
các điều khiển biến đổi của Hình dạng. Điều này là do, trong mô hình tham số, các giá trị của
các tham số rất quan trọng trong việc xây dựng các mối quan hệ logic. Nếu chúng ta chỉ đơn giản chia tỷ lệ Hình dạng, thì
các tham số giữ nguyên giá trị của chúng sẽ không phản ánh kích thước.
Step 6.24: Select the RoundedRectangle node
Bước 6.24: Chọn nút RoundedRectangle
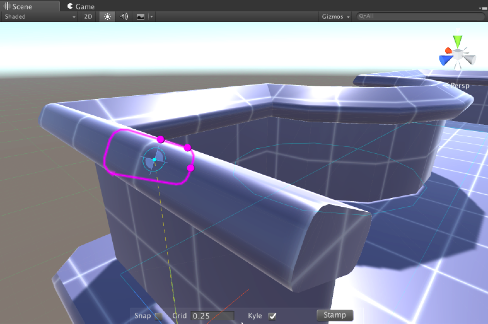
in the Node Graph Editor
window and hit the “f” key to
frame the node in both the scene
and in the Node Graph Editor.
trong Trình chỉnh sửa biểu đồ nút
cửa sổ và nhấn phím “f” để
đóng khung nút trong cả hai cảnh
và trong Trình chỉnh sửa biểu đồ nút.

Step 6.25: Adjust the RoundedRectangle’s
Bước 6.25: Điều chỉnh RoundedRectangle

handles in the scene to make the
Shape smaller, and move and
rotate the centroid to lift the
Shape up to the top of the rail.
xử lý trong hiện trường để thực hiện
Hình dạng nhỏ hơn, và di chuyển và
xoay tâm để nâng
Định hình lên đến đỉnh của đường ray.
Roaring Tide Productions
Archimatix User Guide
!46
Sản phẩm thủy triều gầm
Hướng dẫn sử dụng Archimatix
!46
Page 49

6. The Node Graph Editor
6. Trình chỉnh sửa biểu đồ nút
Now let’s change the material of the rail sides.
Bây giờ hãy thay đổi vật liệu của các mặt đường ray.
Step 6.26: On the Extrude node palette for the rail sides, click on the icon button to the
Bước 6.26: Trên bảng nút Extrude cho các cạnh đường ray, nhấp vào nút biểu tượng để

right of the Material input parameter. This will automatically add a MaterialTool
node to the graph and connect it to the Material input.
bên phải tham số đầu vào Vật liệu. Điều này sẽ tự động thêm MaterialTool
nút vào biểu đồ và kết nối nó với đầu vào Vật liệu.
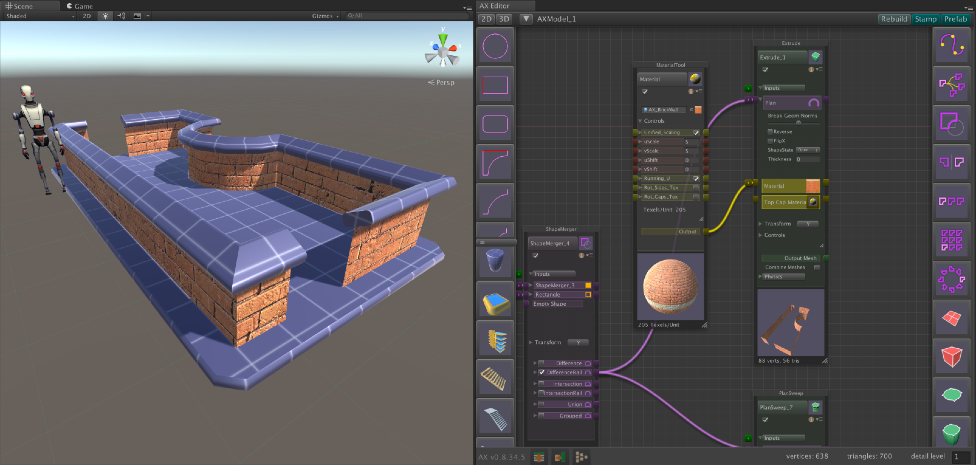


Step 6.27: On the MaterialTool node palette for the rail sides, click on the button to open
Bước 6.27: Trên bảng nút MaterialTool cho các cạnh đường ray, nhấp vào nút để mở
the Unity material browser window. Choose AX_BrickWall. You can use the scale
and shift parameters in the MaterialTool node Controls foldout to adjust the look.
cửa sổ trình duyệt tài liệu Unity. Chọn AX_BrickWall. Bạn có thể sử dụng cân
và thay đổi các tham số trong màn hình điều khiển của nút MaterialTool để điều chỉnh giao diện.
Step 6.28: In a similar way, add materials to the PlanSweep node for the handrail and to the
Bước 6.28: Theo cách tương tự, thêm vật liệu vào nút PlanSweep cho tay vịn và vào nút
Extrude node for the floor slab, perhaps AX_Wood01 and AX_StriatedMarble,
respectively.
Nút đùn cho tấm sàn, có thể là AX_Wood01 và AX_StriateMarble,
tương ứng.
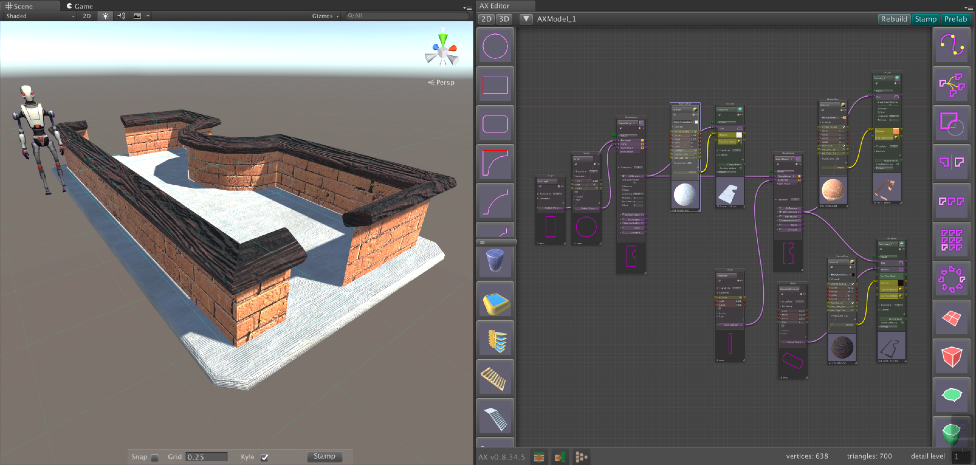
Roaring Tide Productions
Archimatix User Guide
!47
Sản phẩm thủy triều gầm
Hướng dẫn sử dụng Archimatix
!47
Page 50

6. The Node Graph Editor
6. Trình chỉnh sửa biểu đồ nút
If we want to change this model to be more like a room with door openings, we can extrude
the rail walls up.
Nếu chúng ta muốn thay đổi mô hình này giống một căn phòng có cửa mở hơn, chúng ta có thể đùn
các bức tường đường sắt lên.
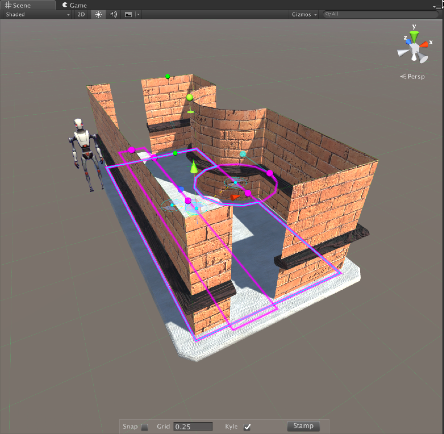
Step 6.29: Click on the rail walls in the scene or
Bước 6.29: Click vào bức tường ray trong cảnh hoặc
on the Extrude node in the Node
Graph Editor. Click and drag the
green knob in the scene to increase
the height of the wall.
trên nút Extrude trong Nút
Trình chỉnh sửa đồ thị. Bấm và kéo
núm màu xanh lá cây trong cảnh để tăng
chiều cao của bức tường.


Step 6.30: Click on the Difference output of the first ShapeMerger and connect it to a new
Bước 6.30: Nhấp vào đầu ra Khác biệt của ShapeMerger đầu tiên và kết nối nó với một cái mới
Extrude node from the right sidebar menu. Move the new Extrude node over near
the rail walls’ Extrude. Connect the output of the brick material to the new
Extrude.
Nút đùn từ menu thanh bên phải. Di chuyển nút Extrude mới tới gần
Extrude của bức tường đường sắt. Kết nối đầu ra của vật liệu gạch với mới
Đùn.
Step 6.31: Turn the Top Cap and Bottom Cap of the new Extrude off and the Backfaces on. In
Bước 6.31: Tắt Top Cap và Bottom Cap của Extrude mới và bật Backfaces. trong
the scene, lift the new Extrude up until it is atop the rail walls. Adjust the height
of the new Extrude.
hiện trường, nâng Extrude mới lên cho đến khi nó ở trên các bức tường đường ray. Điều chỉnh chiều cao
của Extrude mới.
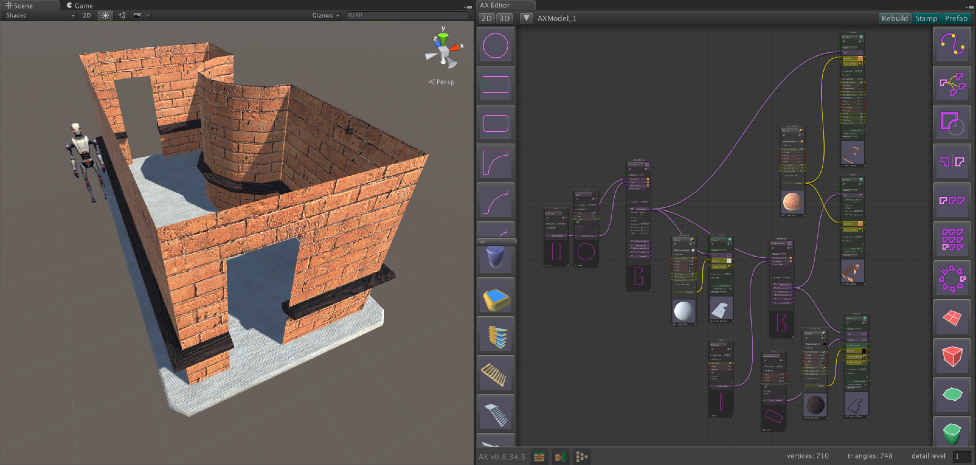
Roaring Tide Productions
Archimatix User Guide
!48
Sản phẩm thủy triều gầm
Hướng dẫn sử dụng Archimatix
!48
Page 51

6. The Node Graph Editor
6. Trình chỉnh sửa biểu đồ nút
Repeating Repeating
Lặp đi lặp lại
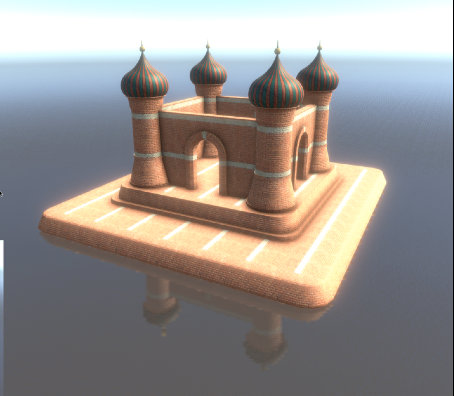
In Chapter 4, we looked at the Domino House,
which used Repeaters to allow us to expand the
building, adding floors and columns as we dragged
the Size handles. Now, let’s take a quick look at how
to use Repeaters in the Node Graph Editor to make
our own parametric building. To do this, we will use
parametric props from the Library and connect
them into a GridRepeater to make a sort of castle
with arched openings.
Trong Chương 4, chúng ta đã xem xét Ngôi nhà Domino,
đã sử dụng Repeater để cho phép chúng tôi mở rộng
xây dựng, thêm tầng và cột khi chúng tôi kéo
tay cầm Kích thước. Bây giờ, chúng ta hãy xem nhanh cách
sử dụng Bộ lặp trong Trình chỉnh sửa biểu đồ nút để thực hiện
tòa nhà tham số của riêng chúng ta. Để làm điều này, chúng tôi sẽ sử dụng
đạo cụ tham số từ Thư viện và kết nối
chúng thành GridRepeater để tạo thành một loại lâu đài
với các lỗ hình vòm.



Step 6.32: In a new scene, instantiate a TowerWithOnionDome from the 3D
Bước 6.32: Trong cảnh mới, khởi tạo TowerWithOnionDome từ 3D

Library left-hand sidebar.
Thư viện bên trái.

Step 6.33: Connect the output of the tower to a GridRepeater_Node in the right-
Bước 6.33: Kết nối đầu ra của tháp với GridRepeater_Node ở bên phải-
hand sidebar node menu.
menu nút bên tay.
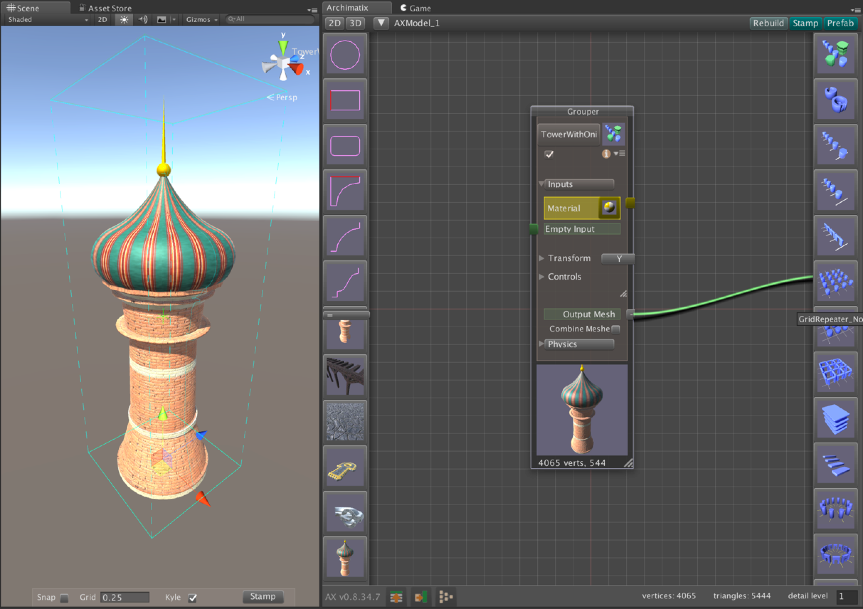

Feel free to open the TowerWithOnionDome Grouper and see how it was assembled with its
own set of nodes, including FreeCurve, Lathe and molding profiles. However, part of the
beauty of Grouper and Library items is the ability to work with pre-formed parametric
objects to give you a head start on environment building.
Vui lòng mở TowerWithOnionDome Grouper và xem nó được lắp ráp như thế nào với
tập hợp các nút riêng, bao gồm FreeCurve, Lathe và các hồ sơ đúc. Tuy nhiên, một phần của
vẻ đẹp của các mục Grouper và Library là khả năng làm việc với tham số được tạo sẵn
giúp bạn có bước khởi đầu thuận lợi trong việc xây dựng môi trường.
Roaring Tide Productions
Archimatix User Guide
!49
Sản phẩm thủy triều gầm
Hướng dẫn sử dụng Archimatix
!49
Page 52


6. The Node Graph Editor
6. Trình chỉnh sửa biểu đồ nút
Step 6.34: Hit the F key to frame the grid of towers in the scene.
Bước 6.34: Nhấn phím F để tạo khung lưới các tháp trong khung cảnh.
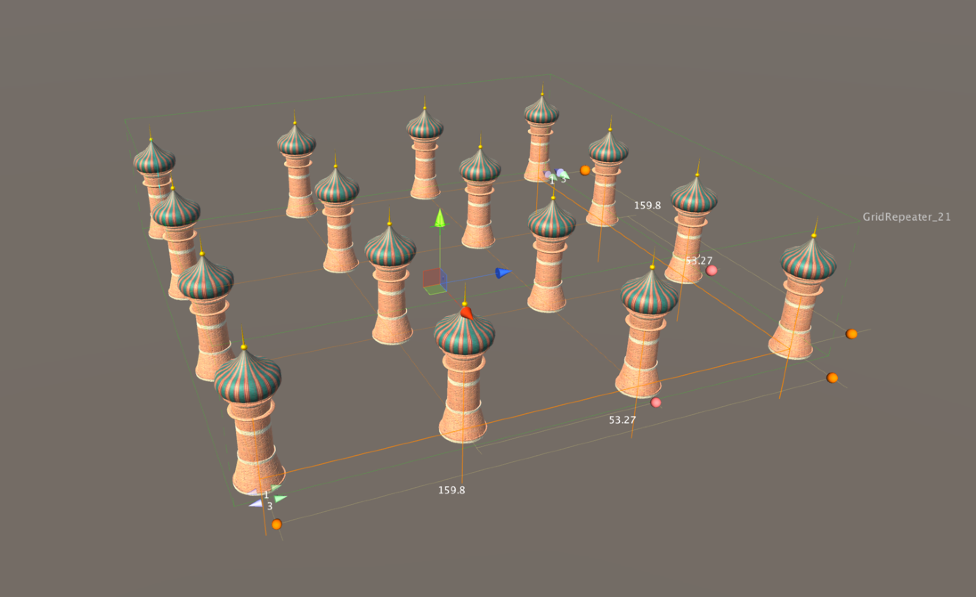


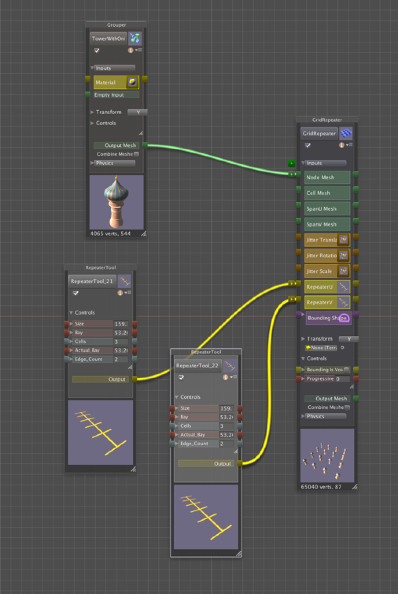
The default grid sizing is based on the size of the
object that is initially connected to it. You can
modify this sizing in the scene by dragging the
orange point handles. The key parameters of the
GridRepeater are the overall Size and the size of a
typical Bay, or cell of the grid. Sizes in the X and Z
axes are controlled independently.
Kích thước lưới mặc định dựa trên kích thước của
đối tượng ban đầu được kết nối với nó. bạn có thể
sửa đổi kích thước này trong cảnh bằng cách kéo
tay cầm điểm màu cam. Các thông số chính của
GridRepeater là Kích thước tổng thể và kích thước của một
Vịnh điển hình, hoặc ô của lưới. Kích thước X và Z
trục được điều khiển độc lập.
When you adjust the Bay size, the Size increases.
When you adjust the Size, the additional bays are
added, while the Actual_Bay size remains as close as
possible to the Bay that had been set.
Khi bạn điều chỉnh kích thước Bay, Kích thước sẽ tăng lên.
Khi bạn điều chỉnh Kích thước, các khoang bổ sung sẽ
đã thêm, trong khi kích thướcActual_Bay vẫn gần bằng
có thể đến Vịnh đã được thiết lập.
The parameters are not found in the GridRepeater
node, but in RepeaterTool nodes that feed into it. For
the GridRepeater, there are two RepeaterTool nodes
for the two axes. These tool nodes were added to
your graph automatically when you created the
GridRepeater.
Không tìm thấy các tham số trong GridRepeater
nút, nhưng trong các nút RepeaterTool cung cấp dữ liệu cho nó. cho
GridRepeater, có hai nút RepeaterTool
cho hai trục. Các nút công cụ này đã được thêm vào
biểu đồ của bạn tự động khi bạn tạo
GridRepeater.
Roaring Tide Productions
Archimatix User Guide
!50
Sản phẩm thủy triều gầm
Hướng dẫn sử dụng Archimatix
!50
Page 53


6. The Node Graph Editor
6. Trình chỉnh sửa biểu đồ nút
Let’s add some walls to our castle.
Hãy thêm một số bức tường vào lâu đài của chúng ta.
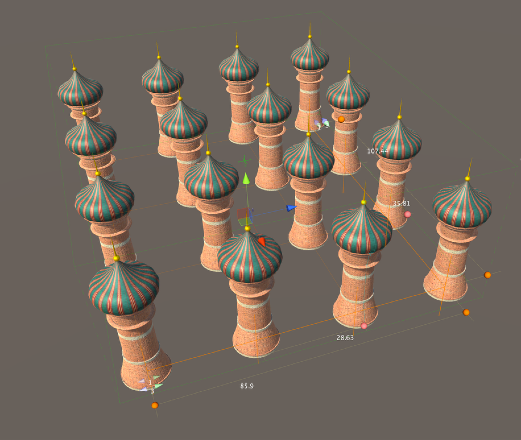
Step 6.35: Adjust the Bay handles to
Bước 6.35: Điều chỉnh tay cầm Bay thành


bring the towers closer
together so that the
arrangement looks like the
image to the right.
đưa các tòa tháp đến gần hơn
cùng nhau sao cho
sự sắp xếp trông giống như
hình ảnh bên phải.



Step 6.36: Instantiate an Arch_02 object from the 3D Library.
Bước 6.36: Khởi tạo đối tượng Arch_02 từ Thư viện 3D.
Step 6.37: Connect its output to both the SpanU Mesh and the SpanV Mesh inputs
Bước 6.37: Kết nối đầu ra của nó với cả đầu vào SpanU Mesh và SpanV Mesh
of the GridRepeater node.
của nút GridRepeater.
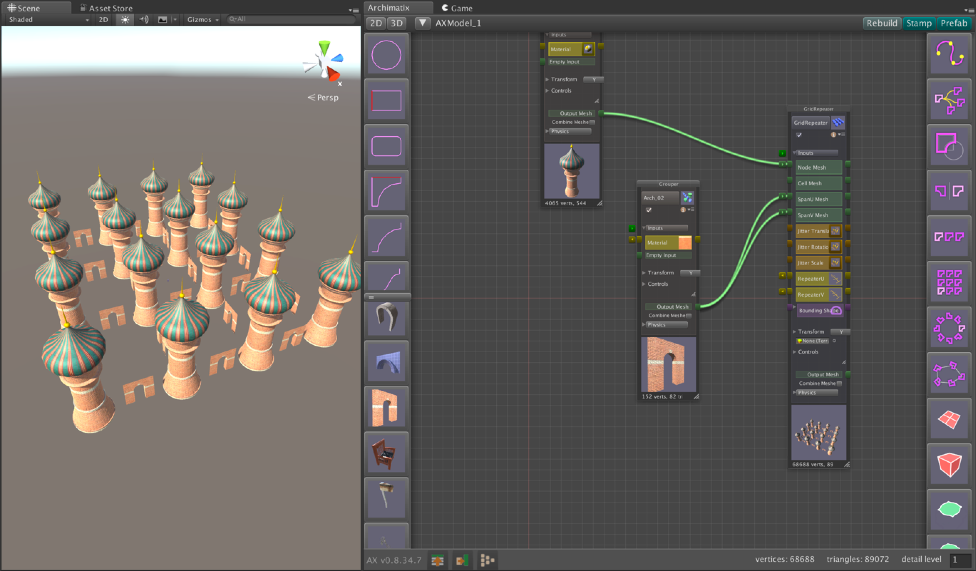

Roaring Tide Productions
Archimatix User Guide
!51
Sản phẩm thủy triều gầm
Hướng dẫn sử dụng Archimatix
!51
Page 54

6. The Node Graph Editor
6. Trình chỉnh sửa biểu đồ nút
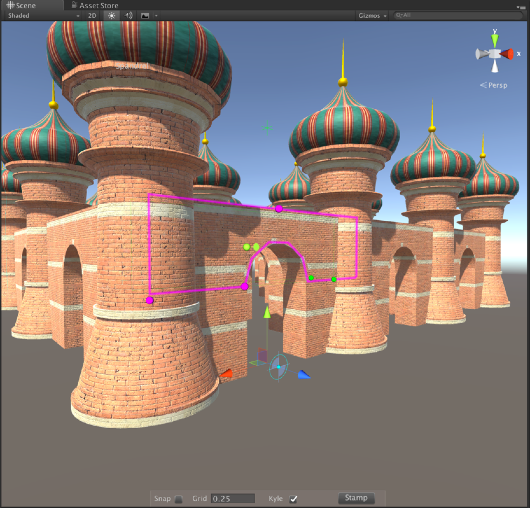
Step 6.38: Click on any one of the
Bước 6.38: Bấm vào bất kỳ một trong các
arches in the scene and
adjust its size to fill the
spaces between the towers.
vòm trong cảnh và
điều chỉnh kích thước của nó để lấp đầy
khoảng trống giữa các tòa tháp.




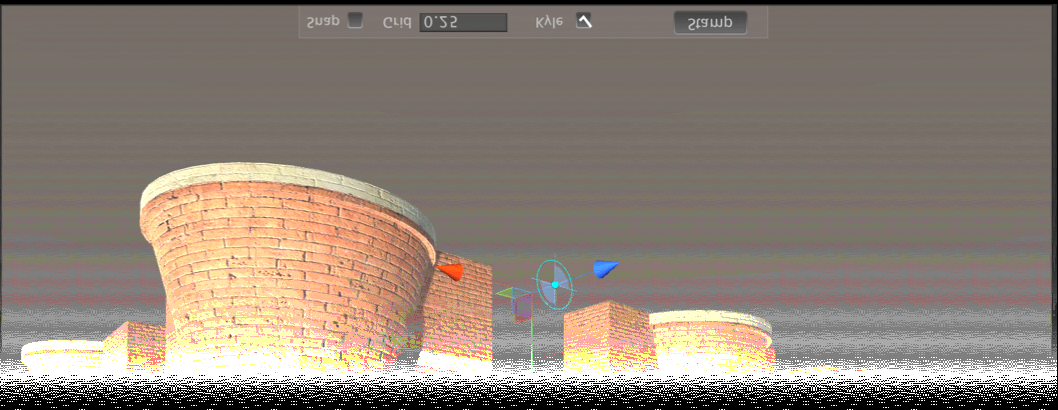
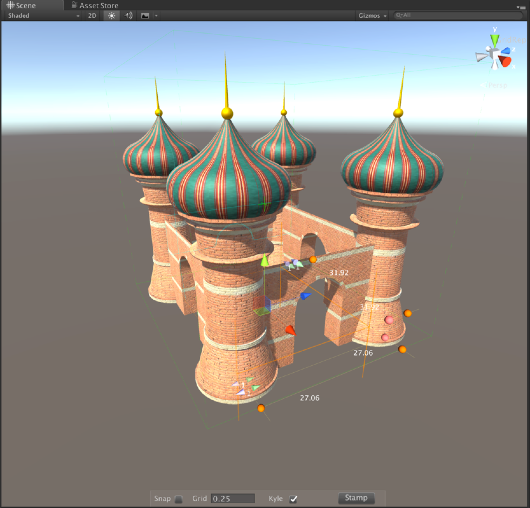
Step 6.39: Reduce the Size of the
Bước 6.39: Giảm kích thước của

GridRepeater in both
directions until there are
only four towers remaining.
GridRepeater ở cả hai
hướng dẫn cho đến khi có
chỉ còn lại bốn tòa tháp.

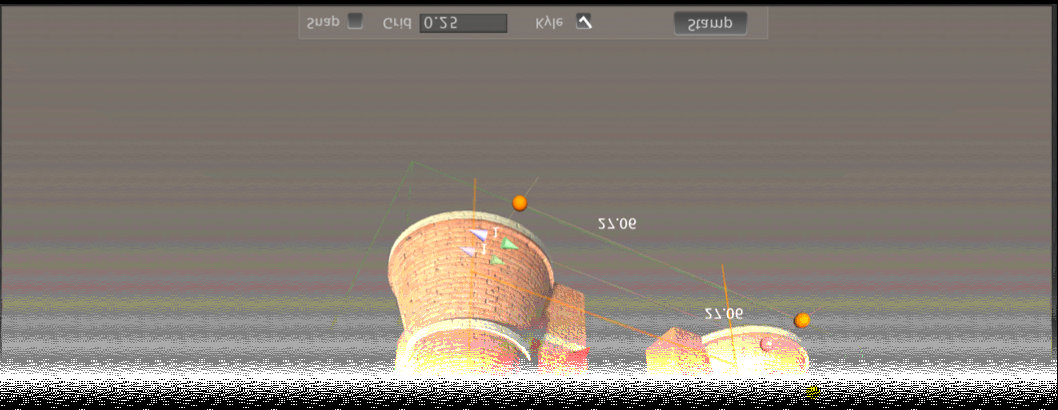
Arch_02 does not come with a top piece, since it is intended to be an infill object. Using 2D
Shapes and the same RepeaterTool nodes, we can make a top piece with a molding profile, as
well as a base.
Arch_02 không đi kèm với phần trên cùng vì nó được dùng để làm vật lấp đầy. Sử dụng 2D
Với các hình dạng và các nút RepeaterTool giống nhau, chúng ta có thể tạo phần trên cùng bằng một cấu hình đúc, như
cũng như một cơ sở.
Roaring Tide Productions
Archimatix User Guide
!52
Sản phẩm thủy triều gầm
Hướng dẫn sử dụng Archimatix
!52
Page 55


6. The Node Graph Editor
6. Trình chỉnh sửa biểu đồ nút
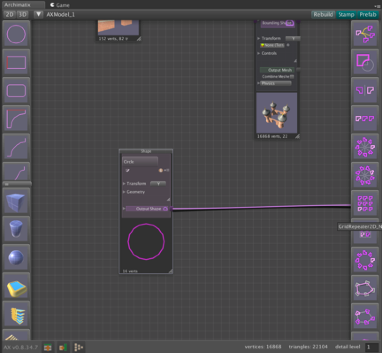

Step 6.40: Instantiate a Circle object
Bước 6.40: Khởi tạo đối tượng Vòng tròn
from the 2D Library.
từ Thư viện 2D.


Step 6.41: Connect the output of the
Bước 6.41: Kết nối đầu ra của

Circle to a GridRepeater2D
from the right-hand sidebar
node menu.
Vòng tròn đến GridRepeater2D
từ thanh bên phải
menu nút.

Step 6.42: Click on the “Show All Nodes” button in
Bước 6.42: Nhấp vào nút “Hiển thị tất cả các nút” trong
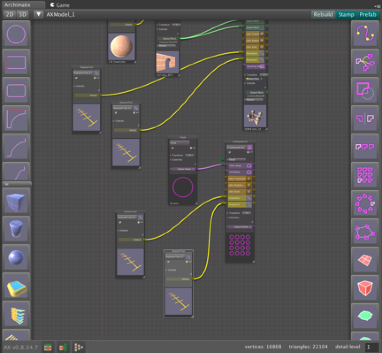
the lower left-hand corner of the Node
Graph Editor window. Arrange the
RepeaterTool nodes to look like the image to
the right.
góc dưới bên trái của Nút
Cửa sổ soạn thảo đồ thị. Sắp xếp các
Các nút RepeaterTool trông giống như hình ảnh
bên phải.


Step 6.43: Delete the two RepeaterTool
Bước 6.43: Xóa hai RepeaterTool
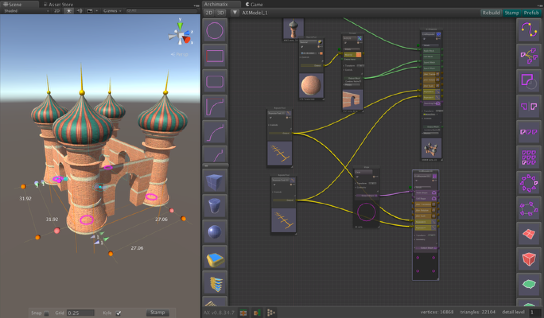
nodes that are feeding into
the GridRepeater2D and
connect the ones that are
feeding into the
GridRepeater into the
GridRepeater2D.
các nút đang ăn vào
GridRepeater2D và
kết nối những cái đó
cho ăn vào
GridRepeater vào
GridRepeater2D.
Now the circles will always be
positioned where the towers are,
regardless of how you modify the grid.
Bây giờ các vòng tròn sẽ luôn như vậy
được đặt ở vị trí của các tòa tháp,
bất kể bạn sửa đổi lưới như thế nào.
Roaring Tide Productions
Archimatix User Guide
!53
Sản phẩm thủy triều gầm
Hướng dẫn sử dụng Archimatix
!53
Page 56

6. The Node Graph Editor
6. Trình chỉnh sửa biểu đồ nút

Step 6.44: Resize the Circle that is feeding into the GridRepeater2D so that it is slightly
Bước 6.44: Thay đổi kích thước Vòng tròn đang nạp vào GridRepeater2D sao cho hơi nhỏ
bigger than the base of the tower.
lớn hơn chân tháp.

Step 6.45: Instantiate a Rectangle from the 2D Library left-hand sidebar and size
Bước 6.45: Tạo một Hình chữ nhật từ thanh bên và kích thước bên trái của Thư viện 2D

it so that its corners are under the towers.
sao cho các góc của nó nằm dưới các tháp.
Step 6.46: Multi-select the GridRepeater2D and Rectangle nodes and then click on
Bước 6.46: Chọn nhiều nút GridRepeater2D và Rectangle rồi nhấp vào

the ShapeMerger node in the right-hand sidebar. Click on the Solid/Void
toggle button to make the circles solid.
nút ShapeMerger ở thanh bên phải. Bấm vào Solid/Void
nút chuyển đổi để làm cho các vòng tròn trở nên rắn chắc.

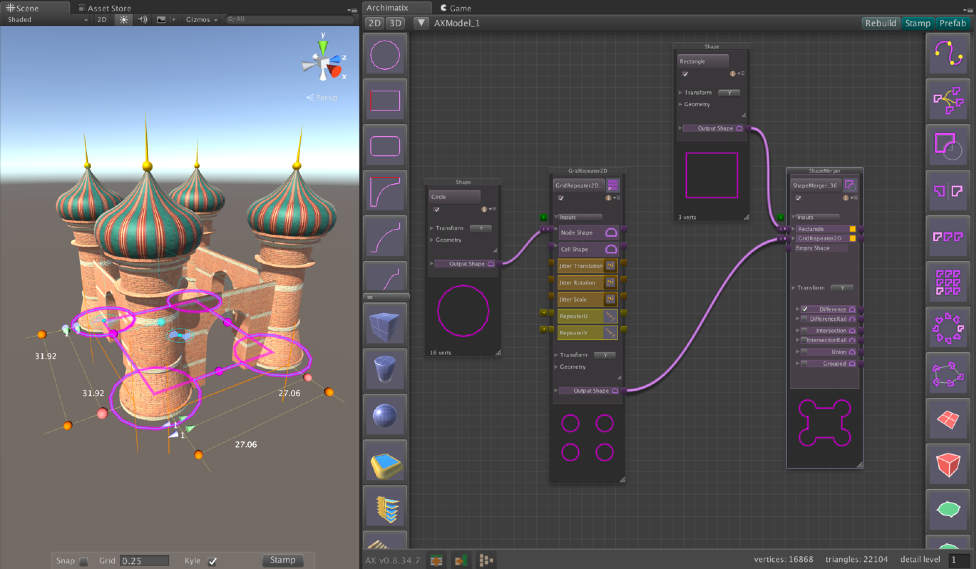




We now have a composite Shape that is the outline of the castle in plan. This Plan Shape
will generate the base and top walkway for the castle.
Bây giờ chúng ta có một Hình dạng tổng hợp là đường viền của lâu đài trong kế hoạch. Hình dạng kế hoạch này
sẽ tạo ra nền móng và lối đi trên cùng cho lâu đài.
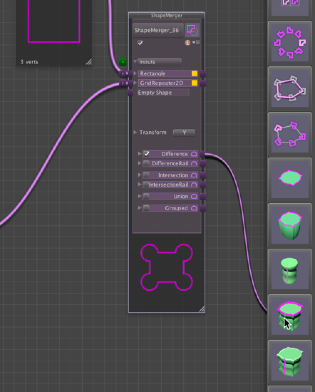
Step 6.47: Connect the output of the ShapeMerger to a
Bước 6.47: Kết nối đầu ra của ShapeMerger với một
PlanSweep_Plan node from the right-hand sidebar
menu.
Nút PlanSweep_Plan từ thanh bên phải
thực đơn.

Roaring Tide Productions
Archimatix User Guide
!54
Sản phẩm thủy triều gầm
Hướng dẫn sử dụng Archimatix
!54
Page 57

6. The Node Graph Editor
6. Trình chỉnh sửa biểu đồ nút

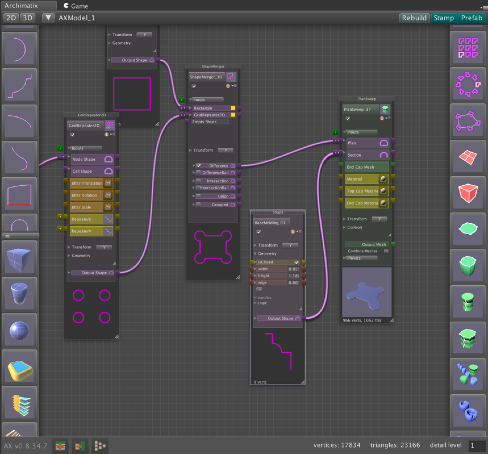
Step 6.48: Create an instance
Bước 6.48: Tạo một phiên bản
of BaseMolding_02.
Connect it to the
Section input of the
PlanSweep node.
của BaseMoulding_02.
Kết nối nó với
Phần đầu vào của
Nút PlanSweep.

Step 6.49: In the Inspector, set the Material
Bước 6.49: Trong Thanh tra, đặt Vật liệu
(Default) to AX_BrickWall.
(Mặc định) thành AX_BrickWall.


Step 6.50: Open the Plan input foldout of the PlanSweep and adjust the Offset until the
Bước 6.50: Mở nếp gấp đầu vào Kế hoạch của PlanSweep và điều chỉnh Offset cho đến khi

PlanSweep object looks like the image below.
Đối tượng PlanSweep trông như hình dưới đây.
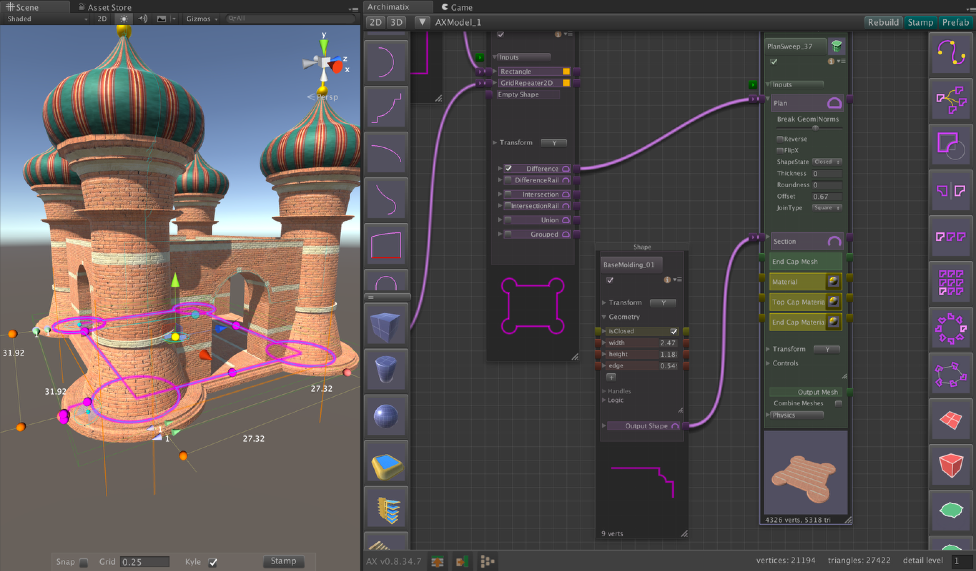

Step 6.51: Adjust the width of the BaseMolding_02 node to add to the parallel edge.
Bước 6.51: Điều chỉnh độ rộng của nút BaseMolding_02 để thêm vào cạnh song song.
Roaring Tide Productions
Archimatix User Guide
!55
Sản phẩm thủy triều gầm
Hướng dẫn sử dụng Archimatix
!55
Page 58
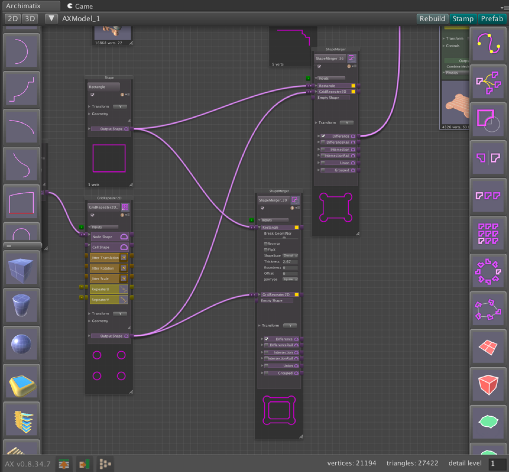

6. The Node Graph Editor
6. Trình chỉnh sửa biểu đồ nút
Step 6.52: Multi-select the Rectangle and
Bước 6.52: Chọn nhiều hình chữ nhật và

the ShapeMerger with the four
Circles again, and click on the
ShapeMerger icon in the righthand sidebar menu. Click on
the Solid/Void toggle button to
make the circles solid.
ShapeMerger với bốn
Vòng tròn một lần nữa và nhấp vào
Biểu tượng ShapeMerger trong menu thanh bên phải. Bấm vào
nút chuyển đổi Solid/Void để
làm cho các vòng tròn vững chắc.


Step 6.53: Open the Plan input foldout
Bước 6.53: Mở màn hình đầu vào Kế hoạch
and set a thickness for the
incoming Rectangle.
và thiết lập độ dày cho
Hình chữ nhật đến.


We now have a Shape to use for the upper walkway and parapet. For this we will use another
PlanSweep.
Bây giờ chúng ta có một Hình dạng để sử dụng cho lối đi phía trên và lan can. Đối với điều này, chúng tôi sẽ sử dụng một cái khác
Kế hoạch Quét.


Step 6.54: Connect the new ShapeMerger’s Difference output to a PlanSweep_Plan
Bước 6.54: Kết nối đầu ra Sự khác biệt của ShapeMerger mới với PlanSweep_Plan
from the right-hand sidebar node menu.
từ menu nút thanh bên phải.

Step 6.55: From the left-hand sidebar, select the CymaReversaMolding profile Shape
Bước 6.55: Từ thanh bên trái, chọn CymaReversaMolding profile Shape
and connect its output to the Section input of the new PlanSweep.
và kết nối đầu ra của nó với đầu vào Phần của PlanSweep mới.
Step 6.56: Select the PlanSweep object in the scene and move it up above the arch
Bước 6.56: Chọn đối tượng PlanSweep trong cảnh và di chuyển nó lên phía trên vòm
walls. Adjust the Lip Top, Lip Edge and Offset of the PlanSweep.
những bức tường. Điều chỉnh Lip Top, Lip Edge và Offset của PlanSweep.


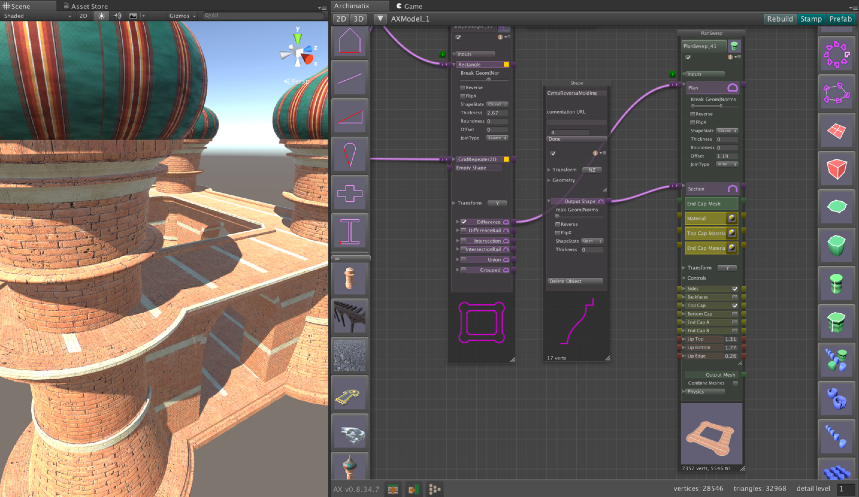

Roaring Tide Productions
Archimatix User Guide
!56
Sản phẩm thủy triều gầm
Hướng dẫn sử dụng Archimatix
!56
Page 59

6. The Node Graph Editor
6. Trình chỉnh sửa biểu đồ nút
Step 6.57: Add a new MaterialTool to the Top Cap Material of the new PlanSweep. Set the
Bước 6.57: Thêm MaterialTool mới vào Top Cap Material của PlanSweep mới. Đặt
material to AX_MedievalWall.
vật liệu vào AX_MedievalWall.

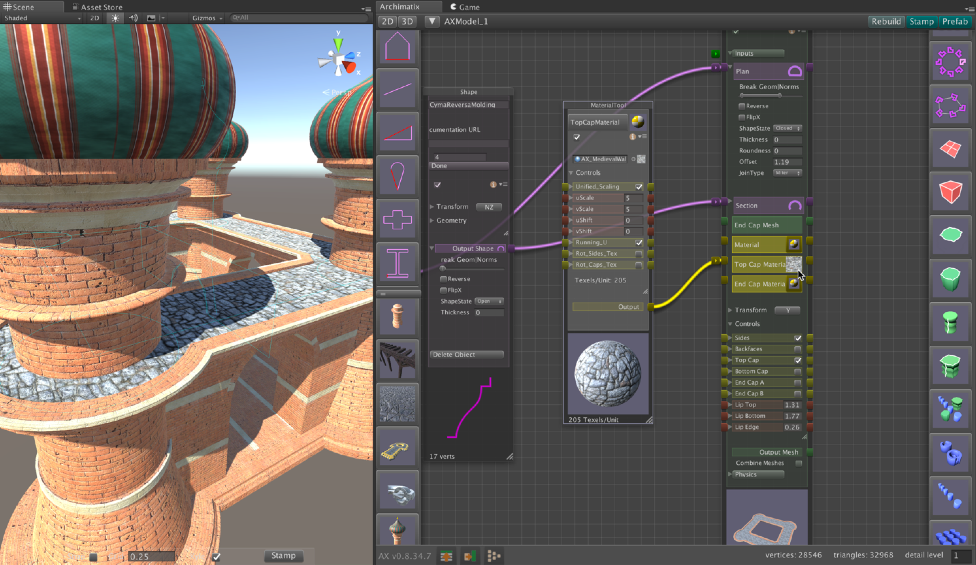



The CymaReversaMolding is a little small for the massing of this castle. Let’s make it a bit
more muscular so that it can hold up some sizable battlements.
CymaReversaMolding hơi nhỏ so với khối lượng của lâu đài này. Hãy làm cho nó một chút
cơ bắp hơn để có thể chứa được một số lỗ châu mai lớn.
Step 6.58: Select the CymaReversaMolding node in the Node Graph Editor and hit the F key
Bước 6.58: Chọn nút CymaReversaMolding trong Node Graph Editor và nhấn phím F
to frame it in the scene. Pull the upper handle upwards and outwards.
để đóng khung nó trong cảnh. Kéo tay cầm phía trên lên trên và ra ngoài.

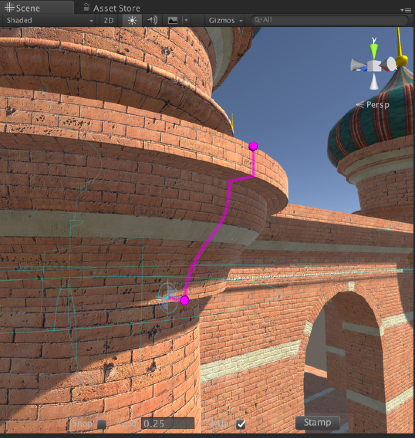
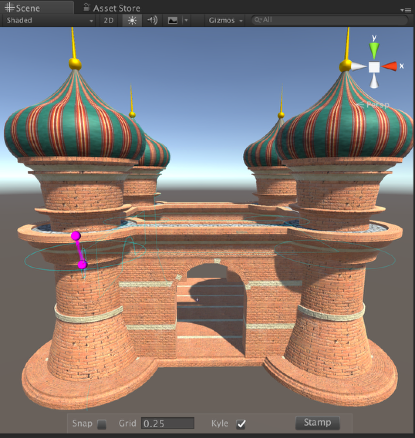


Roaring Tide Productions
Archimatix User Guide
!57
Sản phẩm thủy triều gầm
Hướng dẫn sử dụng Archimatix
!57
Page 60

6. The Node Graph Editor
6. Trình chỉnh sửa biểu đồ nút
As a final step, let’s add some battlements on top.
Bước cuối cùng, hãy thêm một số lỗ châu mai lên trên.
Step 6.59: Connect the output of the upper deck ShapeMerger to a PlanRepeater_Plan node in
Bước 6.59: Kết nối đầu ra của ShapeMerger tầng trên với nút PlanRepeater_Plan trong
the right-hand sidebar menu.
menu thanh bên phải.
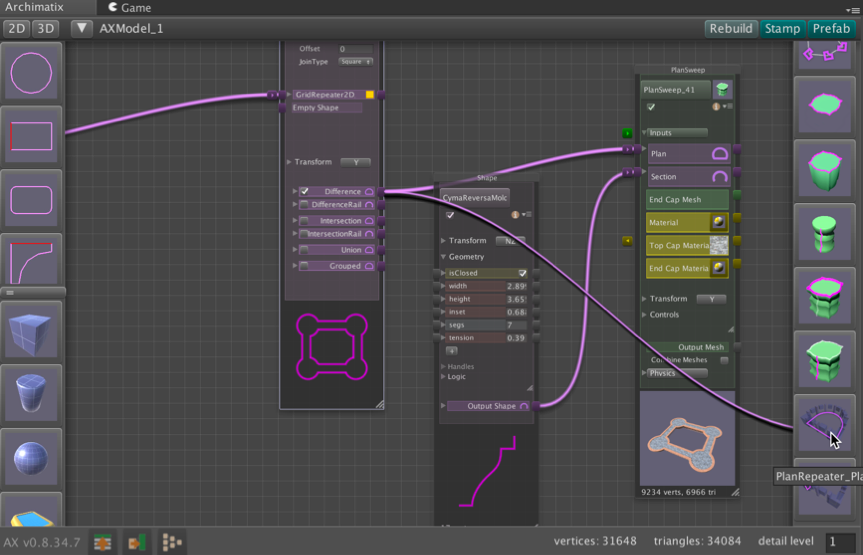


Step 6.60: Instantiate a Cube by clicking on it in the left-hand 3D Library menu.
Bước 6.60: Khởi tạo khối bằng cách nhấp vào khối đó trong menu Thư viện 3D bên trái.
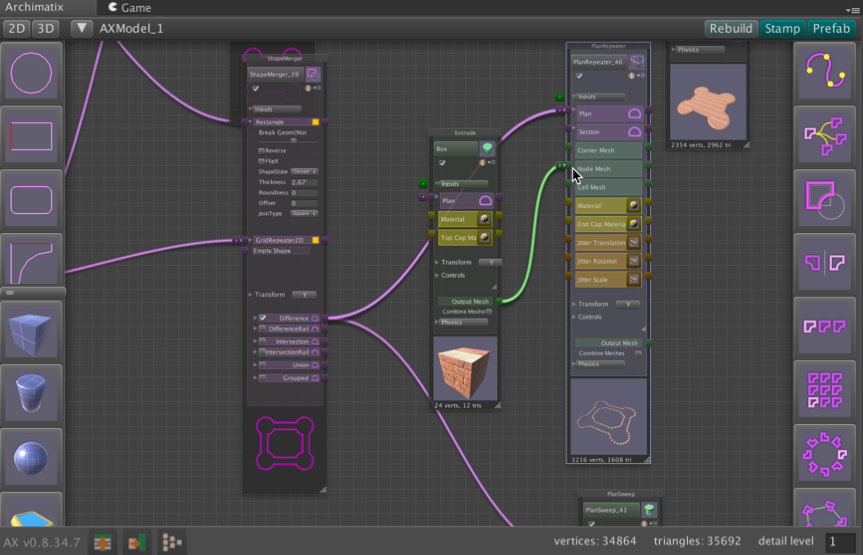

Roaring Tide Productions
Archimatix User Guide
!58
Sản phẩm thủy triều gầm
Hướng dẫn sử dụng Archimatix
!58
Page 61


6. The Node Graph Editor
6. Trình chỉnh sửa biểu đồ nút
Step 6.61: Select the new PlanRepeater and lift it up in the Y-axis until it is sitting atop the
Bước 6.61: Chọn PlanRepeater mới và nâng nó lên theo trục Y cho đến khi nó nằm trên đỉnh
upper deck. Open the Plan input foldout in the PlanRepeater node and adjust the
Offset to move the battlements back a little. Select the Cube node and turn off
Bevels Unified, then set the Top Bevel to about .15.
tầng trên. Mở phần đầu vào Kế hoạch trong nút PlanRepeater và điều chỉnh
Bù lại để di chuyển các lỗ châu mai về phía sau một chút. Chọn nút Cube và tắt
Góc xiên thống nhất, sau đó đặt Góc xiên trên cùng thành khoảng 0,15.
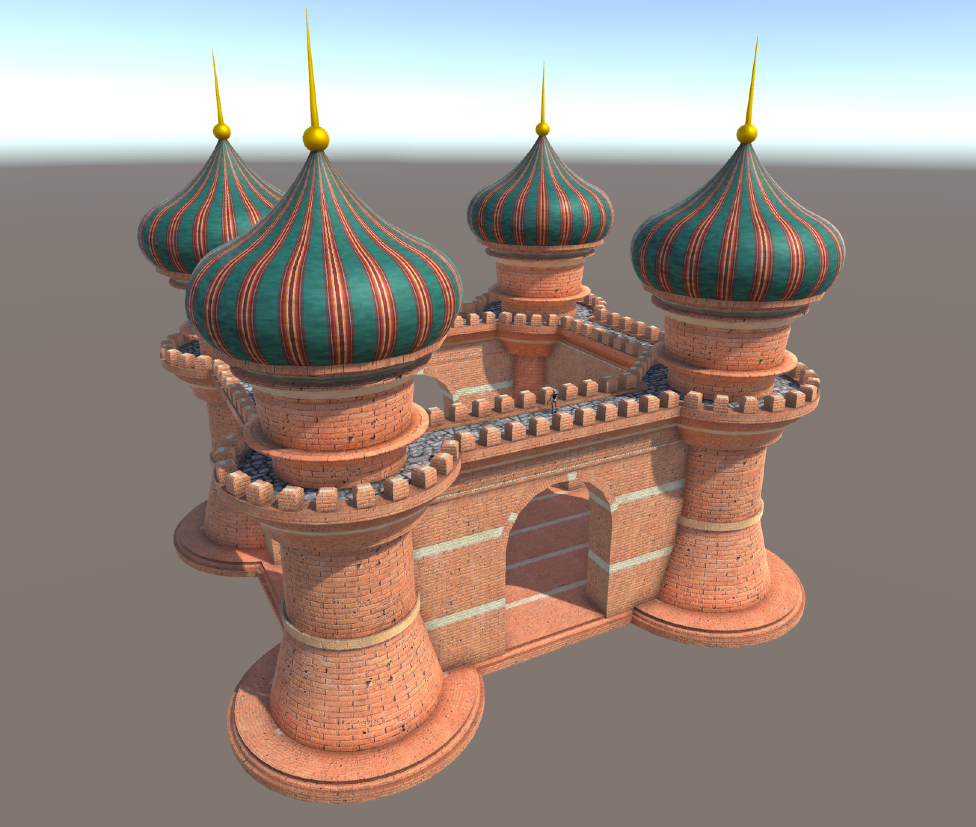

For the final shot above, Ambient Occlusion was added to the scene’s Main Camera from
Unity’s Cinematic Image Effects, a free download from the Asset Store.
Đối với cảnh quay cuối cùng ở trên, tính năng Ambient Occlusion đã được thêm vào Camera chính của cảnh từ
Hiệu ứng hình ảnh điện ảnh của Unity, bản tải xuống miễn phí từ Asset Store.
As our graphs become richer and more complex, it is clear that we could benefit from a
node that groups and hides portions of the graph. Fortunately, Archimatix ships with a node
that does just this. In the next chapter, we will take a look at the Grouper node.
Khi đồ thị của chúng ta trở nên phong phú hơn và phức tạp hơn, rõ ràng là chúng ta có thể hưởng lợi từ một
nút nhóm và ẩn các phần của biểu đồ. May mắn thay, Archimatix có kèm theo một nút
cái đó chỉ làm được điều này Trong chương tiếp theo, chúng ta sẽ xem xét nút Grouper.
Roaring Tide Productions
Archimatix User Guide
!59
Sản phẩm thủy triều gầm
Hướng dẫn sử dụng Archimatix
!59
Page 62
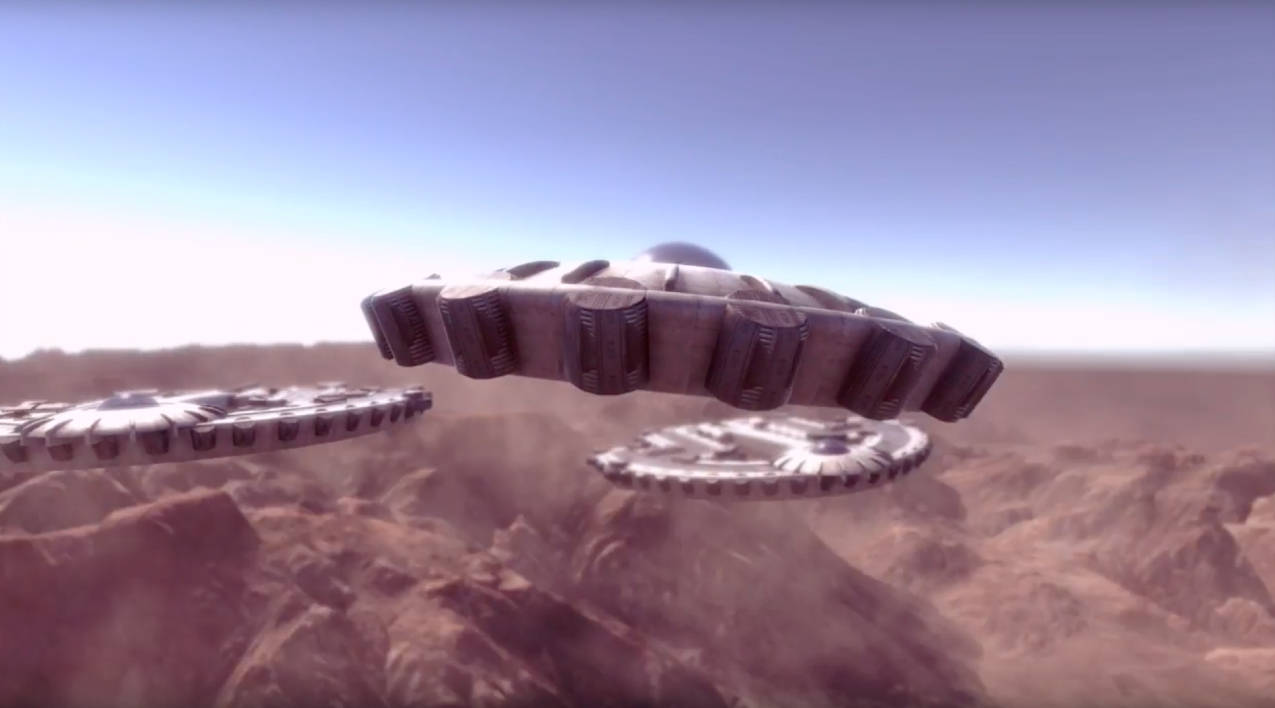
6. The Node Graph Editor
6. Trình chỉnh sửa biểu đồ nút


7. Group Dynamics
7. Động lực nhóm
As your parametric models become richer and more complex,
you can use the powerful Grouper node to organize the
Archimatix graph into a series of nested subgraphs. Each Grouper
is a self-contained parametric object that has an interface defined by
the Grouper’s input parameters.
Khi các mô hình tham số của bạn trở nên phong phú và phức tạp hơn,
bạn có thể sử dụng nút Grouper mạnh mẽ để sắp xếp
Đồ thị Archimatix thành một loạt các đồ thị con lồng nhau. Mỗi con cá mú
là một đối tượng tham số độc lập có giao diện được xác định bởi
các tham số đầu vào của Grouper.
Many of the Library items you have worked with so far are Groupers. For
example, the RicketyStaircase and the ScifiPlatform are Groupers with subnodes
that have been saved to the Library.
Nhiều mục trong Thư viện mà bạn đã làm việc cho đến nay là Nhóm. cho
ví dụ: RicketyStaircase và ScifiPlatform là Nhóm có các nút con
đã được lưu vào Thư viện.
A Grouper node may be thought of as a container that can hold other nodes, including other
Grouper nodes, inside of it. Once a node has been placed inside a Grouper, it cannot have a
direct connection with another node outside of the Grouper. Instead, a proxy parameter can
be added to the list of the Grouper’s parameters to relay the connection between nodes
inside and outside of the Grouper.
Nút Grouper có thể được coi là một thùng chứa có thể chứa các nút khác, bao gồm cả các nút khác.
Các nút nhóm, bên trong nó. Khi một nút đã được đặt bên trong Grouper, nó không thể có
kết nối trực tiếp với một nút khác bên ngoài Grouper. Thay vào đó, một tham số proxy có thể
được thêm vào danh sách các tham số của Grouper để chuyển tiếp kết nối giữa các nút
bên trong và bên ngoài cá mú.
To initiate a Grouper, you can multi-select nodes and then click the Grouper icon in the right
sidebar of the Node Graph Editor window. The selected nodes will disappear as the new
Grouper node appears in the graph. To see the nodes inside, double-click on the Grouper
node, expanding it. Nodes can be popped back out of the Grouper by dragging them to the
left of the Grouper node. Nodes can be added to a Grouper by dragging and dropping them
over the Grouper node.
Để bắt đầu một Nhóm, bạn có thể chọn nhiều nút và sau đó nhấp vào biểu tượng Nhóm ở bên phải
thanh bên của cửa sổ Node Graph Editor. Các nút được chọn sẽ biến mất dưới dạng nút mới
Nút nhóm xuất hiện trong biểu đồ. Để xem các nút bên trong, nhấp đúp chuột vào Grouper
nút, mở rộng nó. Các nút có thể được bật ra khỏi Grouper bằng cách kéo chúng vào
bên trái của nút Grouper. Các nút có thể được thêm vào Grouper bằng cách kéo và thả chúng
qua nút Grouper.
Perhaps the best way to understand node group dynamics is to create a group.
Có lẽ cách tốt nhất để hiểu động lực của nhóm nút là tạo một nhóm.
Roaring Tide Productions
Archimatix User Guide
!60
Sản phẩm thủy triều gầm
Hướng dẫn sử dụng Archimatix
!60
Page 63
7. Group Dynamics
7. Động lực nhóm

Let’s use the Node Graph Editor to create GrayShip, a model that is something like the
SciFiPlatform we instantiated from the Library in Chapter 2 of this guide. In this example,
we will be creating a parametric spaceship that can be used to stamp out dozens of
variations to form an entire fleet.
Hãy sử dụng Node Graph Editor để tạo GrayShip, một mô hình giống như
SciFiPlatform mà chúng tôi đã tạo bản sao từ Thư viện trong Chương 2 của hướng dẫn này. Trong ví dụ này,
chúng tôi sẽ tạo ra một con tàu vũ trụ tham số có thể được sử dụng để tiêu diệt hàng chục
các biến thể để tạo thành một đội tàu hoàn chỉnh.

Step 7.1: In a new scene, instantiate the CathedralPlan from the 2D library by
Bước 7.1: Trong cảnh mới, khởi tạo CathedralPlan từ thư viện 2D bằng cách
either clicking on its icon in the left sidebar of the Node Graph
Editor window or by finding it in the Library window.
hoặc nhấp vào biểu tượng của nó ở thanh bên trái của Biểu đồ nút
cửa sổ soạn thảo hoặc bằng cách tìm nó trong cửa sổ Thư viện.

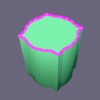
Step 7.2: Extrude the CathedralPlan by connecting it to the Extrude Mesher icon
Bước 7.2: Extrude CathedralPlan bằng cách kết nối nó với biểu tượng Extrude Mesher
in the right sidebar.
ở thanh bên phải.

Step 7.2: Make the CathedralPlan the Plan input of a PlanRepeater by connecting
Bước 7.2: Tạo CathedralPlan đầu vào Plan của PlanRepeater bằng cách kết nối
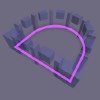

it to the PlanRepeater icon in the right sidebar.
nó vào biểu tượng PlanRepeater ở thanh bên phải.

Step 7.4: Instantiate a Cylinder from the 3D Library and connect it to the Node
Bước 7.4: Khởi tạo Hình trụ từ Thư viện 3D và kết nối nó với Nút
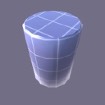
Mesh input of the PlanRepeater.
Đầu vào dạng lưới của PlanRepeater.
At this point, your graph should look similar to the one in the image below.
Tại thời điểm này, biểu đồ của bạn sẽ trông giống như biểu đồ trong hình bên dưới.
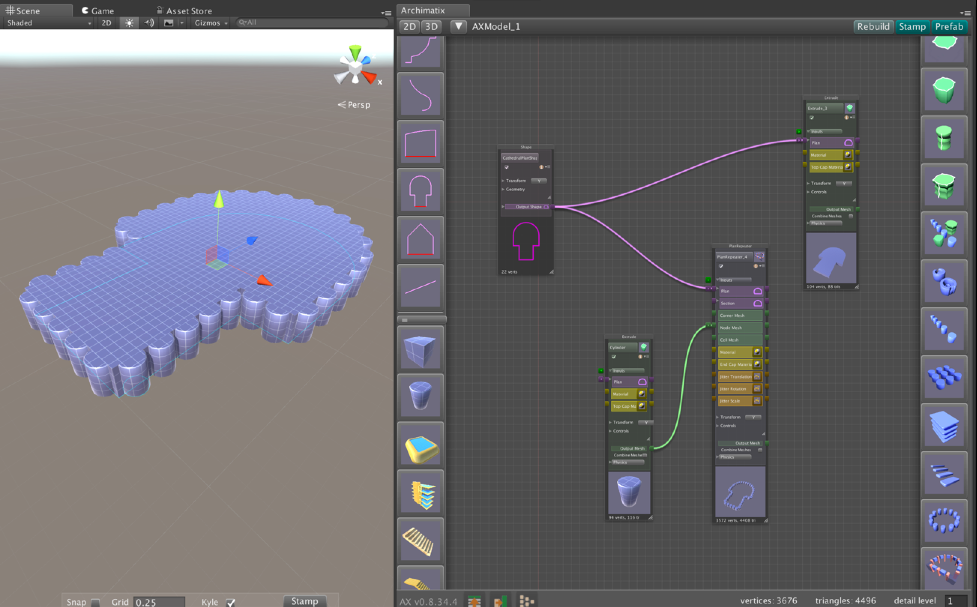

Roaring Tide Productions
Archimatix User Guide
!61
Sản phẩm thủy triều gầm
Hướng dẫn sử dụng Archimatix
!61
Page 64
7. Group Dynamics
7. Động lực nhóm

Lets jump in and group some of these nodes. It will be useful to leave the CathedralPlan
outside of the group, allowing us to have a spaceship model that can take different Shapes as
Plan input.
Hãy nhảy vào và nhóm một số nút này. Sẽ rất hữu ích nếu rời khỏi CathedralPlan
bên ngoài nhóm, cho phép chúng tôi có một mô hình tàu vũ trụ có thể có các Hình dạng khác nhau làm
Lập kế hoạch đầu vào.

Step 7.5: Multi-select the Cylinder, Extrude and PlanRepeater nodes (but not the
Bước 7.5: Chọn nhiều nút Xi lanh, Extrude và PlanRepeater (nhưng không phải nút
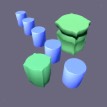
CathedralPlan Shape) and then click on the Grouper icon in the right
sidebar. Multi-selection can be done by either shift-clicking the
nodes or by dragging a rectangle that includes the nodes to select.
CathedralPlan Shape) rồi nhấn vào biểu tượng Cá mú ở bên phải
thanh bên. Có thể thực hiện nhiều lựa chọn bằng cách nhấn shift
các nút hoặc bằng cách kéo một hình chữ nhật bao gồm các nút để chọn.
As soon as you clicked the Grouper icon, the node
graph became visually simpler. All the nodes are
still in the graph, but they are now organized in
such a way as to logically hide a portion of the
graph.
Ngay sau khi bạn nhấp vào biểu tượng Grouper, nút
đồ thị trở nên đơn giản hơn về mặt trực quan. Tất cả các nút đều
vẫn ở trong biểu đồ nhưng giờ đây chúng được sắp xếp theo
một cách để che giấu một cách hợp lý một phần của
đồ thị.
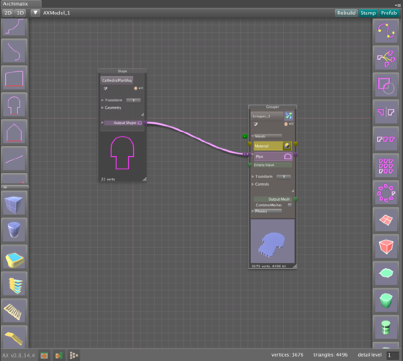

The Grouper serves as a parametric object whose
internal implementation is encapsulated. If we
replace the CathedralPlan with any other Shape, we
will have an Extrude surrounded by Cylinders
conforming to the new Shape.
Grouper phục vụ như một đối tượng tham số có
việc thực hiện nội bộ được đóng gói. Nếu chúng ta
thay thế CathedralPlan bằng bất kỳ Hình dạng nào khác, chúng tôi
sẽ có một Extrude được bao quanh bởi các Xi lanh
phù hợp với Hình dạng mới.

The Plan input parameter was added automatically
to the Grouper to serve as a proxy to relay the
connection between the external Shape and any items inside the Grouper that may want to
use it.
Tham số đầu vào Kế hoạch đã được thêm tự động
tới Grouper để phục vụ như một proxy để chuyển tiếp
kết nối giữa Hình dạng bên ngoài và bất kỳ mục nào bên trong Grouper có thể muốn
sử dụng nó.
Step 7.6: Double-click the thumbnail at the bottom of the Grouper node to expand it.
Bước 7.6: Bấm đúp vào hình thu nhỏ ở cuối nút Grouper để mở rộng nó.
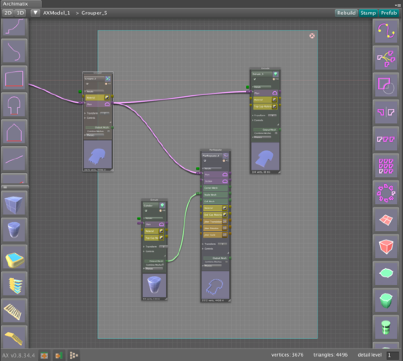

Looking inside the Grouper, we can see that the
Plan parameter has been automatically connected
to the inputs of the nodes that were originally
connected directly to the CathedralPlan Shape.
Nhìn vào bên trong Grouper, chúng ta có thể thấy rằng
Tham số kế hoạch đã được kết nối tự động
tới đầu vào của các nút ban đầu
được kết nối trực tiếp với Hình dạng CathedralPlan.
Notice the breadcrumb trail at the top of the
window. Since Groupers can be nested, these links
will allow you to see where you are and to click on
any “upstream” Groupers to pop up to the previous
grouping level. You can also pop back up a level by
double-clicking again on the Grouper node
thumbnail.
Chú ý đường dẫn breadcrumb ở đầu
cửa sổ. Vì các Nhóm có thể được lồng vào nhau nên các liên kết này
sẽ cho phép bạn biết bạn đang ở đâu và nhấp vào
bất kỳ Groupers “ngược dòng” nào xuất hiện ở phần trước
cấp độ phân nhóm. Bạn cũng có thể bật lên lại một cấp độ bằng cách
nhấp đúp lần nữa vào nút Grouper
hình thu nhỏ.

Roaring Tide Productions
Archimatix User Guide
!62
Sản phẩm thủy triều gầm
Hướng dẫn sử dụng Archimatix
!62
Page 65
7. Group Dynamics
7. Động lực nhóm

Step 7.7: In the scene view, select the Extrude and find the green point handles along the
Bước 7.7: Trong khung nhìn cảnh, chọn Extrude và tìm các điểm điều khiển điểm màu xanh dọc theo
side. Adjust the top handle to give the Extrude a taper. Use the lower one to create
a bevel. The cyan handle coming out from the top green point adjusts the number
of segments in the bevel.
bên. Điều chỉnh tay cầm trên cùng để tạo độ côn cho Extrude. Sử dụng cái dưới để tạo
một góc xiên. Tay cầm màu lục lam đi ra từ điểm xanh trên cùng sẽ điều chỉnh số
của các phân đoạn trong góc xiên.


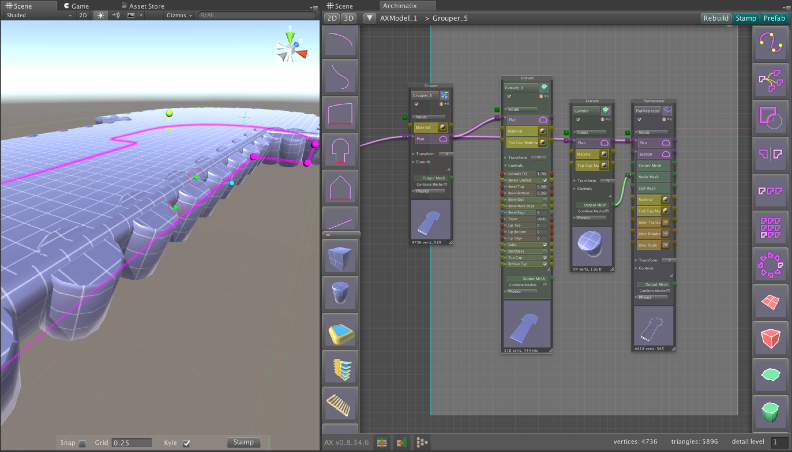



Step 7.8: Select any instance of the Cylinder in the scene.Rotate it until it is parallel to the
Bước 7.8: Chọn bất kỳ phiên bản nào của Hình trụ trong cảnh. Xoay nó cho đến khi nó song song với hình trụ
tapered side of the hull Extrude.
cạnh thon của thân tàu Extrude.
Step 7.9: Double-click the Grouper thumbnail to pop up a group (in this case, back to the
Bước 7.9: Bấm đúp vào hình thu nhỏ của Grouper để bật lên một nhóm (trong trường hợp này, quay lại
model).
mô hình).
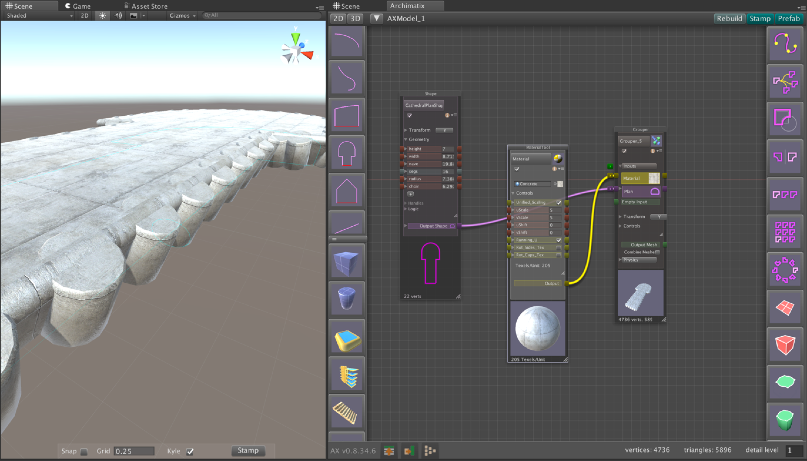



Step 7.10: Click on the MaterialTool button on the Material input for the Grouper to generate
Bước 7.10: Bấm vào nút MaterialTool trên phần nhập Vật liệu để Cá mú tạo
a MaterialTool node. Choose the Concrete material.
một nút MaterialTool. Chọn vật liệu Bê tông.
Roaring Tide Productions
Archimatix User Guide
!63
Sản phẩm thủy triều gầm
Hướng dẫn sử dụng Archimatix
!63
Page 66
7. Group Dynamics
7. Động lực nhóm

Step 7.11: Click on any Cylinder and hit the “f” key to frame the Cylinder in the scene and in
Bước 7.11: Nhấp vào bất kỳ Hình trụ nào và nhấn phím “f” để đóng khung Hình trụ trong cảnh và trong
the Node Graph Editor. Notice that this has automatically opened the Grouper.
Trình chỉnh sửa biểu đồ nút. Lưu ý rằng thao tác này đã tự động mở Grouper.
Step 7.12: Add a MaterialTool node to the Cylinder Extrude and choose sci_fi_003.
Bước 7.12: Thêm nút MaterialTool vào Xi lanh Extrude và chọn sci_fi_003.
Step 7.13: Connect the new MaterialTool to the Extrude’s Top Cap Material.
Bước 7.13: Kết nối MaterialTool mới với Top Cap Material của Extrude.
Step 7.14: Set the Lip Top of the Extrude to 1.2 and the LipEdge to 0.24.
Bước 7.14: Đặt Lip Top của Extrude thành 1,2 và LipEdge thành 0,24.
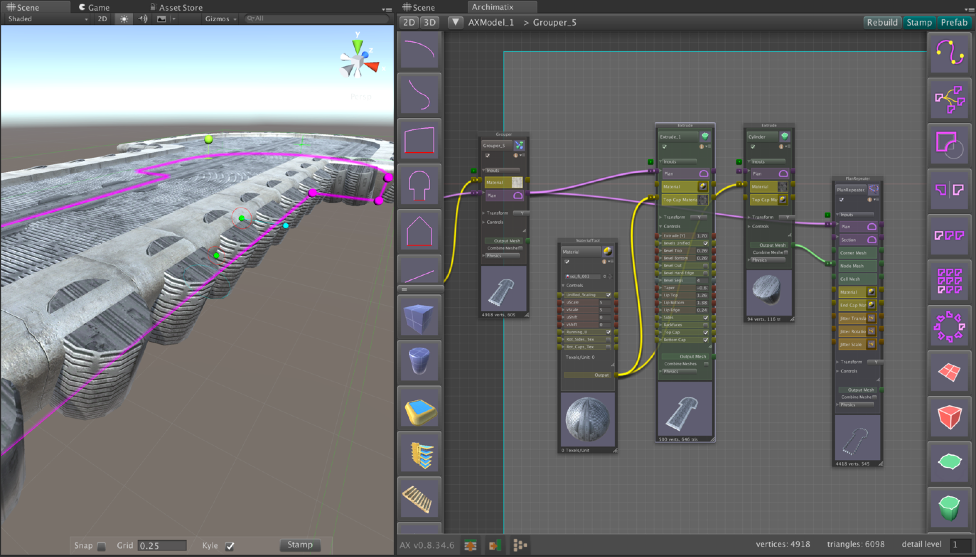



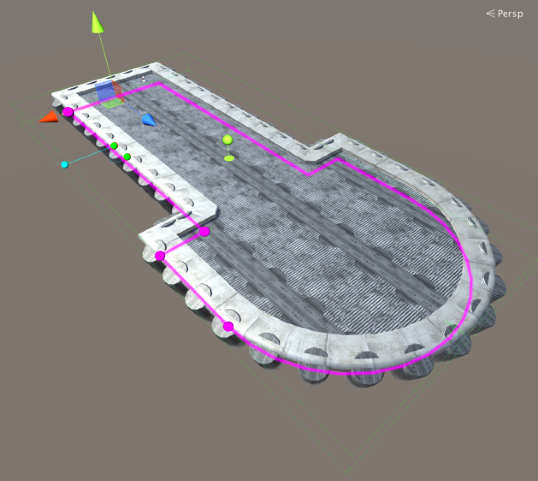
To make the round saucer
superstructure, we will need to make
several pieces that share a center. This
shared center will be displaced from
the origin of the model, which is
currently at the tail of the ship.
Để làm chiếc đĩa tròn
cấu trúc thượng tầng, chúng ta sẽ cần phải thực hiện
một số phần có chung một trung tâm. Cái này
trung tâm chia sẻ sẽ được di dời khỏi
nguồn gốc của mô hình, đó là
hiện đang ở đuôi tàu.
Rather than making each part of the
saucer and translating it, we can
establish a new origin by creating a
Grouper inside our first Grouper and
translating that. Once we do that, any
new nodes we create will be located
relative to the position of the new
Grouper.
Thay vì làm cho mỗi phần của
chiếc đĩa và dịch nó, chúng ta có thể
thiết lập một nguồn gốc mới bằng cách tạo ra một
Cá mú bên trong Cá mú đầu tiên của chúng tôi và
dịch đó. Một khi chúng tôi làm điều đó, bất kỳ
các nút mới mà chúng tôi tạo sẽ được đặt
so với vị trí của cái mới
Cá mú.
Roaring Tide Productions
Archimatix User Guide
!64
Sản phẩm thủy triều gầm
Hướng dẫn sử dụng Archimatix
!64
Page 67
7. Group Dynamics
7. Động lực nhóm

Step 7.15: With the first Grouper for the hull open, but with nothing selected, click on the
Bước 7.15: Khi con cá mú đầu tiên của thân tàu được mở nhưng chưa có gì được chọn, hãy nhấp vào
Grouper icon in the right sidebar to create a new Grouper inside the first Grouper.
Rename the new Grouper “Saucer.”
Biểu tượng Cá mú ở thanh bên phải để tạo Cá mú mới bên trong Cá mú đầu tiên.
Đổi tên cá mú mới là “Saucer”.
Step 7.16: With the new Saucer Grouper selected, translate it to the front of the ship.
Bước 7.16: Saucer Grouper mới được chọn, dịch nó ra phía trước tàu.
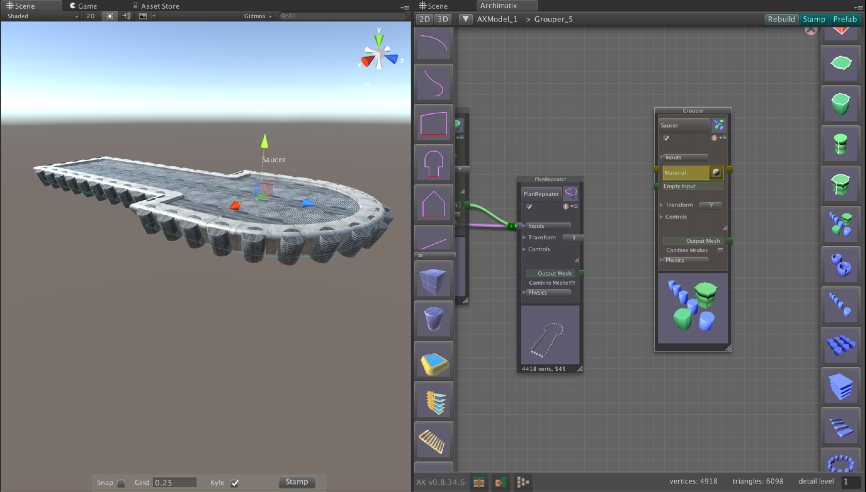



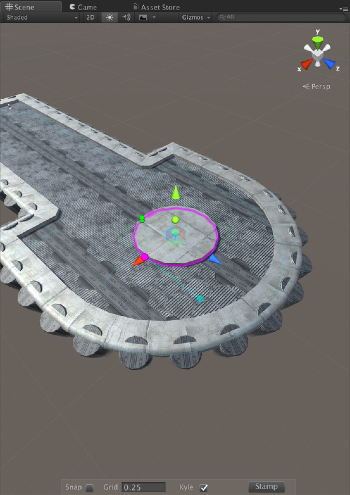
Step 7.17: Double-click the Saucer Grouper’s thumbnail to
Bước 7.17: Bấm đúp vào hình thu nhỏ của Saucer Grouper để
open it and then instantiate a Cylinder from
the 3D Library sidebar. Decrease the Extrude
Height of the Cylinder and increase its radius to
make it serve as the deck for the bridge.
mở nó và sau đó khởi tạo một Xi lanh từ
thanh bên Thư viện 3D. Giảm đùn
Chiều cao của hình trụ và tăng bán kính của nó lên
biến nó thành mặt cầu cho cây cầu.
You will find the new Cylinder at the Saucer Grouper’s
center. If you were to pop the Cylinder out of the Group
by dragging and dropping the Cylinder node to the left of
the Saucer Grouper node, then the Cylinder would
immediately move to the center of the next Grouper, at
the tail of the ship.
Bạn sẽ tìm thấy Xi lanh mới tại Saucer Grouper's
trung tâm. Nếu bạn muốn đưa Xi lanh ra khỏi Nhóm
bằng cách kéo và thả nút Xi lanh ở bên trái của
nút Saucer Grouper, sau đó Xi lanh sẽ
ngay lập tức di chuyển đến trung tâm của cá mú tiếp theo, tại
đuôi tàu.
Thus we can see that Groupers, in addition to
encapsulating subnode graphs, also serve as local
reference planes to model in situ.
Như vậy chúng ta có thể thấy rằng Groupers, ngoài
đóng gói các biểu đồ nút con, cũng đóng vai trò cục bộ
mặt phẳng tham chiếu cho mô hình tại chỗ.
Let’s add another piece of the saucer superstructure.
Hãy thêm một phần khác của cấu trúc thượng tầng chiếc đĩa.
Roaring Tide Productions
Archimatix User Guide
!65
Sản phẩm thủy triều gầm
Hướng dẫn sử dụng Archimatix
!65
Page 68
7. Group Dynamics
7. Động lực nhóm

Step 7.18: Instantiate a DomeMolding Shape from the 2D Library sidebar. Connect it to a
Bước 7.18: Tạo Hình dạng Mái vòm từ thanh bên Thư viện 2D. Kết nối nó với một
Lathe Mesher in the right-hand node sidebar. Turn the Top Cap of the Lathe to off.
Máy tiện Mesher ở thanh bên nút bên phải. Tắt Nắp trên của Máy tiện.
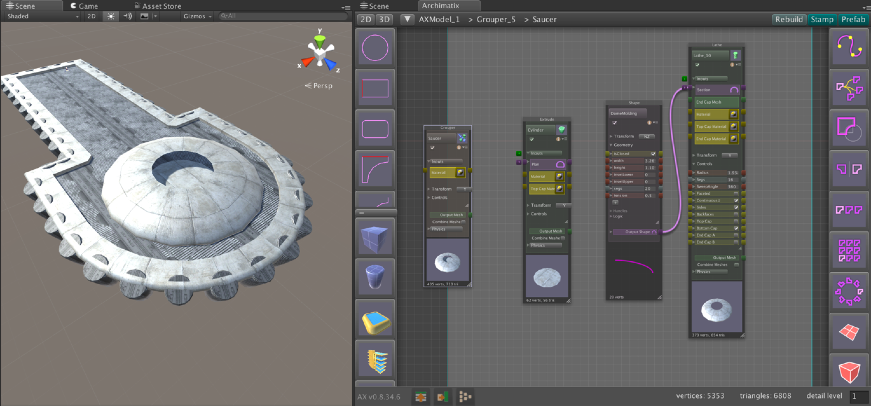



This is as far as we’ll go with GrayShip in
this User Guide. While GrayShip helped
us understand the Grouper node, it has
more to teach us! To complete GrayShip,
please visit the full tutorial video at the
Archimatix support site.
Đây là tất cả những gì chúng tôi sẽ làm với GrayShip trong
Hướng dẫn sử dụng này. Trong khi GrayShip đã giúp
chúng ta hiểu nút Grouper, nó có
nhiều hơn nữa để dạy chúng tôi! Để hoàn thành GrayShip,
vui lòng truy cập video hướng dẫn đầy đủ tại
Trang web hỗ trợ Archimatix.
GrayShipTutorialGrayShipTutorialGrayShipTut
orialGrayShipTutorialGrayShipTutorialGrayShi
pTutorialGrayShipTutorialGrayShipTutorialGr
ayShipTutorialGrayShipTutorialGrayShipTutori
alGrayShipTutorialGrayShipTutorialGrayShipT
utorialGrayShipTutorialGrayShipTutorialGrayS
hipTutorialGrayShipTutorialGrayShipTutorial
GrayShipTutorialGrayShipTutorialGrayShipTut
orialGrayShipTutorialGrayShipTutorial
GrayShipHướng dẫnGrayShipHướng dẫnGrayShipTut
orialGrayShipHướng dẫnGrayShipHướng dẫnGrayShi
pHướng dẫnGrayShipHướng dẫnGrayShipTutorialGr
ayShipHướng dẫnGrayShipHướng dẫnGrayShipTutori
alGrayShipHướng dẫnGrayShipHướng dẫnGrayShipT
hướng dẫnGrayShipHướng dẫnGrayShipHướng dẫnGrayS
hôngHướng dẫnGrayShipHướng dẫnGrayShipHướng dẫn
GrayShipHướng dẫnGrayShipHướng dẫnGrayShipTut
orialGrayShipHướng dẫnGrayShipHướng dẫn


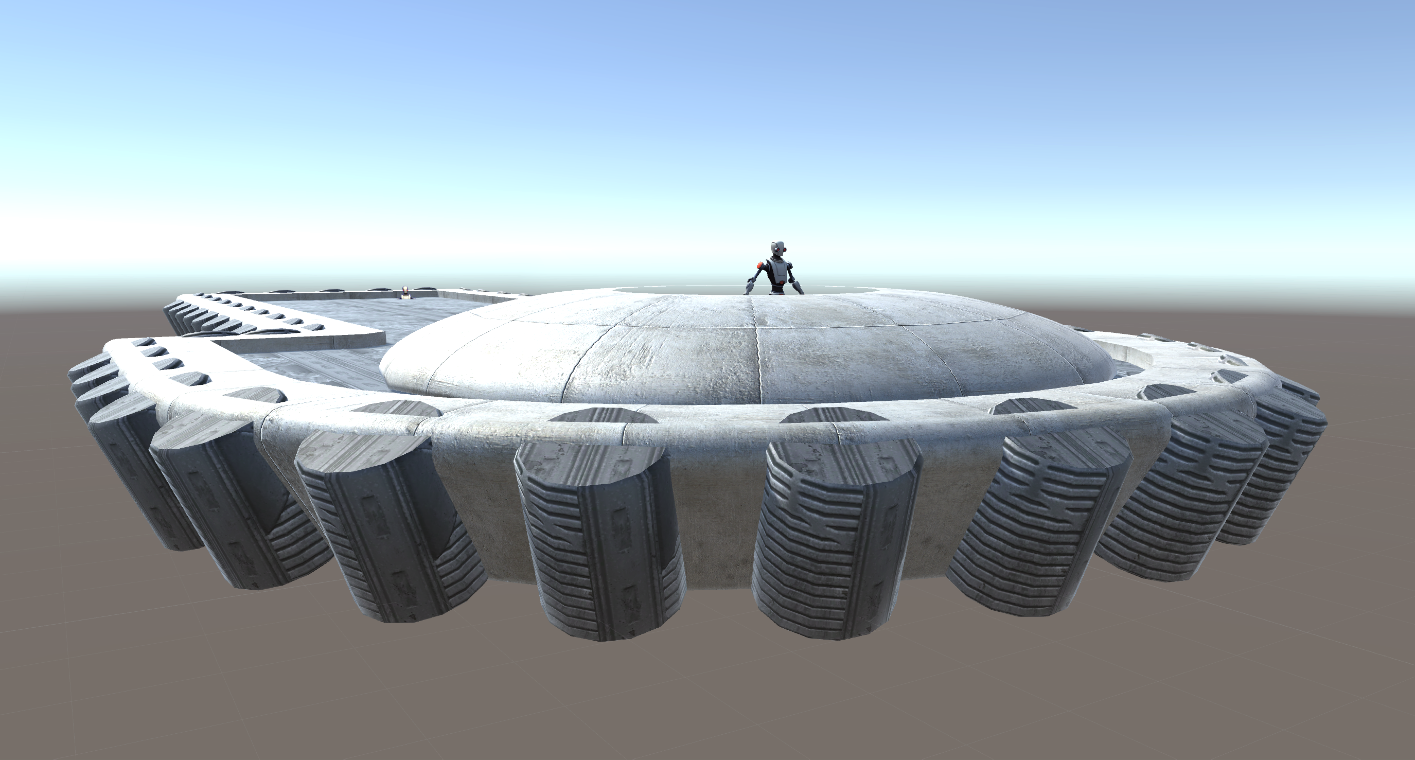
Robot Kyle can hardly wait to take the helm of his new GrayShip!
Robot Kyle nóng lòng muốn được điều khiển GrayShip mới của mình!
Roaring Tide Productions
Archimatix User Guide
!66
Sản phẩm thủy triều gầm
Hướng dẫn sử dụng Archimatix
!66
Page 69
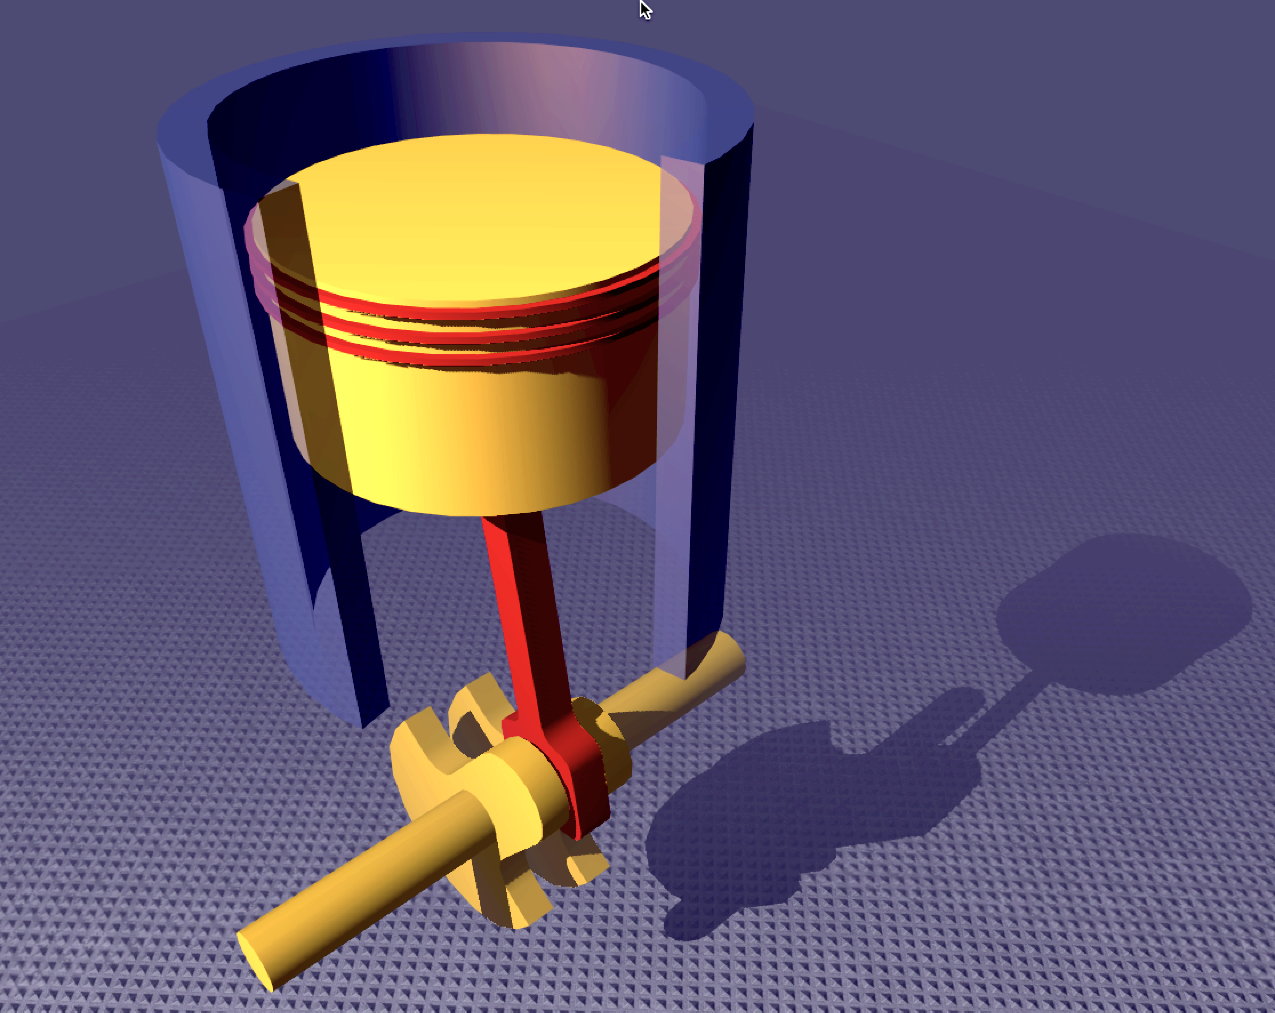
Relations
quan hệ


8. Getting to Know Your Relations
Parts of a parametric model often need to be related to each other in mathematical terms.
The ability of such expression-based relations is important for defining logic that governs
the behavior of a model as you vary parameters. Architectural proportions and the
interrelationships of machine parts depend on such logic.
8. Tìm hiểu các mối quan hệ của bạn
Các phần của mô hình tham số thường cần phải liên quan với nhau về mặt toán học.
Khả năng của các mối quan hệ dựa trên biểu thức như vậy là quan trọng để xác định logic chi phối
hành vi của một mô hình khi bạn thay đổi các tham số. Tỷ lệ kiến trúc và
mối quan hệ qua lại của các bộ phận máy phụ thuộc vào logic đó.
Archimatix lets you relate any parameter to any other parameter in a graph using a
mathematical expression. For example, if you wanted to set the vertical position of a
Cylinder to always equal the height of a Box, then you would essentially be saying that the
Cylinder should sit on top of the Box as you vary the Box height.
Archimatix cho phép bạn liên kết bất kỳ tham số nào với bất kỳ tham số nào khác trong biểu đồ bằng cách sử dụng một
biểu thức toán học. Ví dụ: nếu bạn muốn đặt vị trí thẳng đứng của một
Hình trụ luôn bằng chiều cao của Hộp thì về cơ bản bạn có thể nói rằng
Hình trụ phải nằm phía trên Hộp khi bạn thay đổi chiều cao của Hộp.
Relations in Archimatix are bi-directional. This means that, in the above example, you can
not only alter the height of the Box and automatically translate the Cylinder, but you could
also translate the Cylinder and automatically alter the height of the Box.
Mối quan hệ trong Archimatix là hai chiều. Điều này có nghĩa là, trong ví dụ trên, bạn có thể
không chỉ thay đổi chiều cao của Hộp và tự động dịch Hình trụ mà bạn còn có thể
cũng dịch Xi lanh và tự động thay đổi chiều cao của Hộp.
Why don’t we go ahead and try this?!
Tại sao chúng ta không tiếp tục và thử điều này?!
Roaring Tide Productions
Archimatix User Guide
!67
Sản phẩm thủy triều gầm
Hướng dẫn sử dụng Archimatix
!67
Page 70
8. Getting to Know Your Relations
8. Tìm hiểu các mối quan hệ của bạn
Step 8.1:
Start a new scene and add a Cylinder node and a Box node.
Bước 8.1:
Bắt đầu một cảnh mới và thêm nút Xi lanh và nút Hộp.

Step 8.2:
Open the Transform foldout on the Cylinder and the Controls foldout on the Box.
Bước 8.2:
Mở nếp gấp Biến đổi trên Hình trụ và nếp gấp Điều khiển trên Hộp.
Step 8.3:
Click on the Trans_Y parameter of the Cylinder to start a new connector. Move
the mouse to the Height parameter of the Box and click the input to complete the
Relation connection.
Bước 8.3:
Bấm vào tham số Trans_Y của Xi lanh để khởi động đầu nối mới. Di chuyển
chuột vào thông số Height của Box và nhấn vào dữ liệu đầu vào để hoàn thành
Kết nối quan hệ.


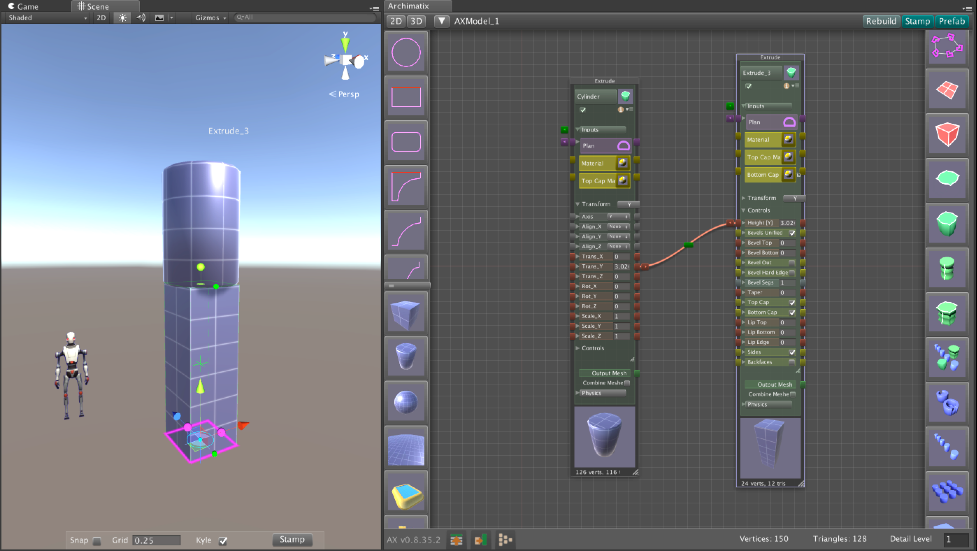


Step 8.4:
Adjust the height of the Box either by sliding its Height parameter or by dragging
the Height handle in the scene.
Bước 8.4:
Điều chỉnh chiều cao của Hộp bằng cách trượt tham số Chiều cao hoặc bằng cách kéo
tay cầm Chiều cao trong cảnh.
Remember, relations are bi-directional, meaning that the connector socket on either side of
the parameter in the node palette can be chosen when connecting parameters. The bidirectionally of relations also means that you can adjust either end of the connection and
the parameter on the other side of the connection will be modified according to the
expression in the Relation.
Hãy nhớ rằng, các mối quan hệ là hai chiều, nghĩa là ổ cắm đầu nối ở hai bên của
tham số trong bảng nút có thể được chọn khi kết nối các tham số. Mối quan hệ hai chiều cũng có nghĩa là bạn có thể điều chỉnh một trong hai đầu của kết nối và
tham số ở phía bên kia của kết nối sẽ được sửa đổi theo
biểu thức trong quan hệ.
The default Relation expression is equivalency, or “=”. In the above example, the Relation
equation is Cylinder.Trans_Y=Box.Height.
Biểu thức quan hệ mặc định là tương đương hoặc “=”. Trong ví dụ trên, mối quan hệ
phương trình là Xi lanh.Trans_Y=Box.Height.
Let’s create a Relation with a slightly more interesting expression.
Hãy tạo một Mối quan hệ với một biểu thức thú vị hơn một chút.
Roaring Tide Productions
Archimatix User Guide
!68
Sản phẩm thủy triều gầm
Hướng dẫn sử dụng Archimatix
!68
Page 71
8. Getting to Know Your Relations
8. Tìm hiểu các mối quan hệ của bạn
Cranking Up Relations
Cải thiện mối quan hệ
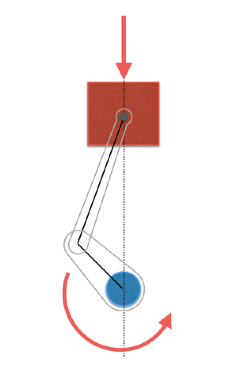
A good example of a relation between two objects is
that of a piston to a crankshaft in an internal
combustion engine.
Một ví dụ điển hình về mối quan hệ giữa hai đối tượng là
của một piston tới một trục khuỷu ở bên trong
động cơ đốt.

piston
pít-tông
Typically, as the piston moves up and down, the
crankshaft rotates in a constant direction.
Conversely, if the crankshaft rotates, it moves the
piston up and down in a sinusoidal motion. Such a
relationship calls for the use of a sine function in its
Relation expression.
Thông thường, khi piston di chuyển lên xuống,
trục khuỷu quay theo một hướng không đổi.
Ngược lại, nếu trục khuỷu quay thì nó sẽ di chuyển
piston lên xuống theo chuyển động hình sin. Như vậy
mối quan hệ yêu cầu sử dụng hàm sin trong
Biểu thức quan hệ.

crankshaft
trục khuỷu


To make a simple model of an internal combustion
engine, we will exclude the piston rod, representing
the piston and crankshaft by two cylinders.
Xây dựng mô hình đốt trong đơn giản
động cơ, chúng ta sẽ loại trừ thanh piston, đại diện cho
piston và trục khuỷu bằng hai xi lanh.
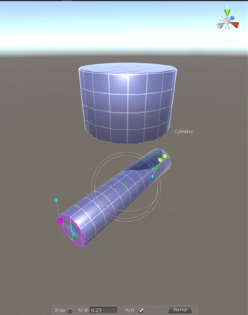
Also, for the purposes of a quick start, instead of
using the trigonometry needed to find the more
accurate relation of the piston and crankshaft based
on the length of the piston rod, we will approximate
the Relation with a variation of:
Ngoài ra, với mục đích bắt đầu nhanh chóng, thay vì
sử dụng lượng giác cần thiết để tìm ra nhiều hơn
quan hệ chính xác giữa piston và trục khuỷu dựa trên
trên chiều dài của cần piston, chúng ta sẽ tính gần đúng
Mối quan hệ với một biến thể của:
Piston.Trans_Y = sin(Crankshaft.Rot_Z)
Piston.Trans_Y = sin(Trục khuỷu.Rot_Z)
For a more elaborate scenario using the actual
geometry of a piston and crankshaft, see this tutorial
at the Archimatix support site:
Đối với một kịch bản phức tạp hơn bằng cách sử dụng thực tế
hình học của piston và trục khuỷu, xem hướng dẫn này
tại trang hỗ trợ Archimatix:
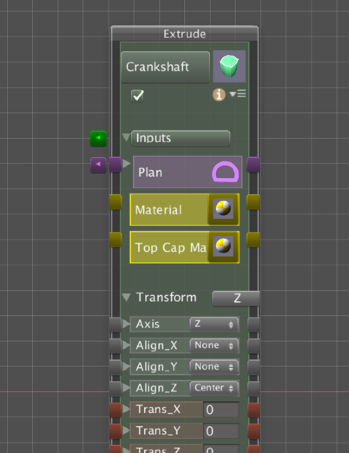

http://www.archimatix.com/tutorials/piston-andcrankshaft
http://www.archimatix.com/tutorials/piston-andcrankshaft
Step 8.5:
In a new scene, choose the Cylinder item from
the left sidebar menu. Click on the node name
button and change the name to Crankshaft.
Bước 8.5:
Trong một cảnh mới, chọn mục Xi lanh từ
menu thanh bên trái. Bấm vào tên nút
nút và đổi tên thành Trục khuỷu.
Step 8.6:
Click the axis orientation button until it is set
to Z. Open the Transform foldout and set the
Align_Z to Center.
Bước 8.6:
Nhấp vào nút định hướng trục cho đến khi nó được đặt
đến Z. Mở thư mục Biến đổi và đặt
Căn chỉnh_Z vào giữa.



Step 8.7:
Change the material of the model to
AX_PurpleGrid. In the Scene View, use the
handles to adjust the length of the Crankshaft
and its radius so that it looks like the image
above right.
Bước 8.7:
Thay đổi vật liệu của mô hình thành
AX_PurpleGrid. Trong Chế độ xem cảnh, hãy sử dụng
tay cầm để điều chỉnh độ dài của trục khuỷu
và bán kính của nó sao cho nó trông giống như hình ảnh
phía trên bên phải.
Roaring Tide Productions
Archimatix User Guide
!69
Sản phẩm thủy triều gầm
Hướng dẫn sử dụng Archimatix
!69
Page 72

8. Getting to Know Your Relations
8. Tìm hiểu các mối quan hệ của bạn
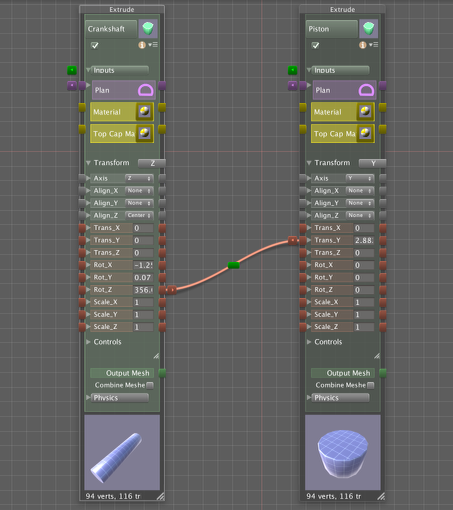
Step 8.8
Create another Cylinder and rename
it Piston. Adjust its radius until it
looks like the image on the previous
page.
Bước 8.8
Tạo một Xi lanh khác và đổi tên
nó Pít-tông. Điều chỉnh bán kính của nó cho đến khi nó
trông giống như hình ảnh trước đó
trang.

Step 8.9:
Open the Transform foldouts for
both nodes and create a connection
between the Rot_Z of the
Crankshaft and the Trans_Y of the
Piston.
Bước 8.9:
Mở các nếp gấp Biến đổi cho
cả hai nút và tạo kết nối
giữa Rot_Z của
Trục khuỷu và Trans_Y của
Pít-tông.
As mentioned previously, the default Relation
expression is “=”. If you like, you can drag the
Piston in the Y-axis to see the Crankshaft rotate,
but the sensitivity is not very high. In other
words, as you drag the Piston through 2 units,
the Crankshaft will rotate only 2 degrees.
Như đã đề cập trước đó, Mối quan hệ mặc định
biểu thức là “=”. Nếu thích, bạn có thể kéo
Piston theo trục Y để thấy Trục khuỷu quay,
nhưng độ nhạy không cao lắm. Ở nơi khác
nói cách khác, khi bạn kéo Piston qua 2 đơn vị,
trục khuỷu sẽ chỉ quay 2 độ.


Step 8.10: Open the Edit Relation window by clicking on the green button at the midpoint
Bước 8.10: Mở cửa sổ Chỉnh sửa quan hệ bằng cách nhấp vào nút màu xanh ở điểm giữa
of the connection, or by clicking on the connection cable to select it and then
hitting the Spacebar. Change the expressions to those in the image below.
của kết nối hoặc bằng cách nhấp vào cáp kết nối để chọn nó và sau đó
nhấn phím cách. Thay đổi các biểu thức thành những biểu thức trong hình ảnh bên dưới.
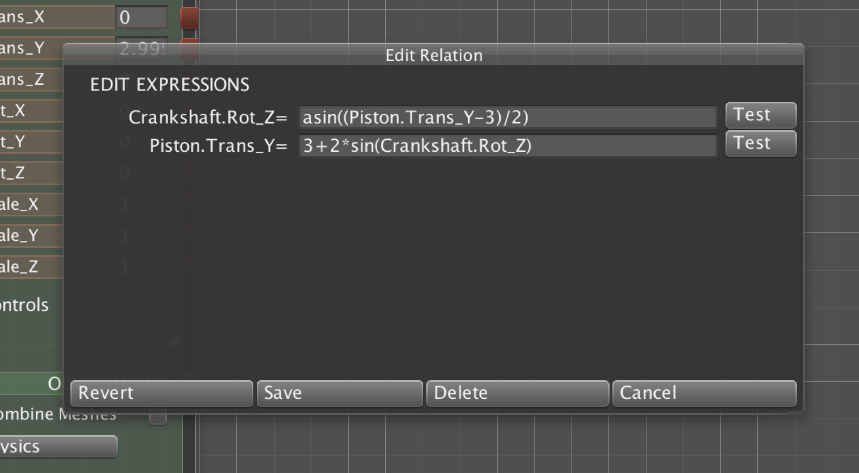
The expressions relating the two parameters are the inverse of each other. In the second
expression, the sine of the Crankshaft.RotZ is multiplied by 2 to give it more sensitivity, and 3
units are added to lift the sinusoidal motion of the Piston to be centered at 3 units above the
Các biểu thức liên quan đến hai tham số là nghịch đảo của nhau. Trong lần thứ hai
biểu thức, sin của Trục khuỷu.RotZ được nhân với 2 để tăng độ nhạy và 3
các đơn vị được thêm vào để nâng chuyển động hình sin của Piston tập trung ở 3 đơn vị phía trên
Roaring Tide Productions
Archimatix User Guide
!70
Sản phẩm thủy triều gầm
Hướng dẫn sử dụng Archimatix
!70
Page 73
8. Getting to Know Your Relations
8. Tìm hiểu các mối quan hệ của bạn
Crankshaft. Again, this is fudged geometry designed to produce quick, rudimentary results.
With it, you can now rotate the Crankshaft in the Z-axis indefinitely, and the Piston will cycle
up and down; if you move the Piston up and down, however, the Crankshaft will only respond
while the Piston is just above the Crankshaft (in its first cycle).
Trục khuỷu. Một lần nữa, đây là hình học giả mạo được thiết kế để tạo ra kết quả nhanh chóng, thô sơ.
Với nó, giờ đây bạn có thể xoay Trục khuỷu theo trục Z vô thời hạn và Piston sẽ quay theo chu kỳ
lên xuống; Tuy nhiên, nếu bạn di chuyển Piston lên và xuống, Trục khuỷu sẽ chỉ phản hồi
trong khi Piston ở ngay phía trên Trục khuỷu (trong chu kỳ đầu tiên).

Taking Archimatix to the Next Level
Đưa Archimatix lên một tầm cao mới
I hope you found this guide useful. For more documentation and tutorials, please visit the
Archimatix support site at http://www.archimatix.com.
Tôi hy vọng bạn thấy hướng dẫn này hữu ích. Để biết thêm tài liệu và hướng dẫn, vui lòng truy cập
Trang web hỗ trợ Archimatix tại http://www.archimatix.com.
And come join the community at http://community.archimatix.com!
Và hãy tham gia cộng đồng tại http://community.archimatix.com!

If you have specific technical questions, email us at support@archimatix.com.
Nếu bạn có câu hỏi kỹ thuật cụ thể, hãy gửi email cho chúng tôi theo địa chỉ support@archimatix.com.
Roaring Tide Productions
Archimatix User Guide
!71
Sản phẩm thủy triều gầm
Hướng dẫn sử dụng Archimatix
!71